


Installation
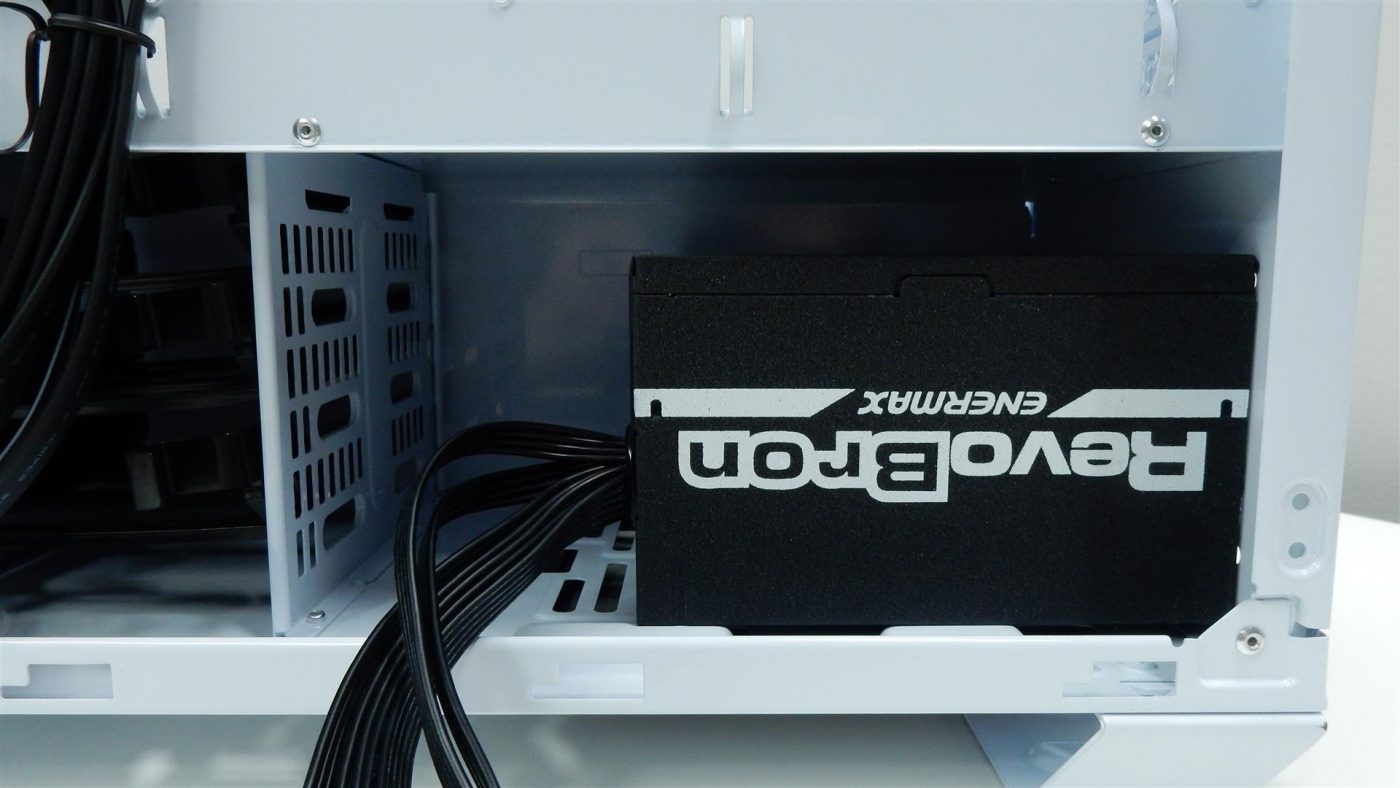
Up first in our installation process was our semi-modular power supply, which fit quite nicely in the base of the PM02. While we did have plenty of room to work with, larger power supplies may encounter cable clearance issues with the 3.5″ drive cage.
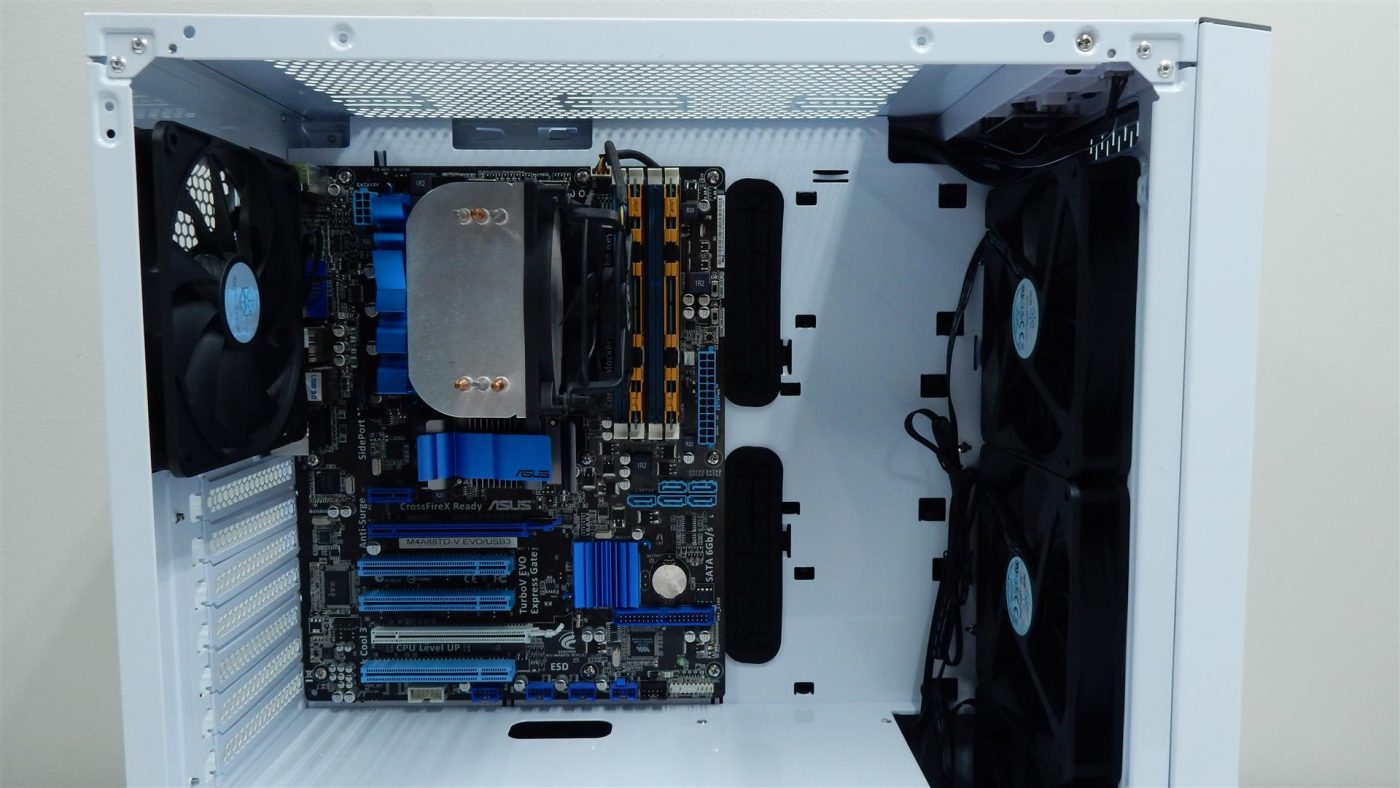
Next up was our motherboard, and before we could place the unit into the case, we had to install all nine of the motherboard standoffs. While this isn’t a difficult task by any means, we always appreciate when the standoffs are installed at the factory, especially with a painted interior like the one on the PM02, as it can be a bit tedious to get the threads lined up when they have a coat of paint covering them.
With the standoffs installed we had no issues getting out motherboard into place, and the two cutouts with rubber grommets were in the perfect spot to route our required cabling.
Next to be installed was our graphics card, and while its installation was pretty standard, we did want to point out the hinged door at the rear of the case that secures the add-in cards to the PM02.

At first we liked the idea of four screws keeping everything in place, but once we were installing our videocard, we realized the downside to this design. Without a screw holding each add-in slot cover in place, they were constantly falling out, leading to a mildly annoying portion of the build process that is usually quick and easy.
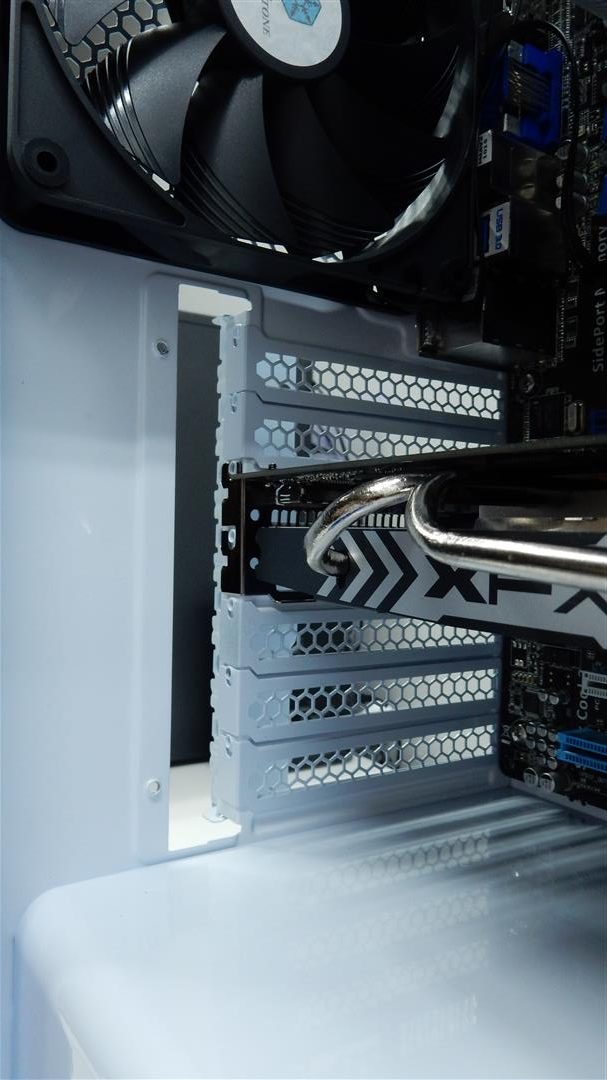
With all of the cover lined up, we were able to swing the door back into place and secure it with the four included screws.

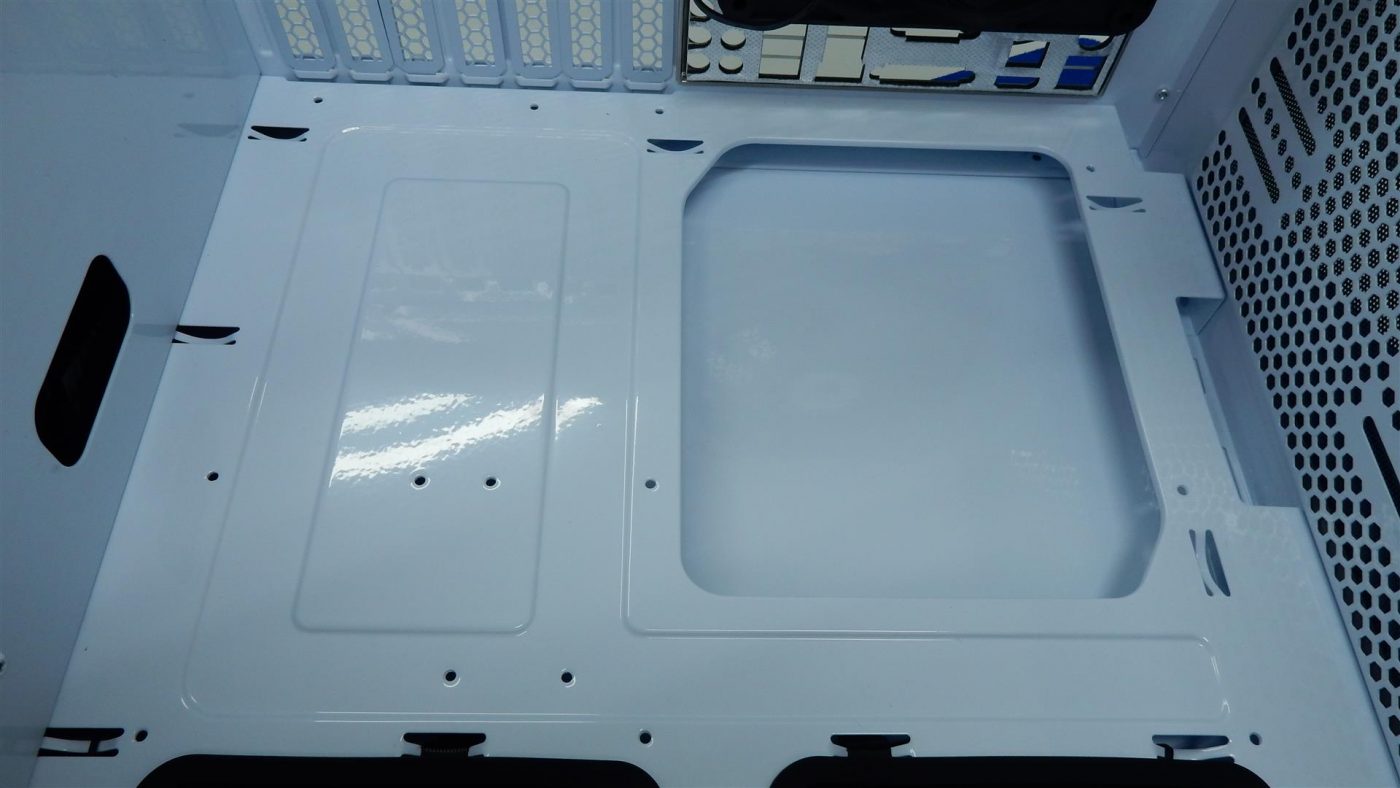
Moving behind the motherboard tray, we chose to install our 2.5″ drive in the bottom tool-less drive tray. This is where we ran into a bit of a design flaw, as the trays themselves feature a molded image showing how to orient your drive in the tray.
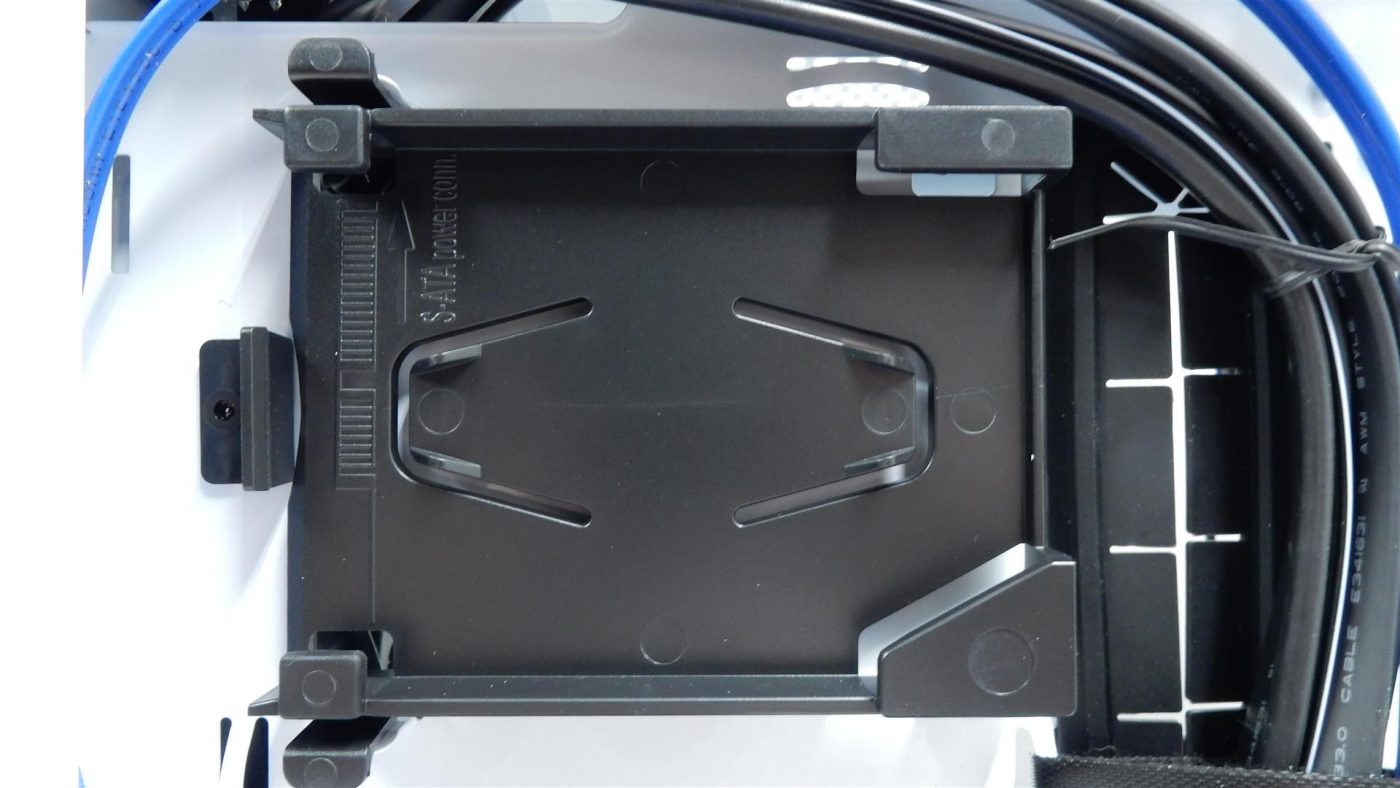
If you mount a 2.5″ drive with the SATA power and data connections on the side that the tray displays, when you close the tray the locking mechanism will block your cables.
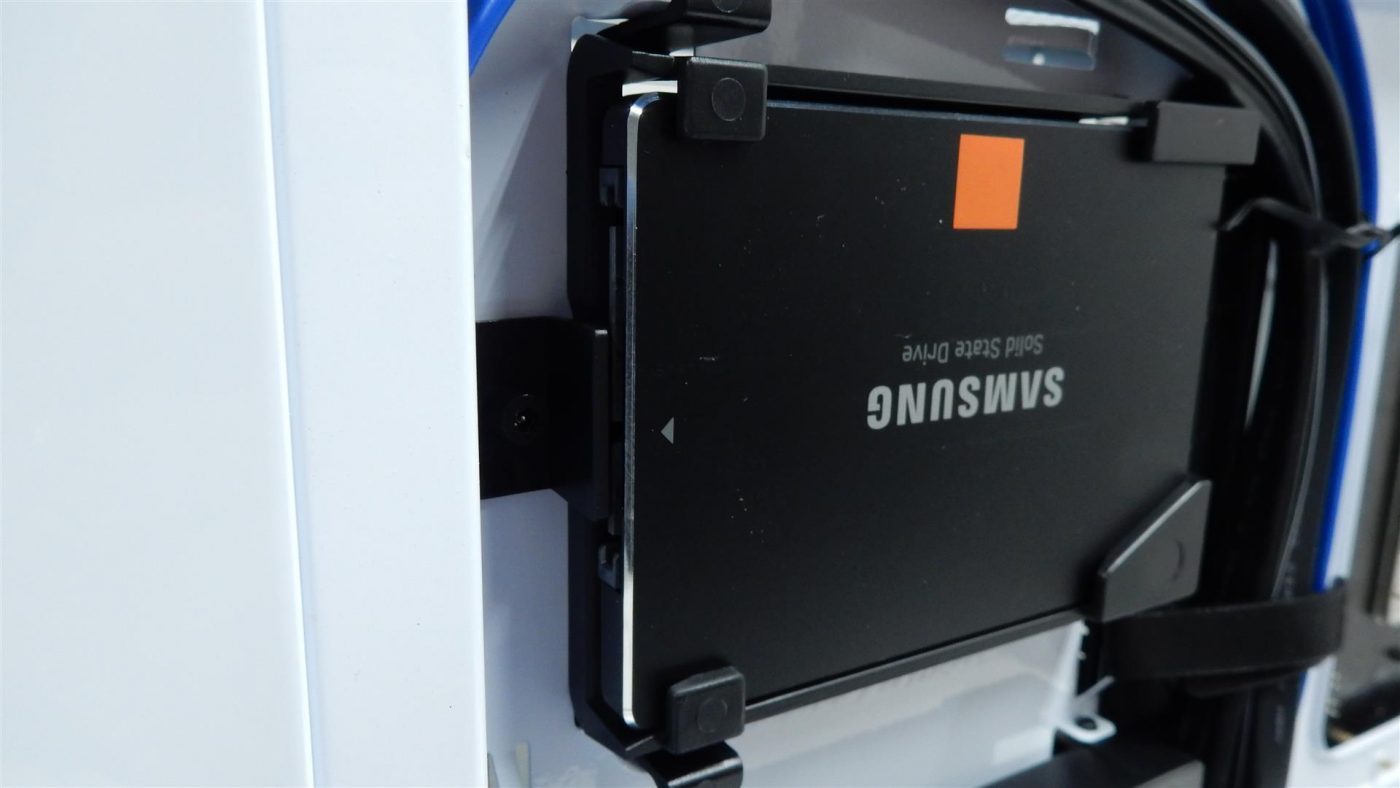
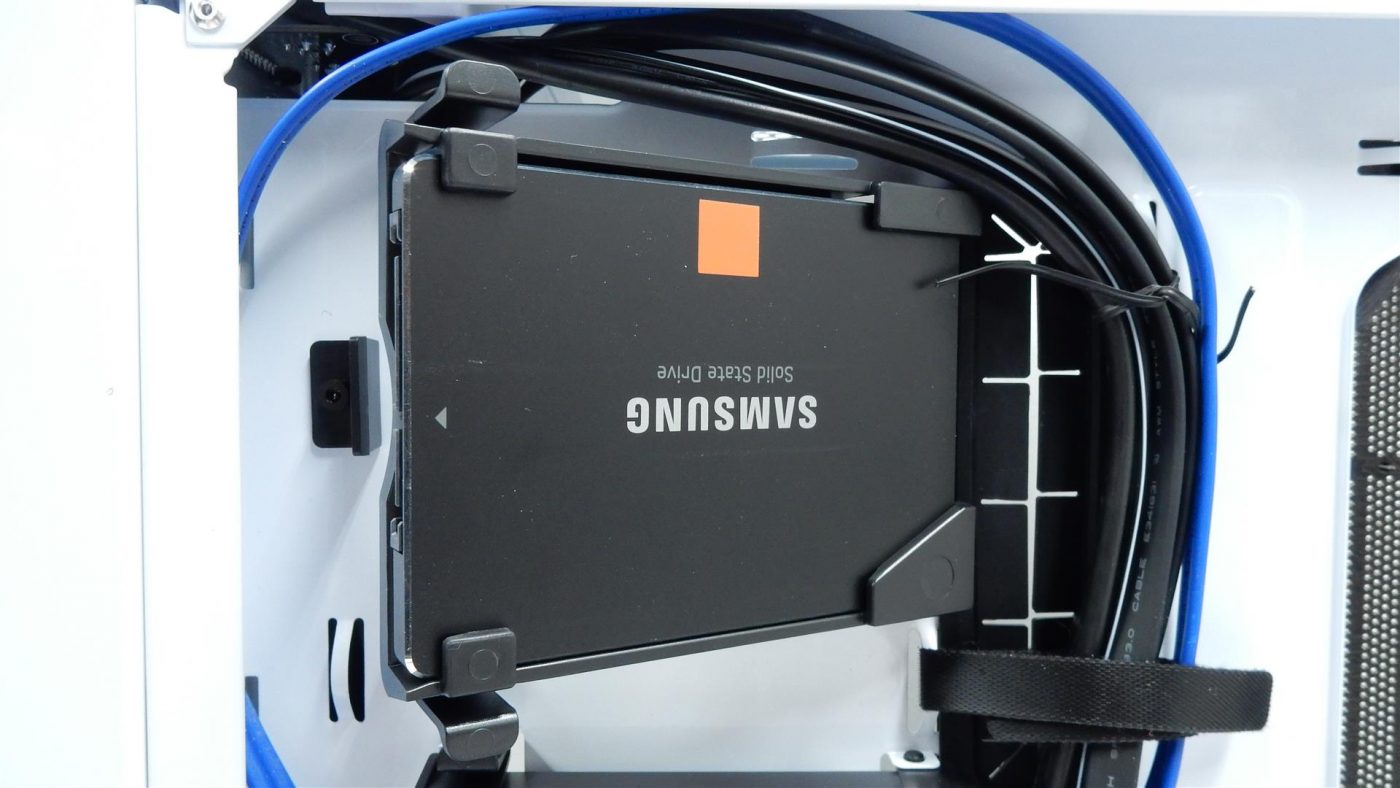
Flipping the drive over to place the connectors towards the right side of the tray remediated this issue, and other than that little hiccup we really liked how these trays operated.

With all of our components in place, our last task was to tidy things up. Using the supplied velcro straps we were able to route all of our cables quite nicely. At no point did we feel like we were having to fight against the cable management components and their positioning. There is quite a bit of room behind the motherboard panel, and when replacing the side panel, at no point did we have to cram things in to get the panel back in place.
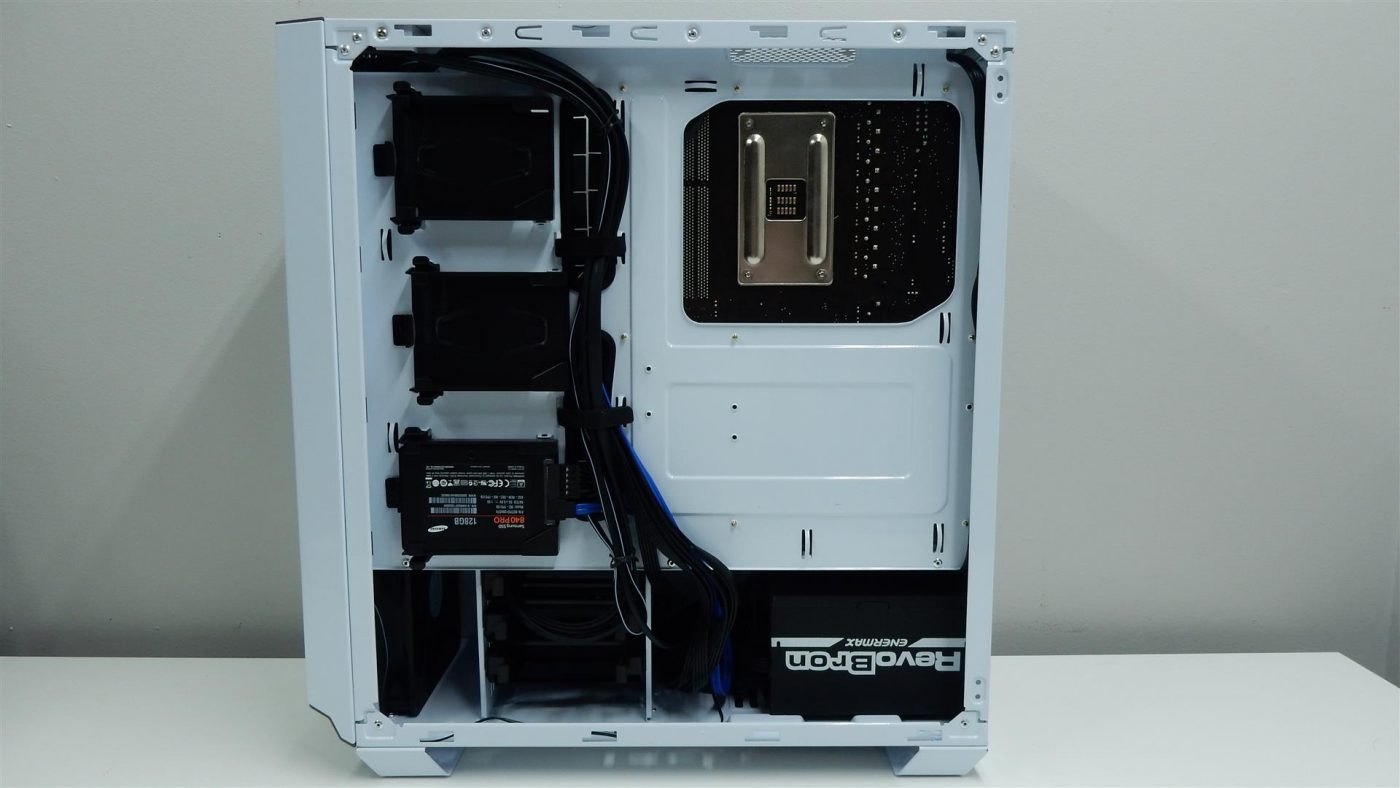
The component side of the case is quite clean in our experience, and the white interior is a stark contrast to the multiple colors of components available to today’s builders. The only complaint we have with the interior look of the finished build are the rectangular cutouts for the 2.5″ drive trays that sit between the front case fans and the rubber cable management grommets. This is probably only really an issue in the white version of the PM02, as on the black version these would blend right in.

Once powered up, the SilverStone PM02’s previously mentioned LED projector places a glowing blue “SilverStone” image below the front panel of the case, which adds a unique look to the case.

Unfortunately, the PM02 doesn’t allow you to change the projected image. We would have loved the option to make our own stencil to show our gaming handle, or some other unique message in this place. That being said, we are sure that the more adventurous builders will be able to customize this feature to their liking.
