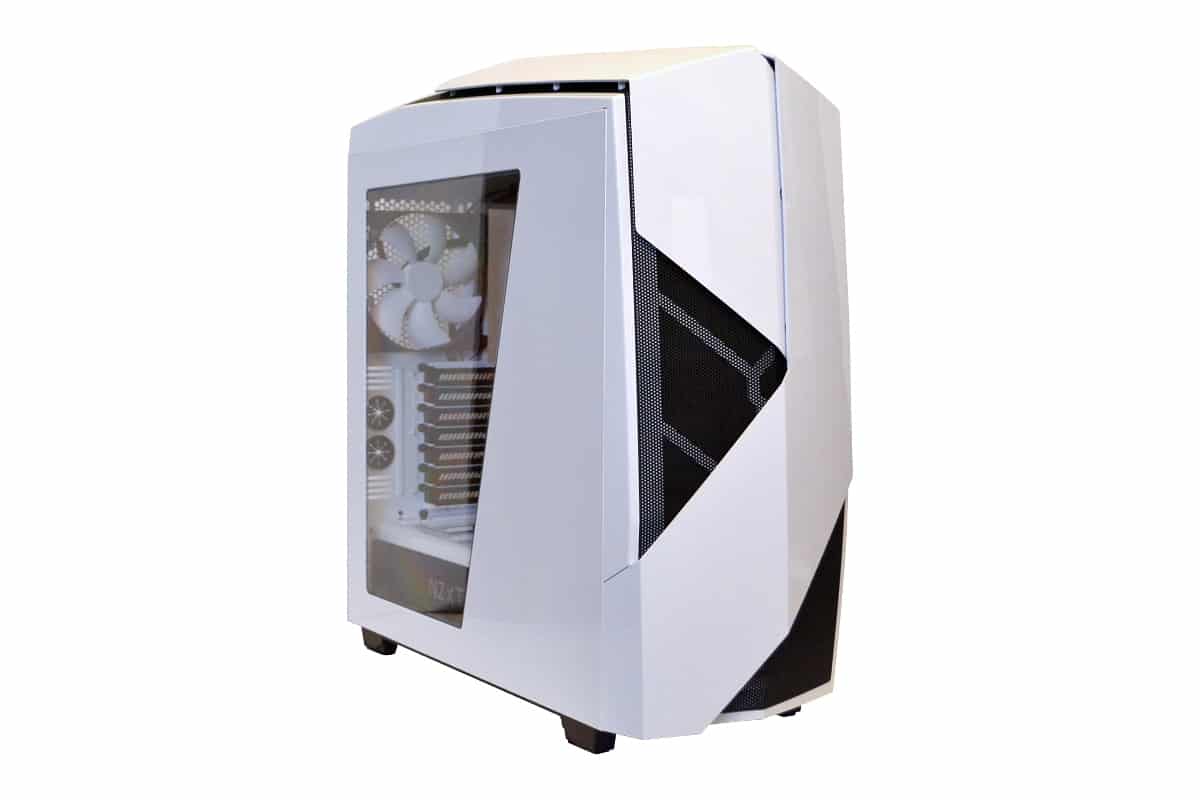
Building Style in the NZXT NOCTIS 450
With this build I wanted be as typical builder as I could. I used a none modular ENERMAX NAXN ENP450AST 450W ATX12V Power Supply with lots of wires to test the wire management in this case and I was not disappointed in the least bit. Building inside the NZXT NOCTIS 450 is very intuitive, meaning the case understands the parts you are putting into it so NZXT has made all the arrangements that they could possibly due to make your build fit right and look awesome. The way the tie downs are located and the access holes are very well located and really made it easy to do things without really looking directly at your hands. Many times I was able to just reach around and insert wires into the front while I was facing the board and it worked very well. But that’s enough of the chit-chat, let’s get down to business.
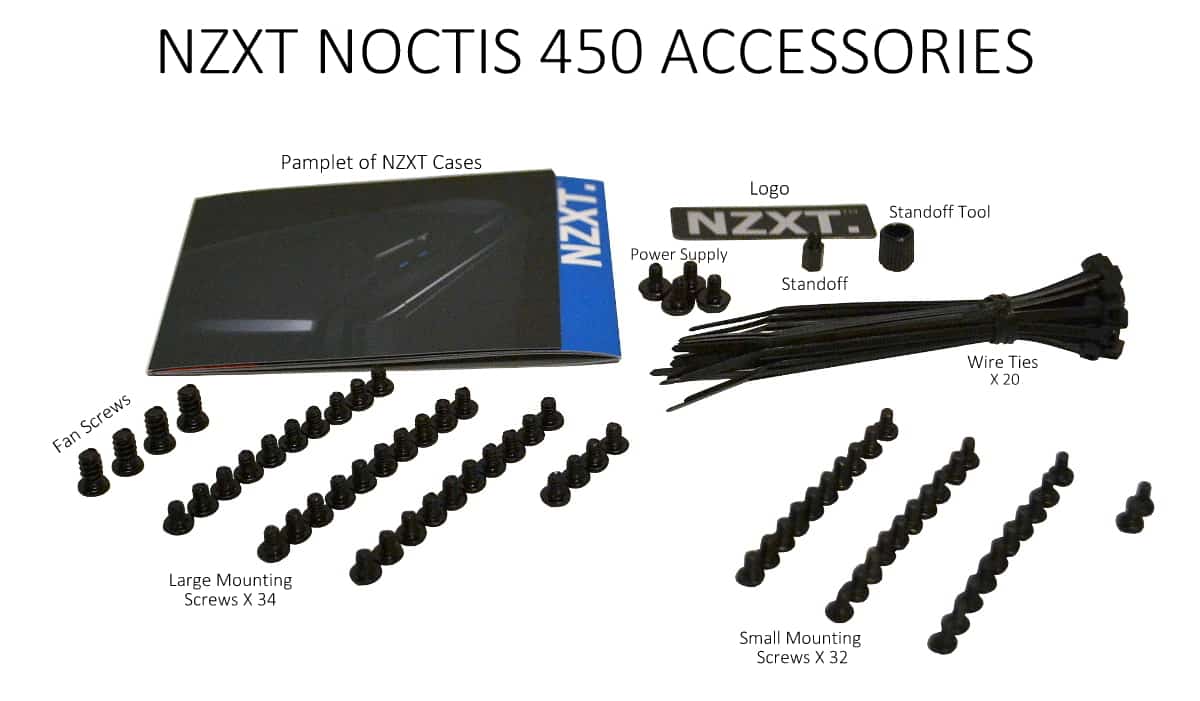
Included accessories are not just bagged but some are already installed on the case for you, so here is an inventory of the parts that come with the NZXT NOCTIS 450.
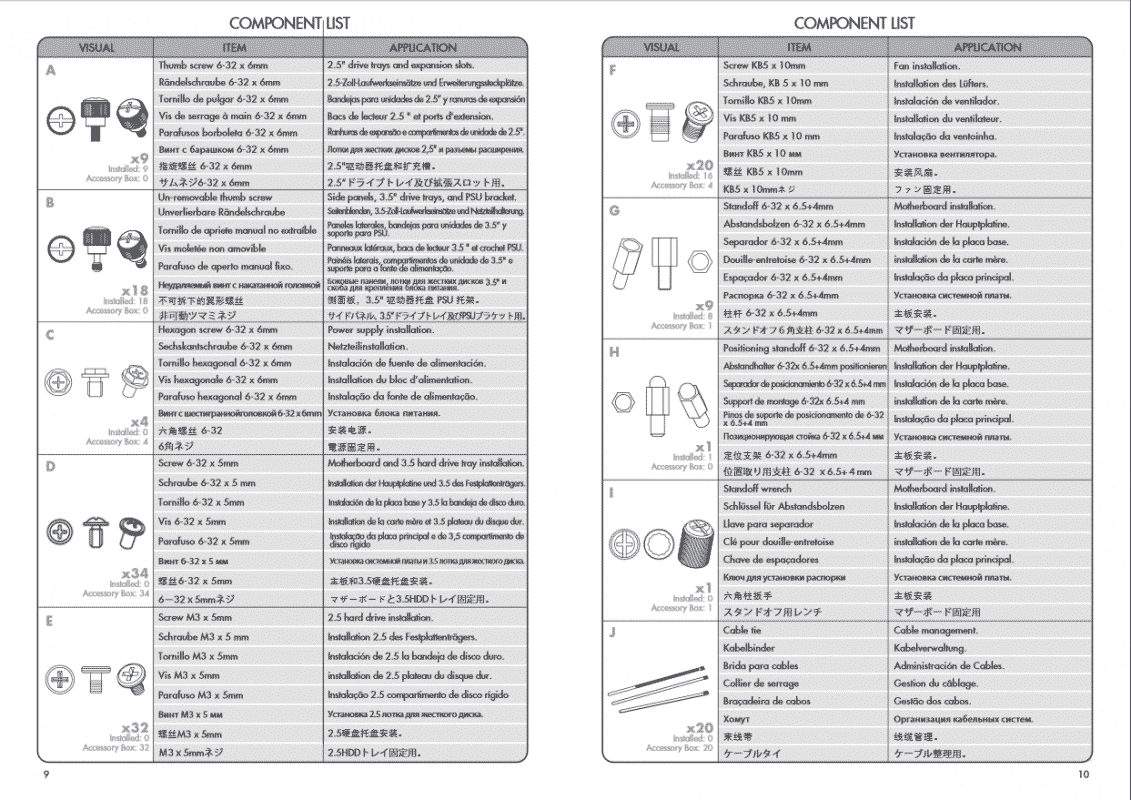
Here is a few portions of the NOCTIS 450 manual for descriptions.
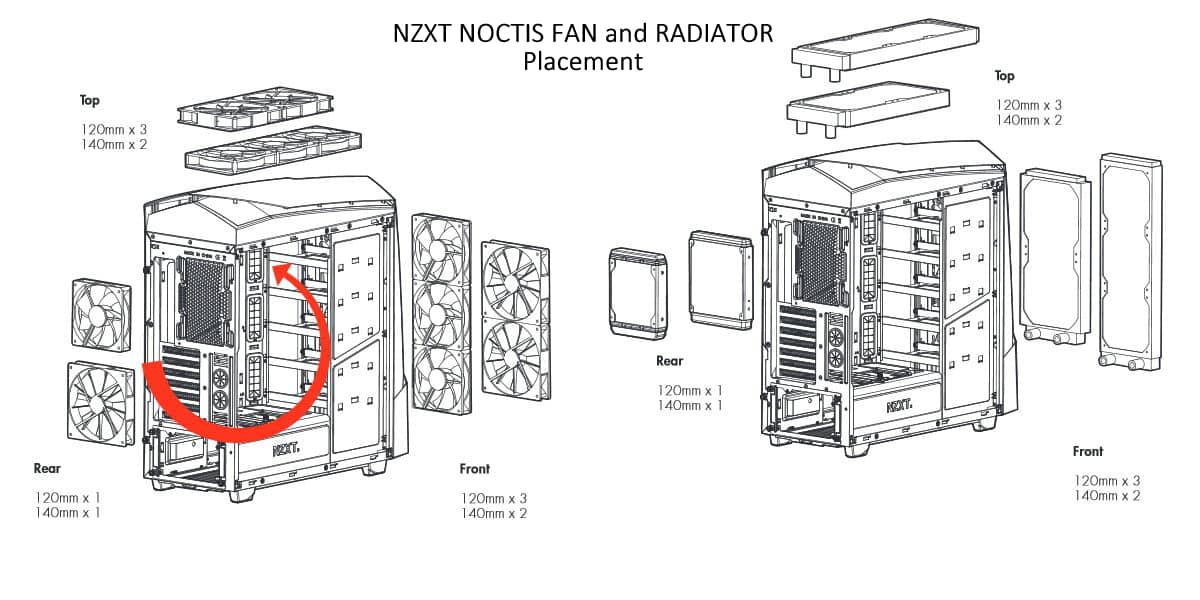
There are many options that can be used for water-cooling. Here is a diagram from the Manual to see the different ways you can use fans and radiator cores and sizes.
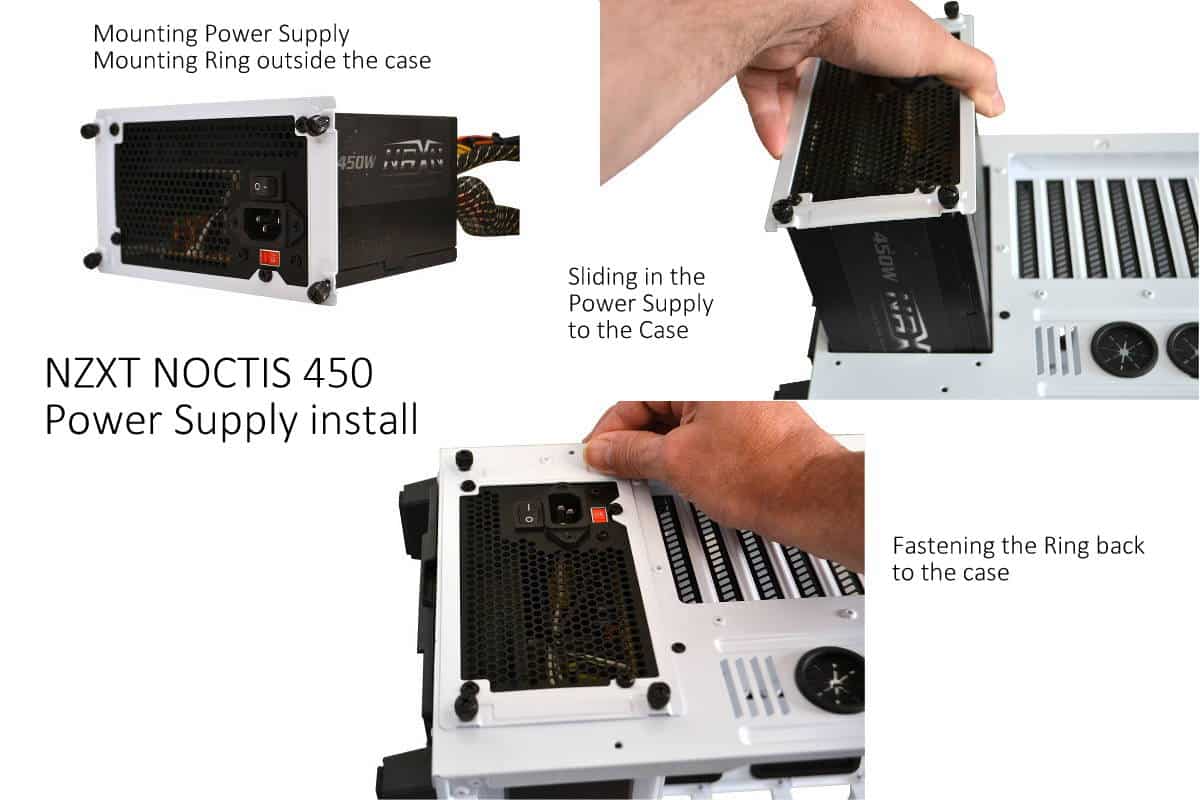
Mounting the power supply is easy in a Lian Li sort of way. There is a power supply mounting ring that you take off the case with four thumb screws, then you mount that ring to your power supply. With this case having a power supply cover it is necessary to mount the power supply fan down so that it can breathe easy. Once the mounting of the ring is complete to the back of the power brick your next part is to get all your wires in your hand and slowly feed the power supply down into the case assembly and then tighten the ring back onto the back of the case. All of this is very easy and allows the builder time management so they don’t have to try to fight the power supply mounting from behind or to take the cover off.
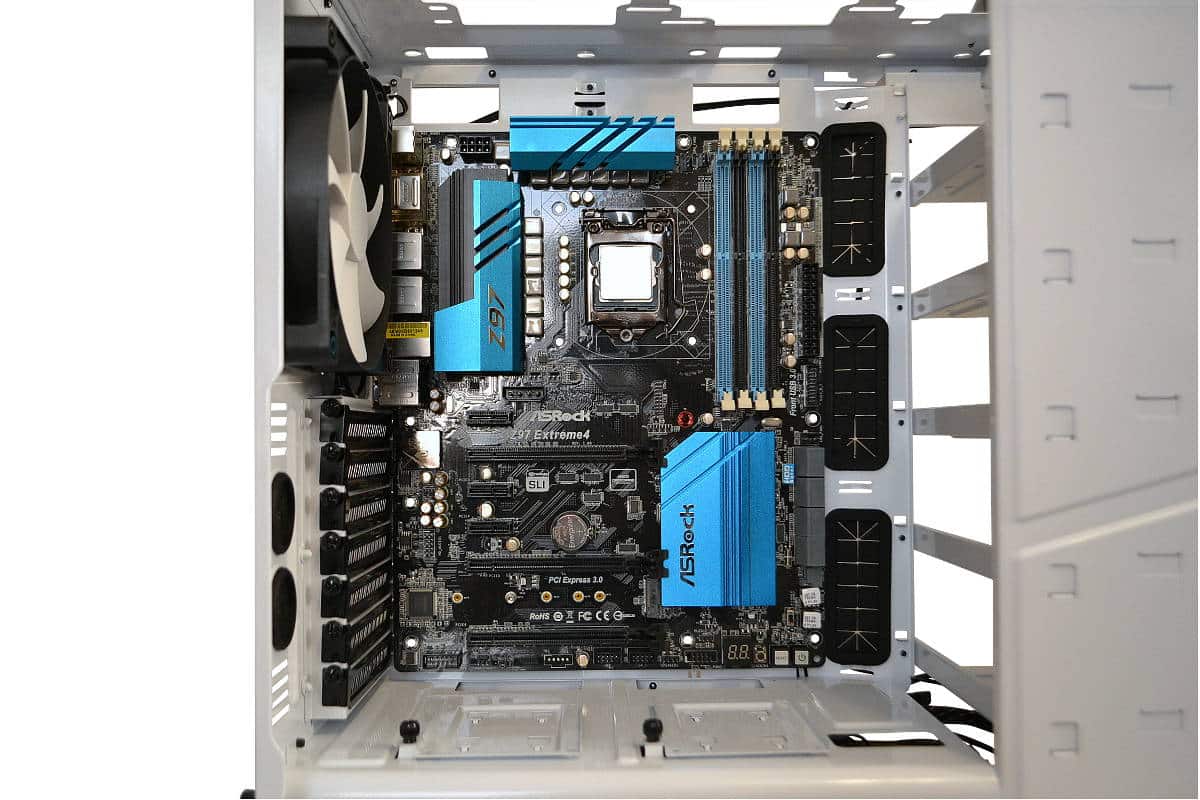
With the center placed mounting pin it really makes the placement of the motherboard very simple. I was able to install the motherboard without setting the case on its back. The pin held the board in place during my lunch break and when I returned I was able to locate the mounting screws and very simply install them. I tend to mount from the middle out to keep the board secure to the motherboard tray and then work my mounting outward toward the edges.
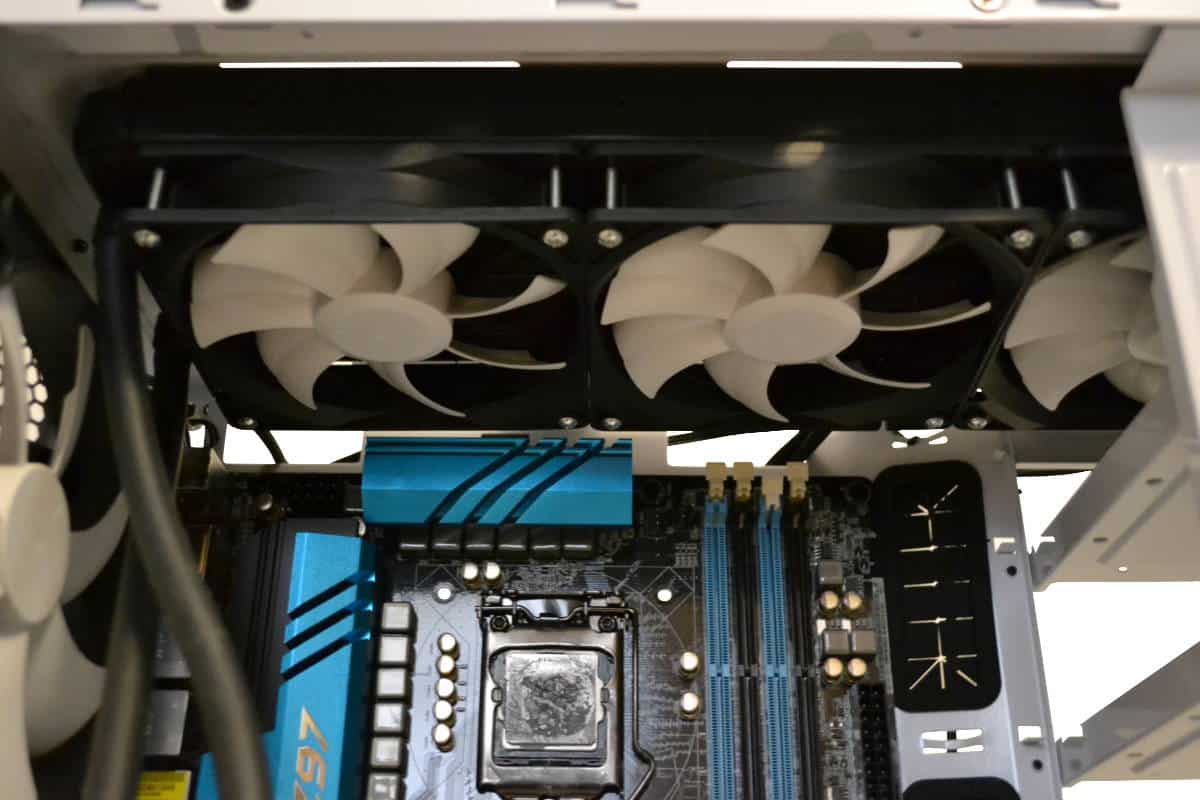
Even with the motherboard installed first it was still fairly easy to install the radiator with the fans already installed to the bottom of the radiator unit. The secret is to gently work your radiator at a 45 degree angle, back down, into the open build area completely before starting to lift the radiator into place. The fit and finish was simple and easy. Just place a few middle screws in place to hold the radiator core in place and then mount the rest of your screws. Remember to not tighten any of the screws completely until you have aligned all the screw mounts or you will find yourself doing more work, like I did.
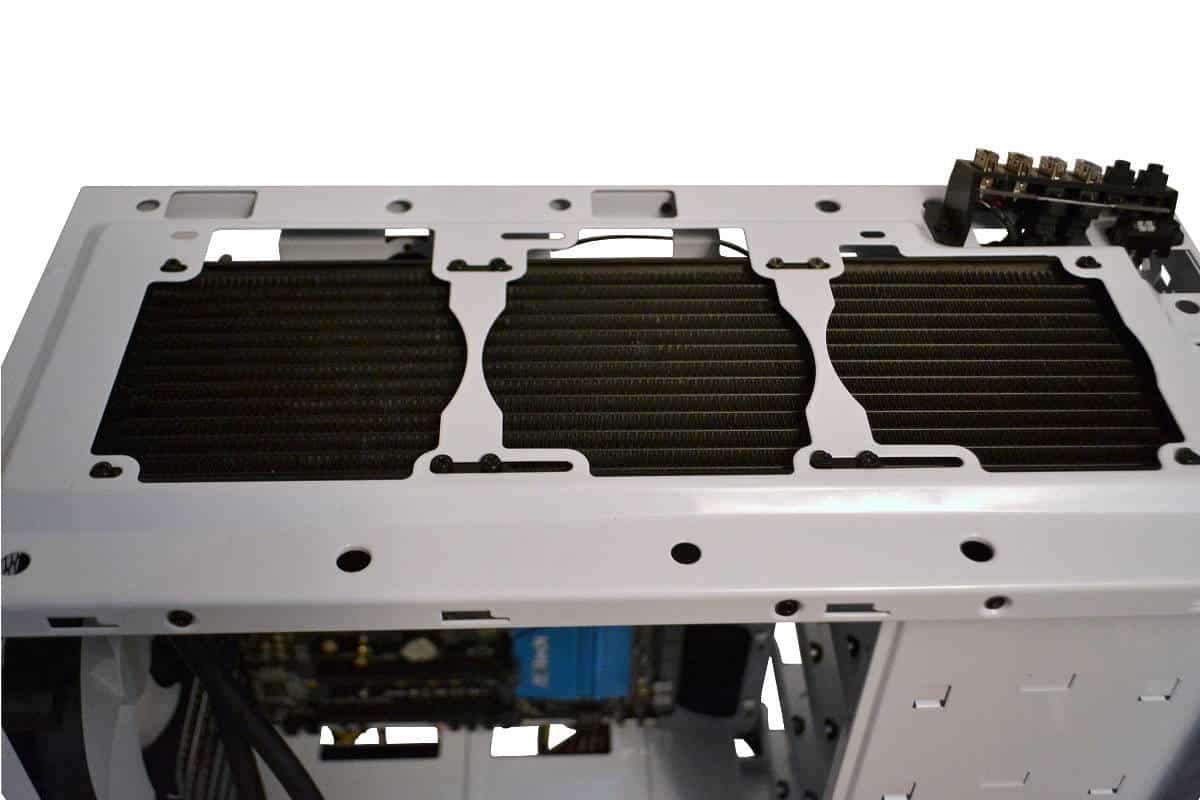
With the inlet water tubes in the rear of the unit I had to lower my rear 140 fan to the lowest lever so to not make contact with the rubber tubing of the cooling solution. As its shown in the picture below the radiator core is set forward enough to allow for wire management later during the build process. There is plenty of space to work even after the Radiator core is mounted to the frame.
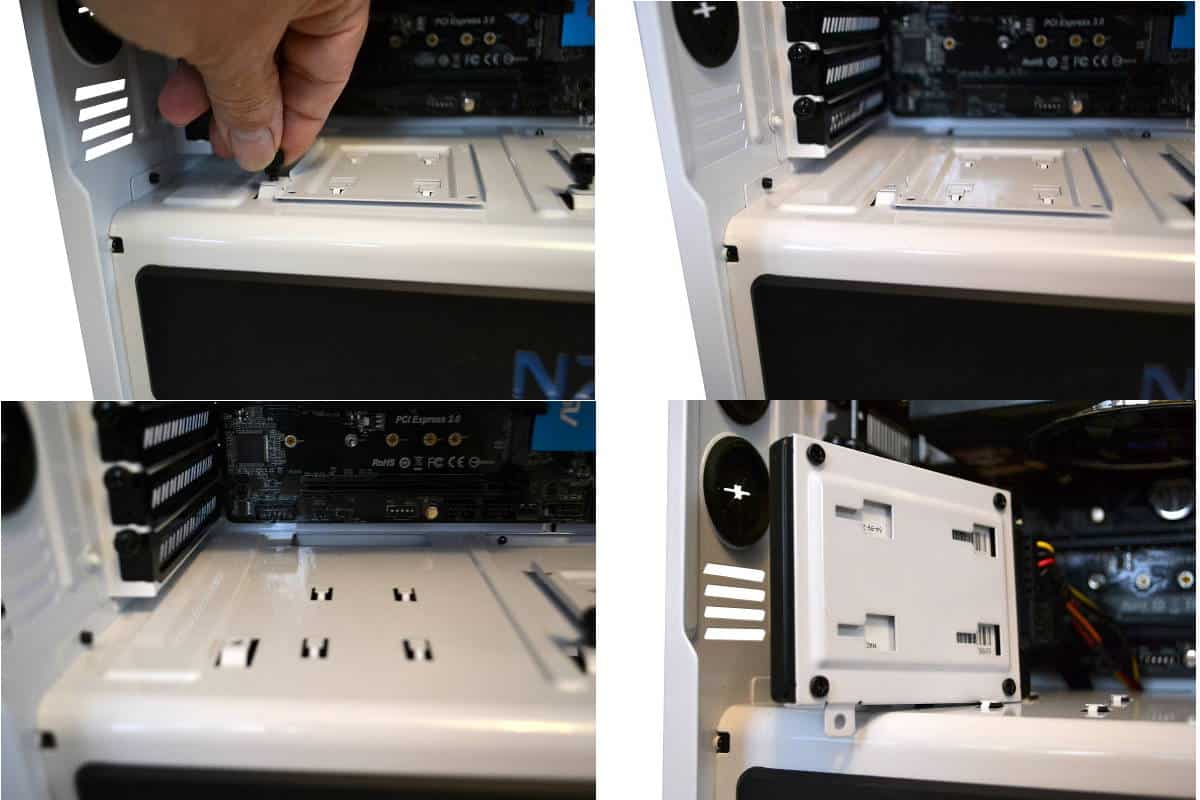
I did find one thing that I was not so pleased with when I was mounting the SSD power supply rack trays. They tie down really nice with the thumbscrew but the mounts at the bottom fit loosely. This can be good if you have a thick wire to install into the SSD’s male connections and will not bend the connectors when the mounting is completed but since SSD’s have no moving parts and the thumbscrews hold down the unit quite tightly it was something that I still had to mention. Whether this was done on purpose is not known to the Reviewer at this time, but it seems to me that they made the bottom slide mounting loose to save SSD connection from breaking on install and this is really “much to do about nothing”. The installation of every drive on the case is done is a similar procedure so I thought it redundant to show the front tray mounts. They are basically the same engineering. You untighten the thumb screw and then unlatch the front tab and install the drives from the bottom and reverse the processes. Here is a diagram of the mounting of the SSD on the bottom power supply shelf that I prefer in my build here.
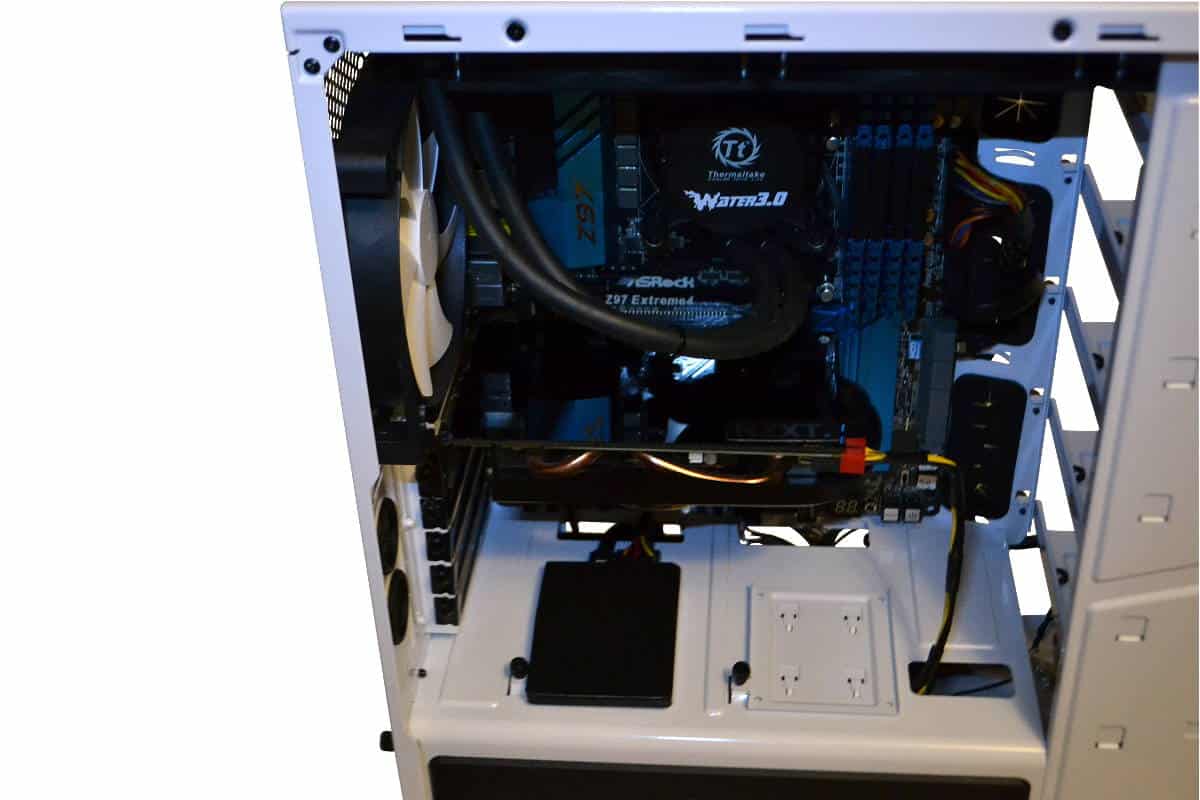
As the reader can see here there is ample room for everything and NZXT thought of pretty much everything that a builder will encounter during installation of parts. You will need a flat-headed screw driver to remove the back PCI blanks because they are very tightly installed. This is not a bad thing but a medium flat-head screwdriver will give you plenty of torque to untighten the thumbscrews from the grip of the unit and then a medium Phillips head will work fine afterwards. The frame is made for wire management so even if you are not a seasoned professional you will still find that your build will look very clean as long as you think about where the wires should be routed before connecting them.
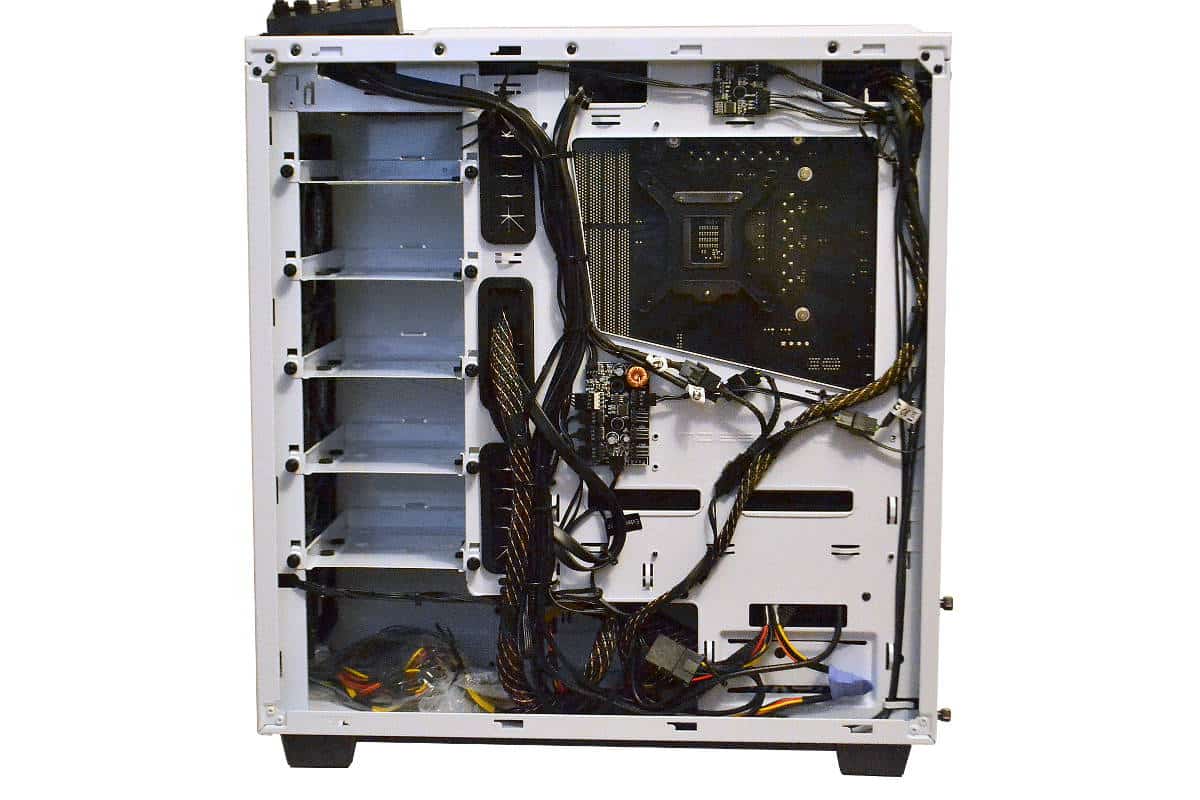
Wire-management was really well engineered in the NZXT NOCTIS 450 mid-tower case. For once, a case manufacturer gave plenty of wire ties to finish a wire-management project. I wonder if they have been reading my reviews on past cases? There were 20 wire ties which for me, gave me a few leftovers but I love having too many than not enough.
The wires are easy to flow around the mounted circuit boards and access points and the bags that they use to cover the control wires of the case were nice to use for stowing away my extra wires down low and safely away from everything. I did use the fingertip of a Nylon glove to cover a SATA Power connection that was dangerously close to the frame but that was easy. After all you see here the back panel went on effortlessly and that is no small feat when replacing a back panel after wiring. Usually that is the toughest part of a build sometimes and if you have built in the past you know what I am talking about. There are plenty of tie downs and I was able to make a really nice arrangement without too much thinking.
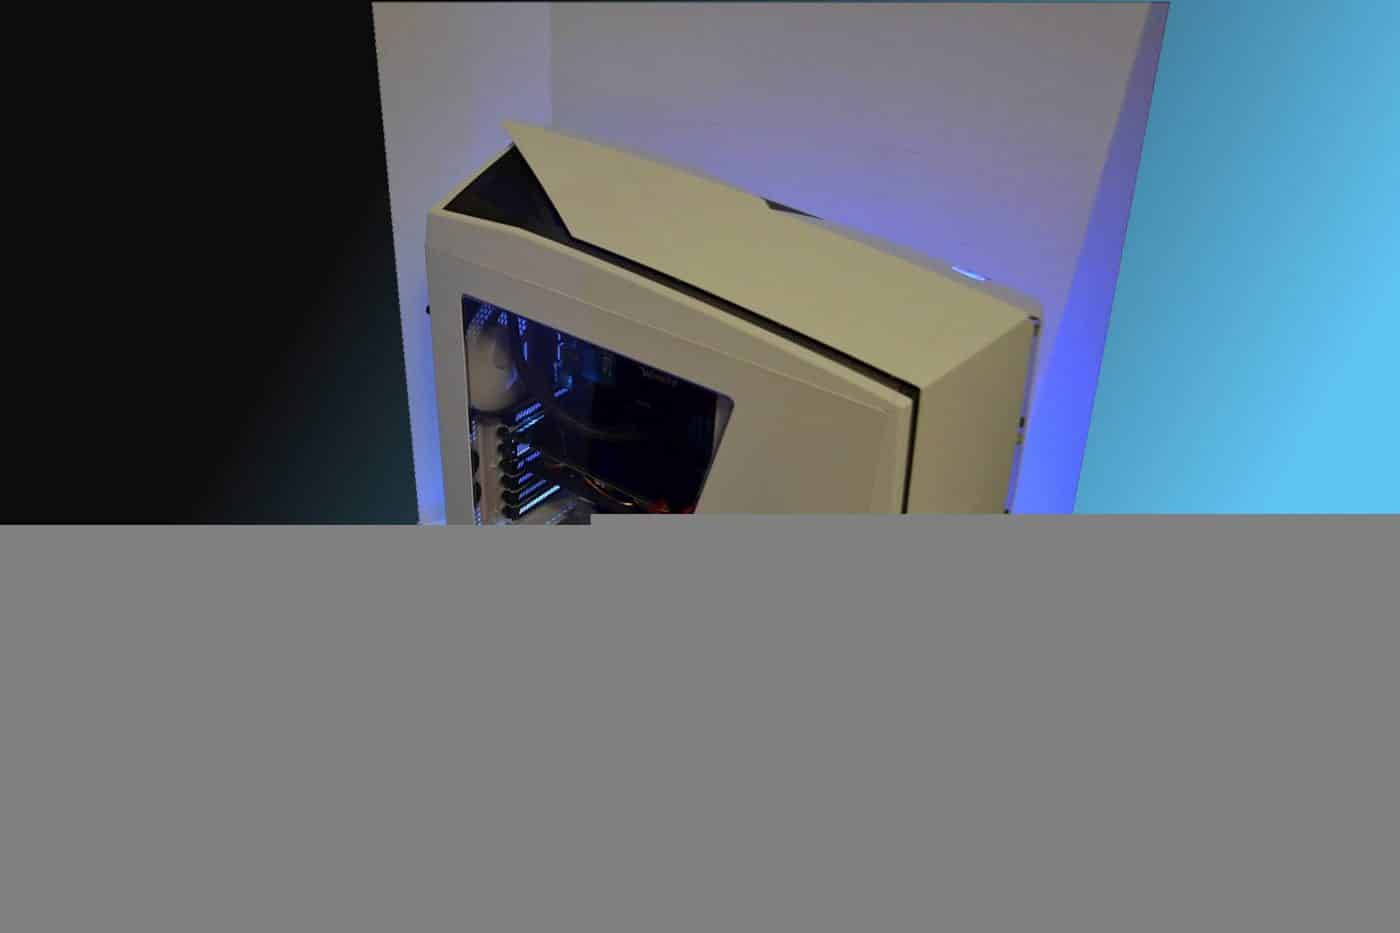
After assembly it was time to light her up and she didn’t let me down at all. The fit and finish is great and the detailing and lighting is excellent in my own humble opinion. Everything looked good; Fit good; and left me with a real since or wanting to keep this case for myself for a future case modding project. This is a case that you can build as-is and still come away with the look and feel of a premiere custom gaming computer.
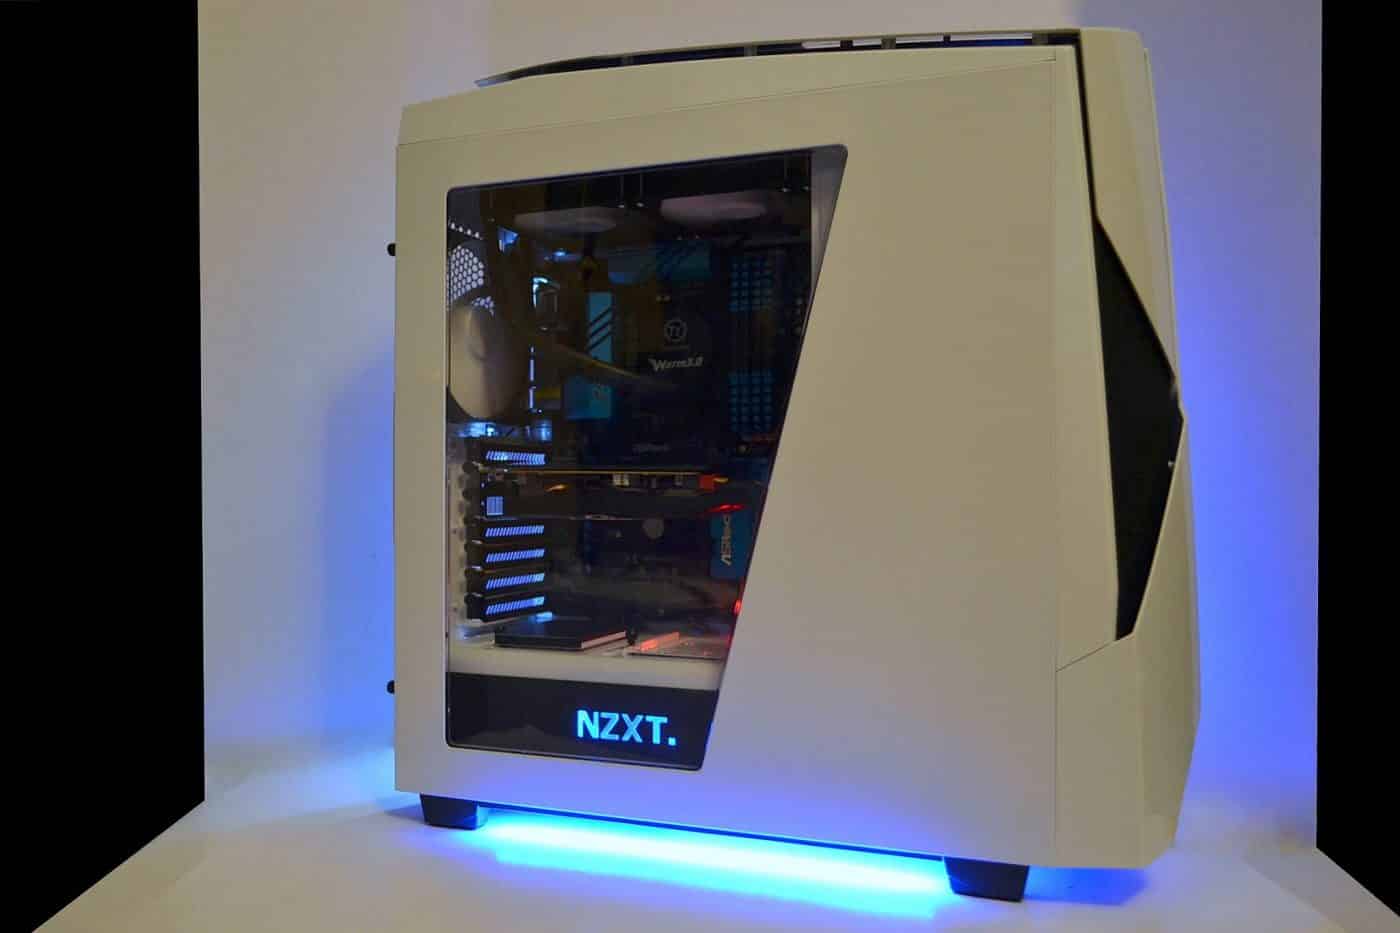
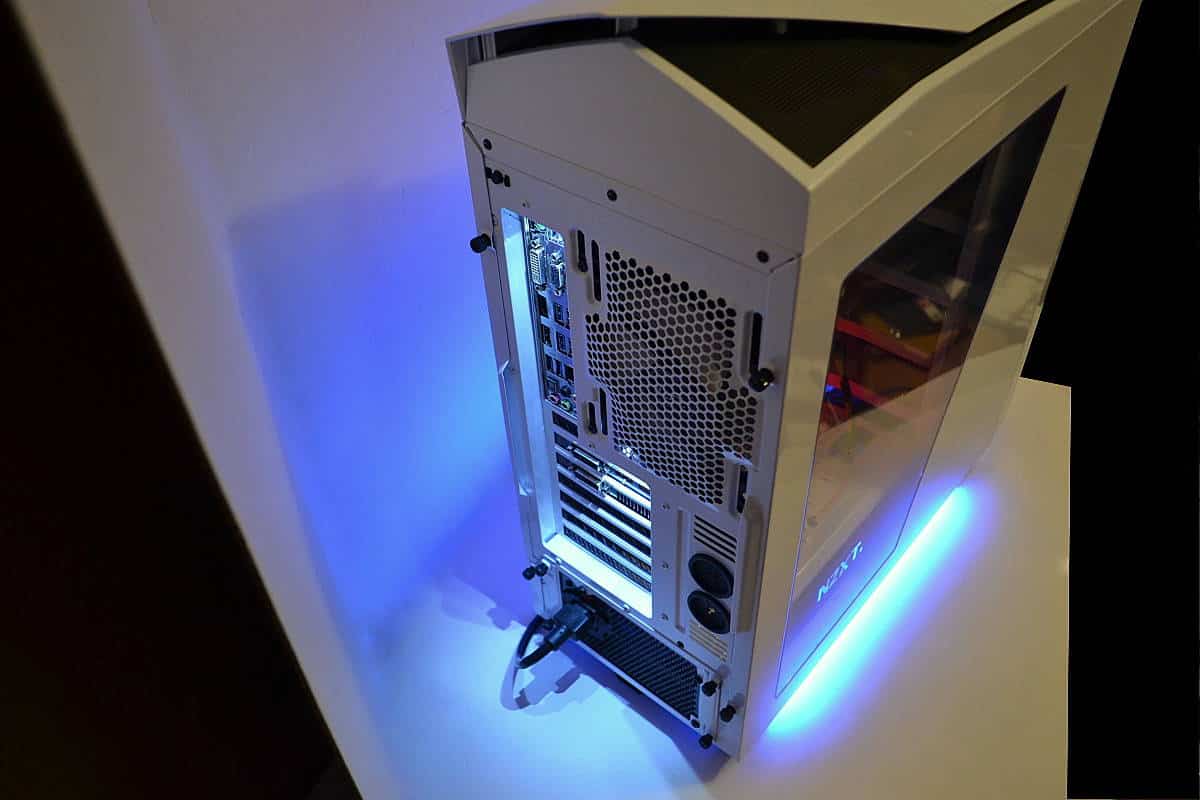
NZXT did not just go with style with the lighting the back panel LED’s give a very practical application for lighting so that if you need to plug in a wire in the back you will not have to go looking for the nearest flashlight. There is plenty of lighting for the PCI slots and the I/O shield and as you can see here the lighting is plenty for plugging in that USB in the right position the first time… Maybe if you’re lucky. Just a joke.
One more final look at the lighting and the full look of the case before we finish this up with the conclusions for this Review of the NZXT NOCTIS 450.