EVGA X299 Micro Overview
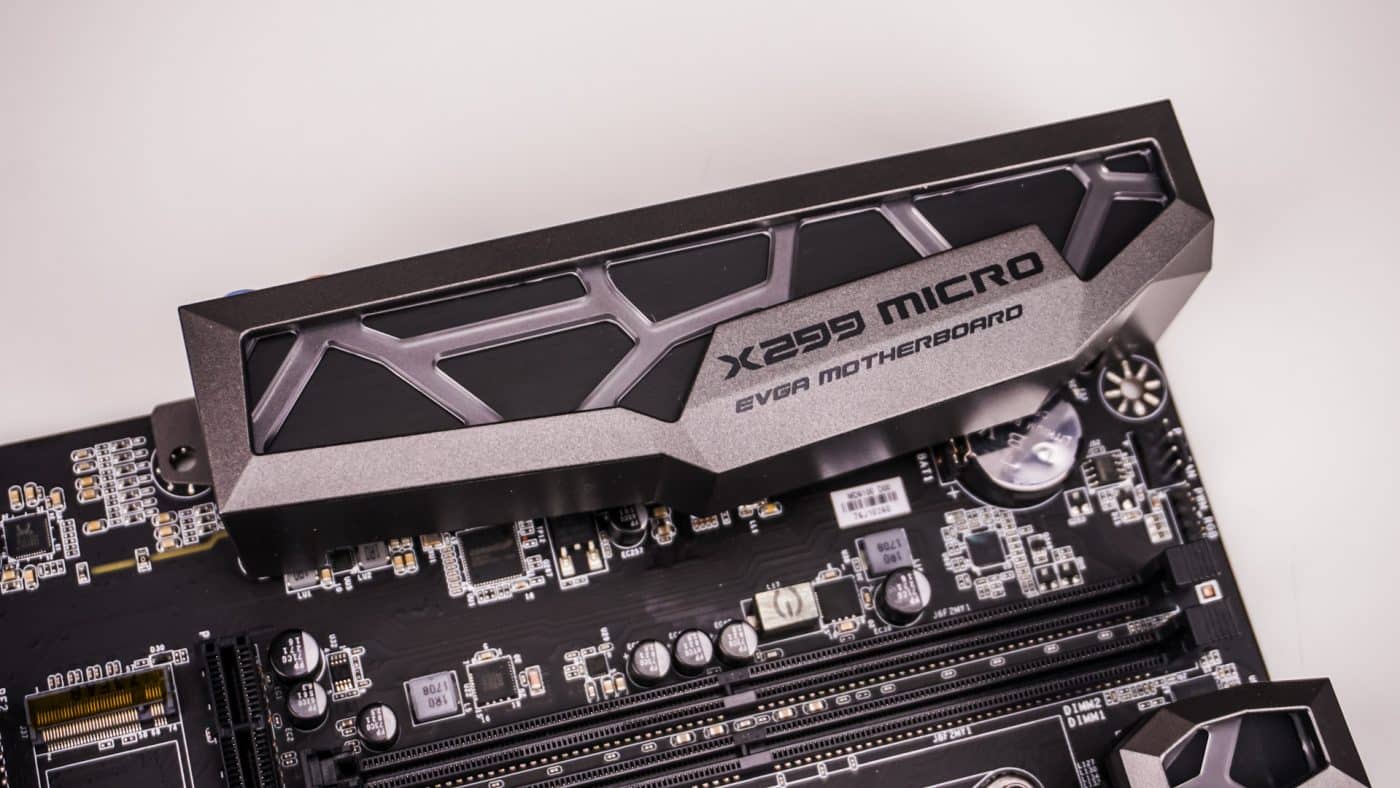
Taking a first look at the X299 Micro we can see that the design is pretty subtle. If you’ve been following EVGA’s motherboard designs over the past few years you know they are not over the top or flashy, which many people actually like. So here we have an all black PCB with black accents mostly, although the heatsink on the power delivery components is a more gunmetal color. Since this is a Micro-ATX motherboard you have official dimensions of 9.6-inches x 9.6-inches.
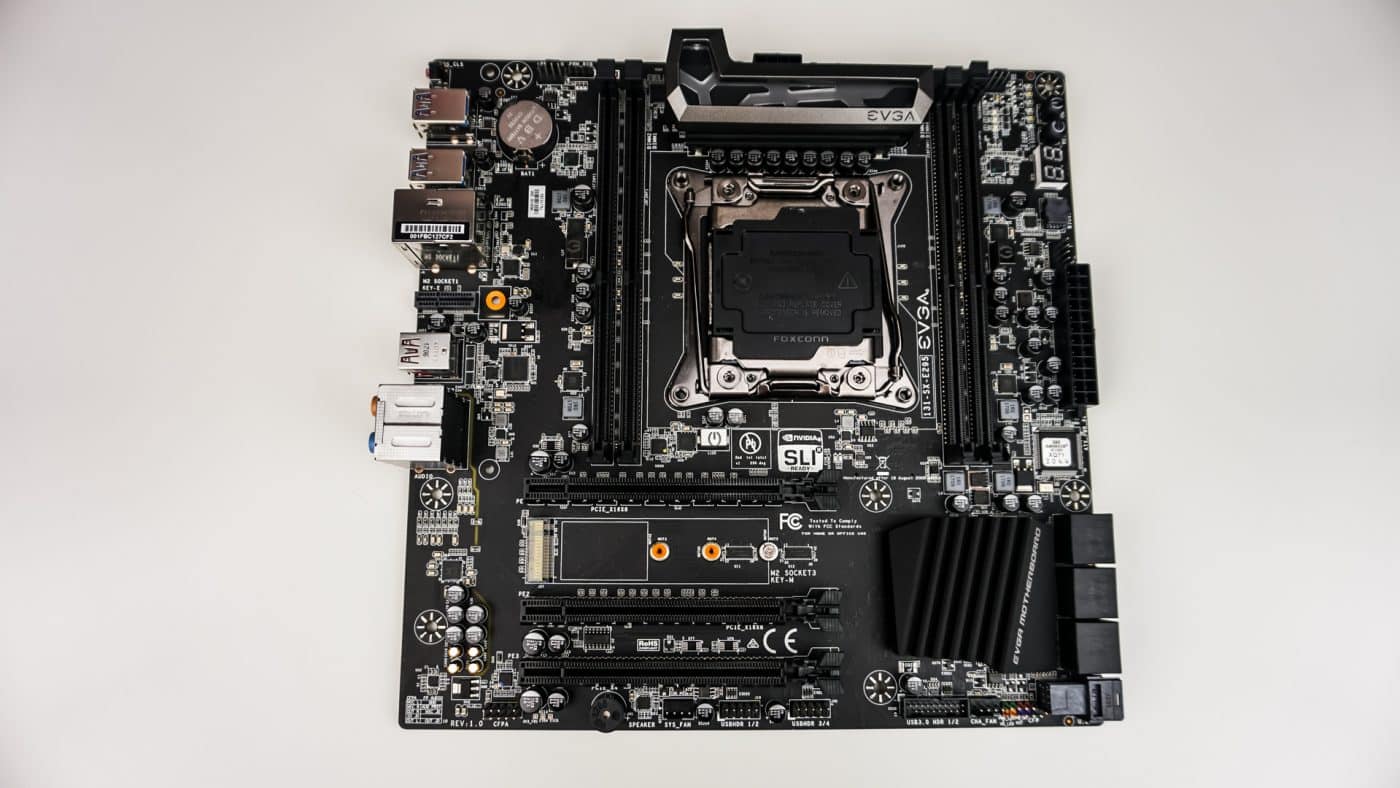
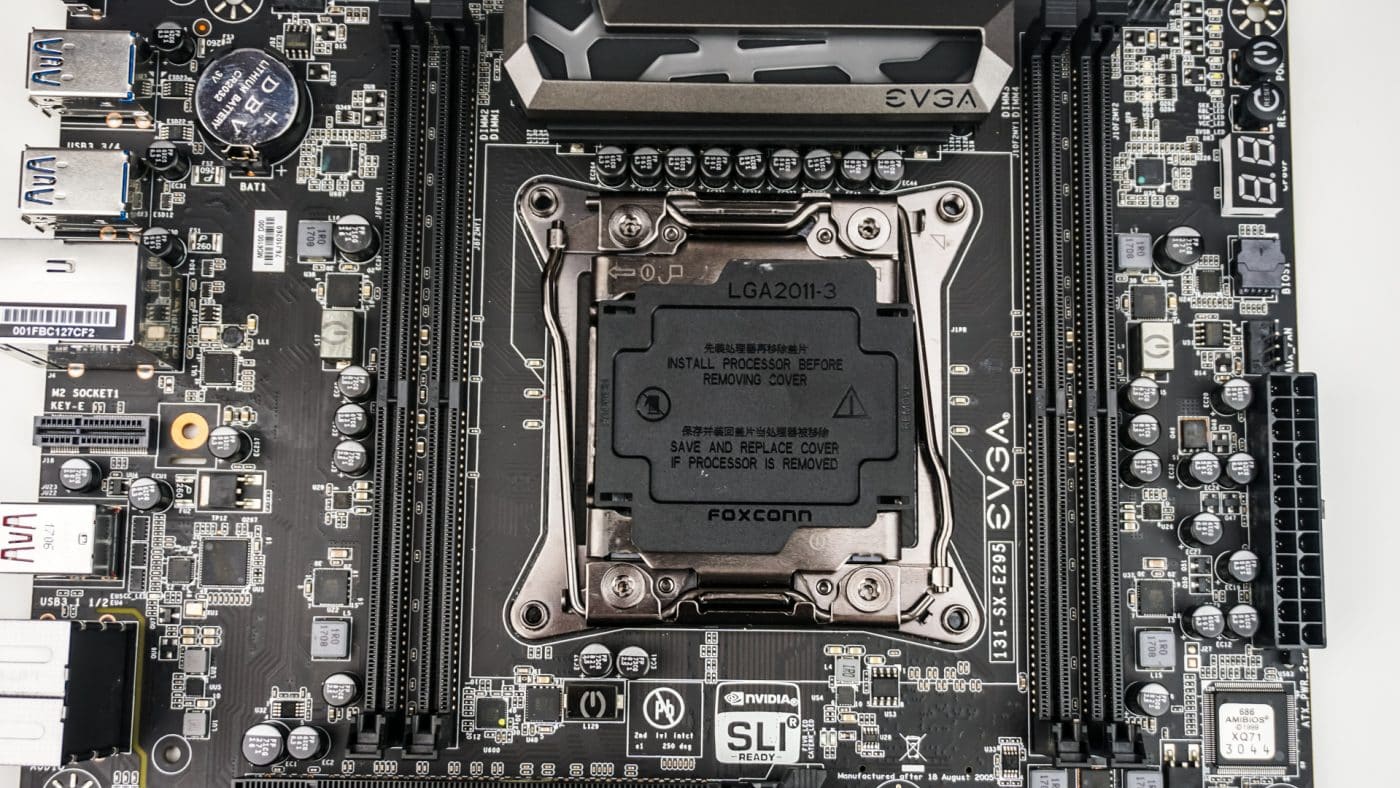
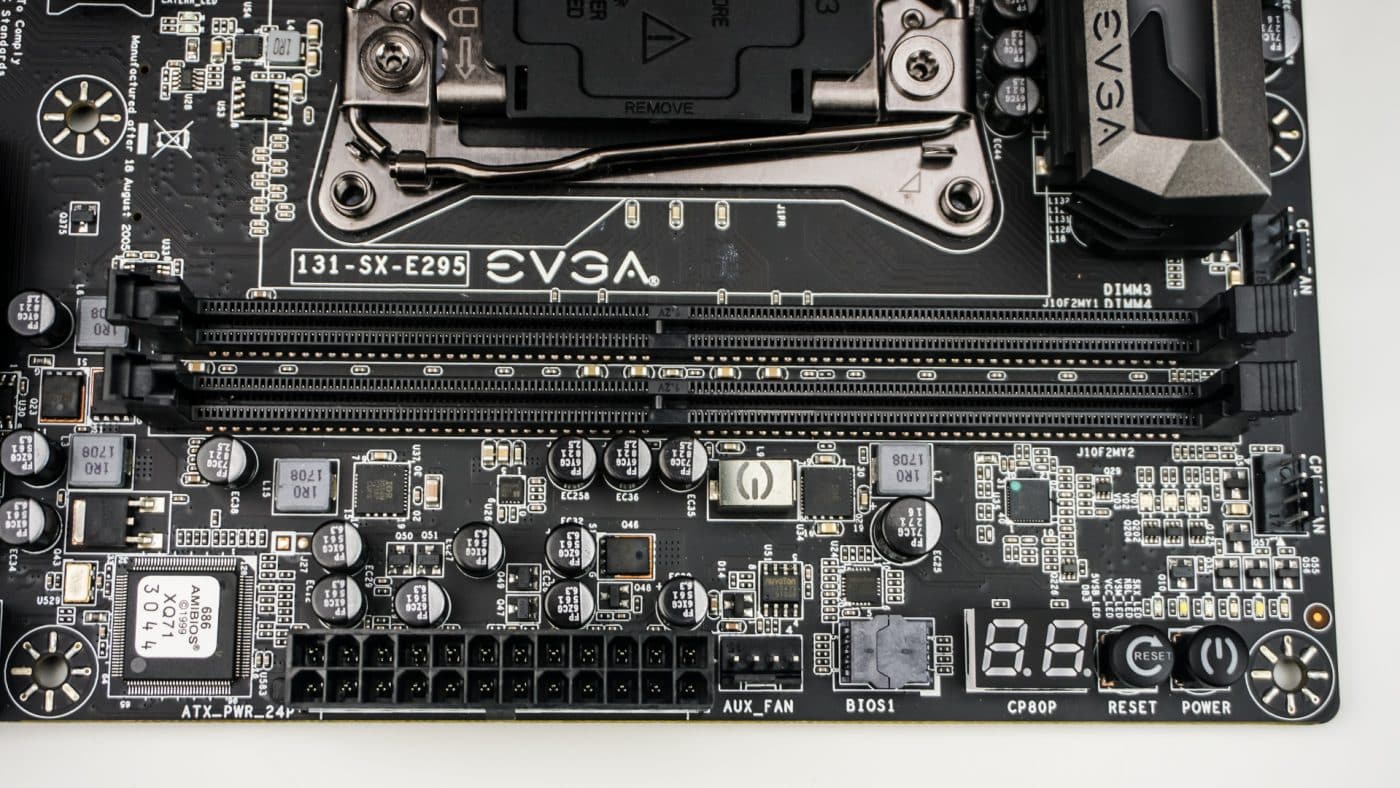
Starting at the CPU socket we have the LGA2066 socket, which is of course made for Intel’s latest high-end desktop (HEDT) processors. On each side of the CPU socket you have two (giving you a total of four) DDR4 DIMM slots. So you can do quad-channel DDR4 setups up to 64GB running at 3600 MHz. The DDR4 DIMM slots do not have any metal protection, but the bottom locking levers are absent making it easier to remove and install memory once you have a graphics card installed.
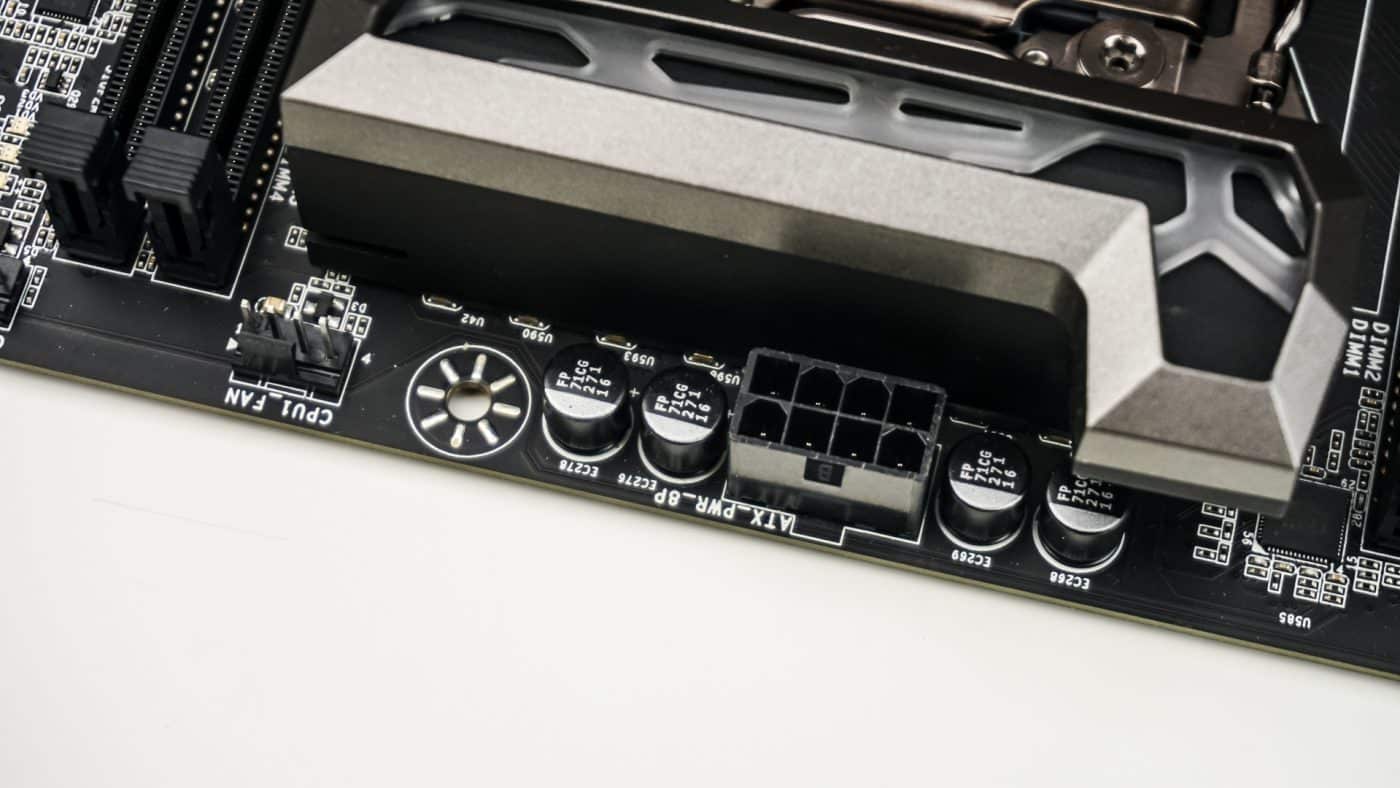
This board makes use of a 12-phase power delivery system powered by the IR 35201 PWM controller. The power delivery components are covered by a heatsink which should keep temperatures in check. Hidden above that heatsink is a your 8-pin EPS connector and 4-pin CPU fan header.

Moving over to the far side of the board you are going to find an optional CPU fan header, dedicated power and reset buttons, post code display, 4-pin fan header, and 24-pin ATX power connection.
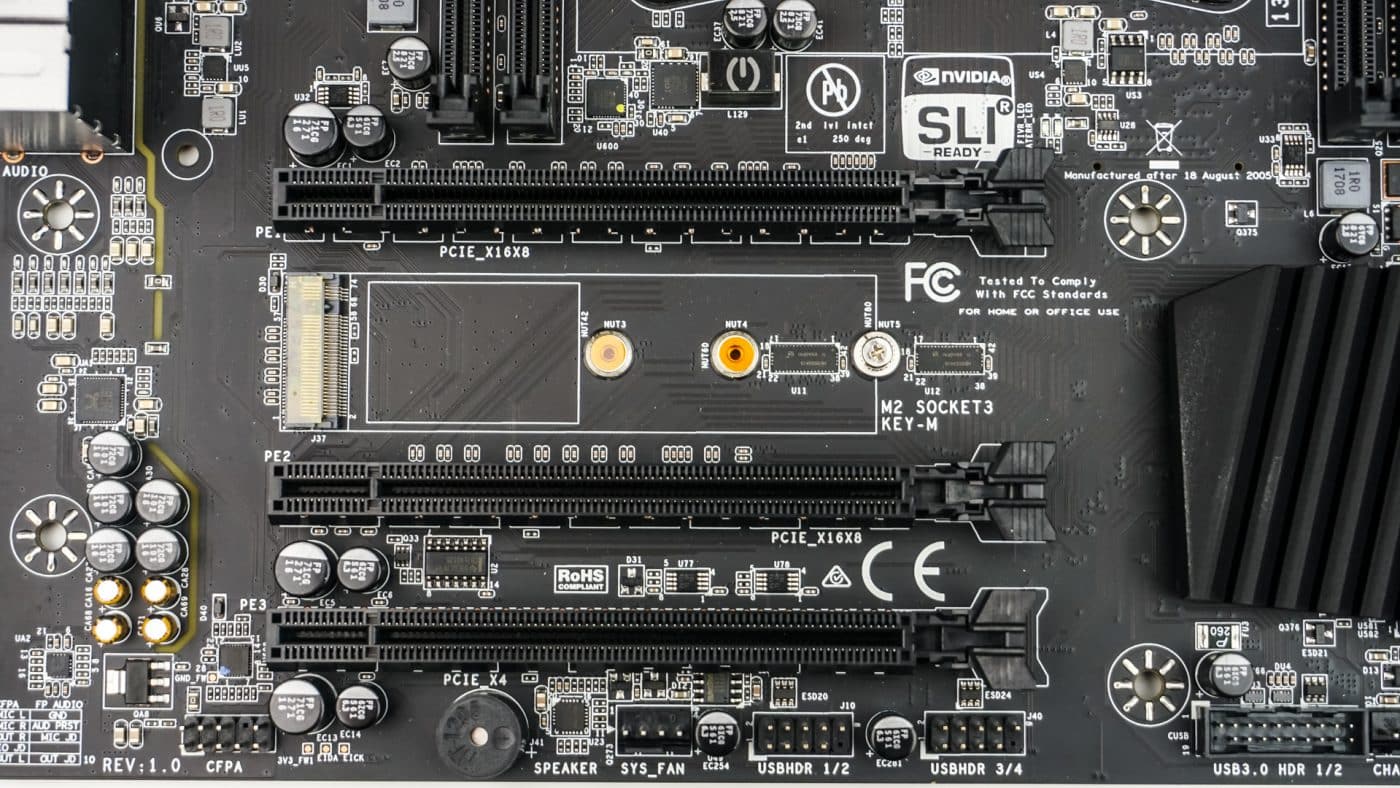
Coming down the board you are going to find your storage connections which are made up of six SATA 6 GB/s ports and a U.2 port, all of which are at a 90-degree angle facing out from the board.

At the bottom of the board is the rest of your headers and connections. From left to right you have your HD audio header, 4-pin fan header, two USB 2.0 headers, a USB 3.0 header, another 4-pin fan header, and your front panel headers.

As far as expansion slots go you have three PCI-Express 3.0 x16 slots. The top two are spaced for a dual graphic card setup, if you wanted to do three you would need to be running single-slot cards with water blocks installed. This board officially supports dual-SLI setups. In between the first two PCI-Express slots you’ll find an M.2 slot (PCIe x4) for your M.2 SSDs.
Moving on to the rear I/O you have a small clear CMOS button, four USB 3.0 ports, Gigabit Ethernet port (Intel), two USB 3.1 ports (1x type-A / 1x Type-C), and you audio connections.

When you actually get the board it will not have a rear I/O cover installed. You have to install it as well as the WiFi card yourself. I feel like this is an extra step that is not needed and most other motherboard makers have everything installed for you. On the top corner of the board you’ll find a 4-pin fan header and 4-pin RGB header.