System Overview & General Usage Tests
Getting the Affinity setup is pretty easy. Go ahead and install it in your home theater or where you plan on using it, connect power, all of your components, and hit the power button. Upon first login we were presently surprised to find no extra bloatware or anything like that, a basically clean system (minus the AVADirect background).
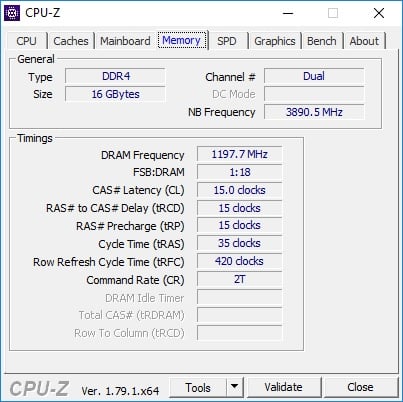
To check our components we download CPU-Z and see what all we have inside. As you can see it reads everything correctly and all of our components are running at their advertised speeds.

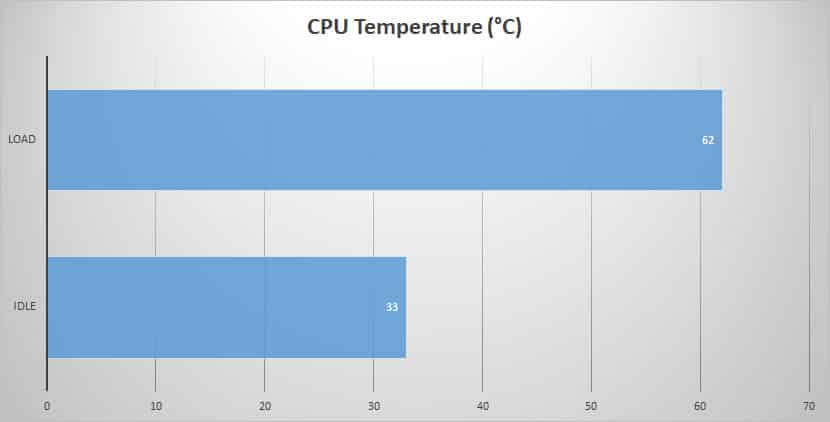
Our first test will be CPU temperature. We run this test to be sure AVADirect’s choice of the Corsair H80i V2 was the correct one. Idle tests are taken on the Windows 10 desktop and load test are taken running the AIDA64 system stability test for 30 minutes.
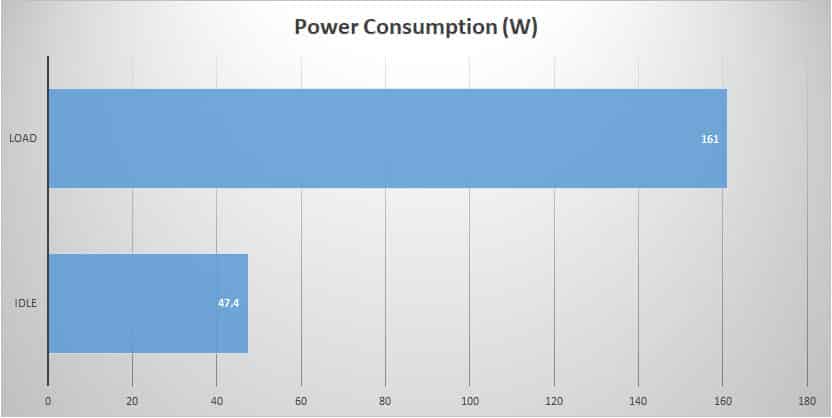
After CPU temperature we have power consumption. This test was done using a Kill-A-Watt meter measuring the total wattage of the system. Idle was taken on the Windows 10 Desktop and load was taken running the AIDA64 system stability test with the FPU tests on.
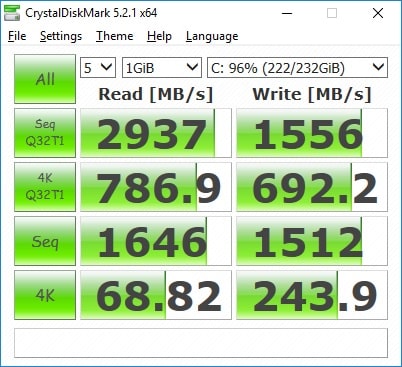
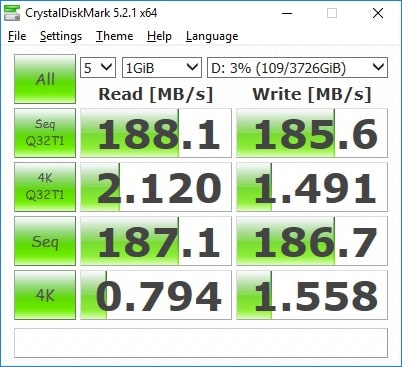
Our final normal system test is our hard drive tests. We will be using CrystalDiskMark to test the speeds of both the Samsung 960 Evo and the Seagate Constellation ES.3. The results from the Samsung are on the left and the results from the Seagate are on the right. Remember the Samsung is a NVMe M.2 SSD whereas the Seagate is just your normal hard drive.