

Performance Testing
Keep in mind that often times idle temps are not that impressive under water cooling, these systems typically don’t start to impress until the heat is really turned up. Time perhaps for some overclocking? Or maybe just a long gaming session? Either way enjoy your awesome new cooling, we did some overclocking of our own with our WCing 101 rig check it out!
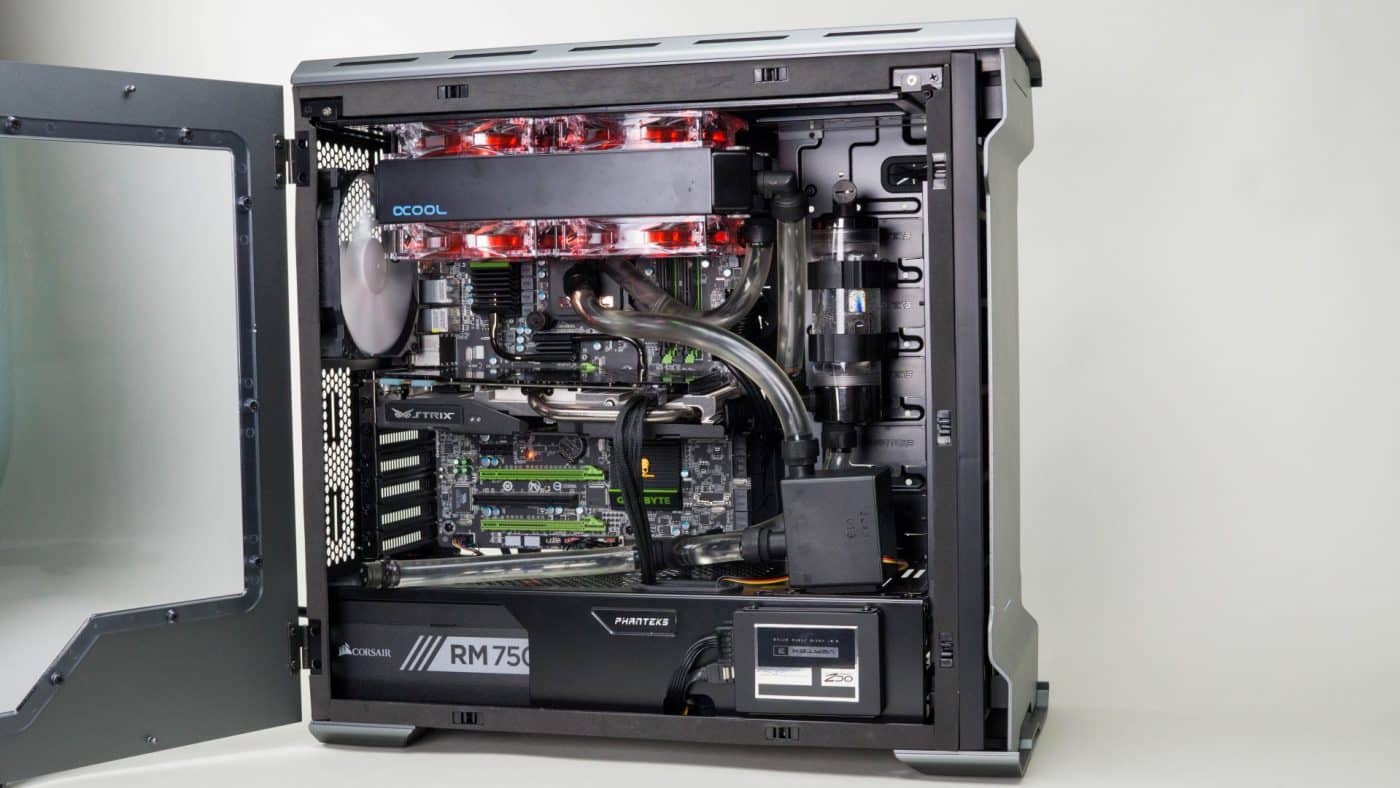
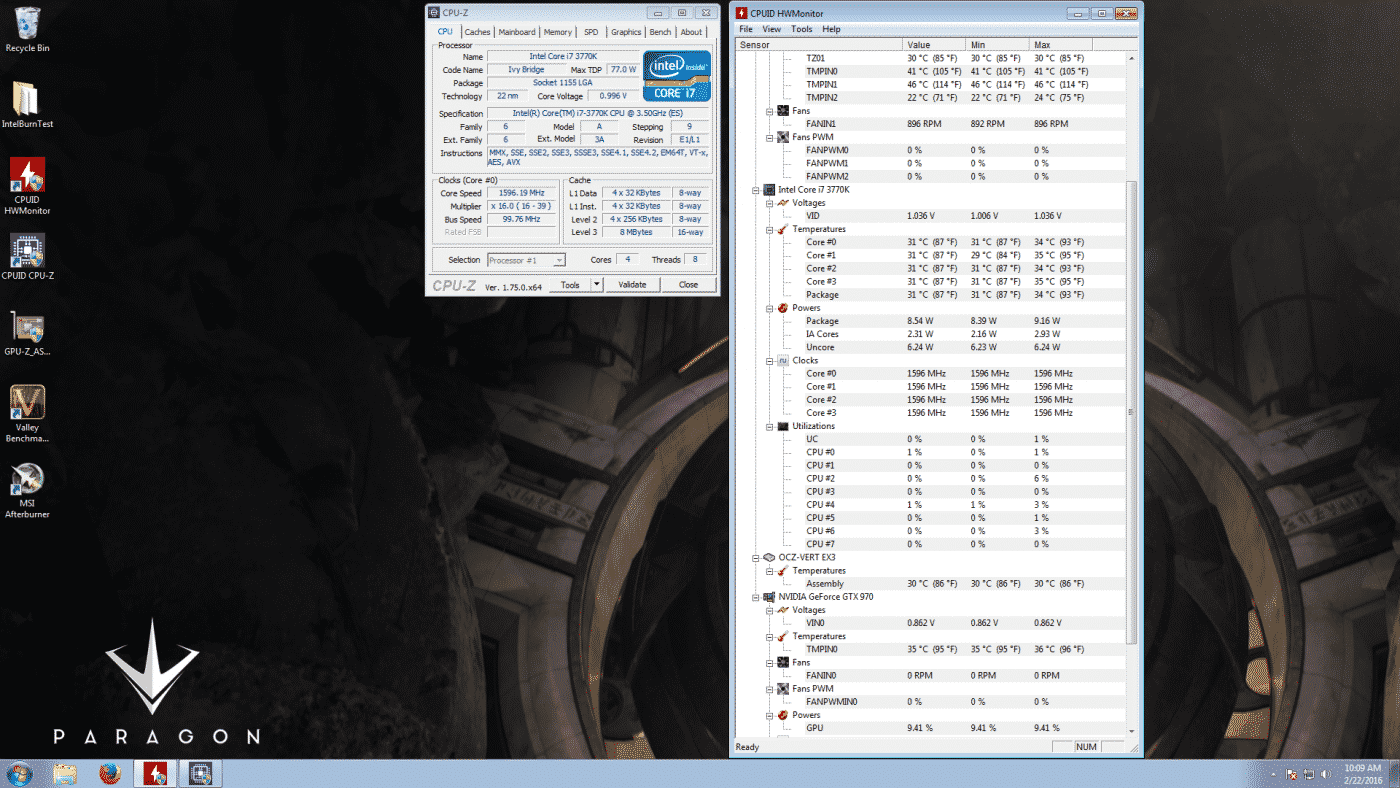
To get things started we took some screenshots of the processor running at stock idle and under load using Intel Burn Test set to maximum for one run.
Ambient: 72°F / 22.22°C
Idle Avg: 94.1°F / 34.5°C
Load Avg: 140.45°F / 60.25°C
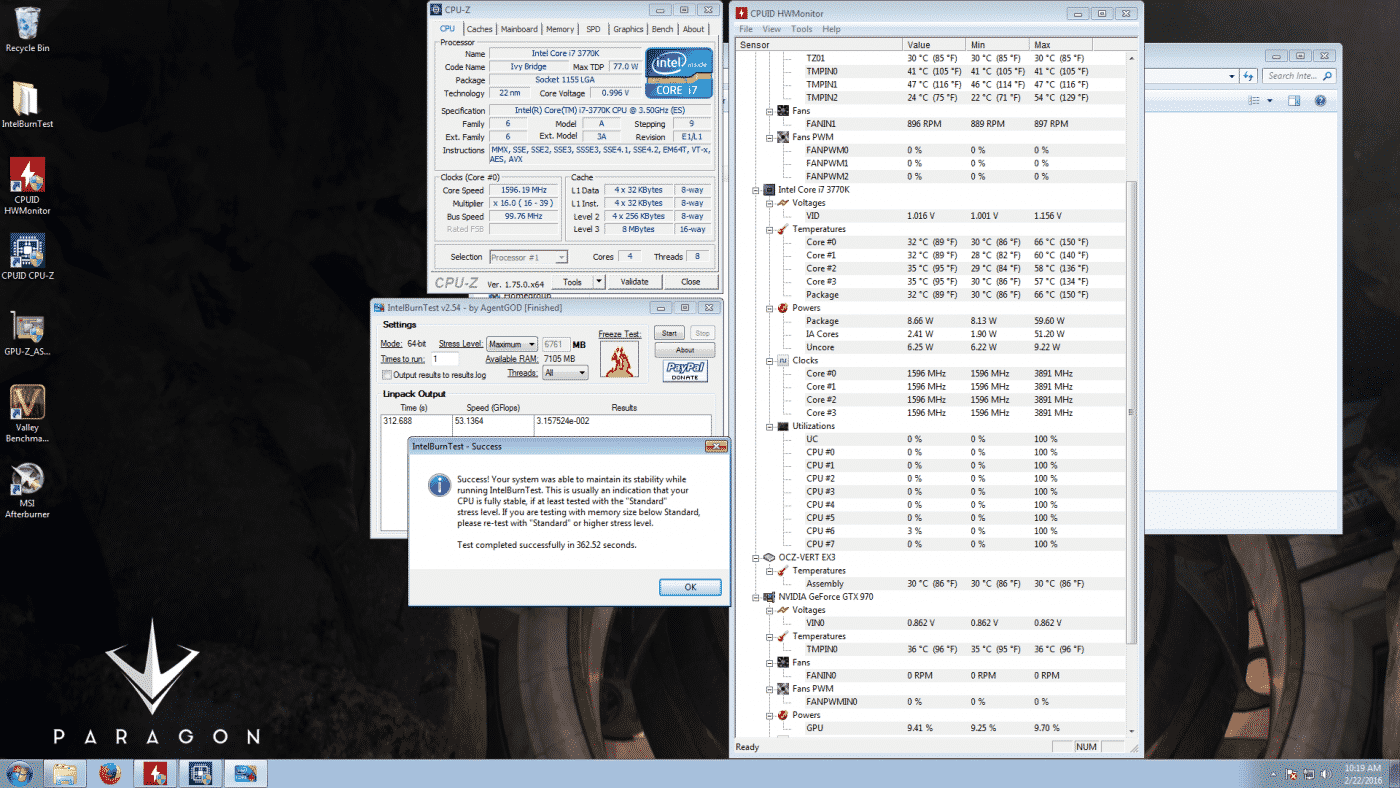
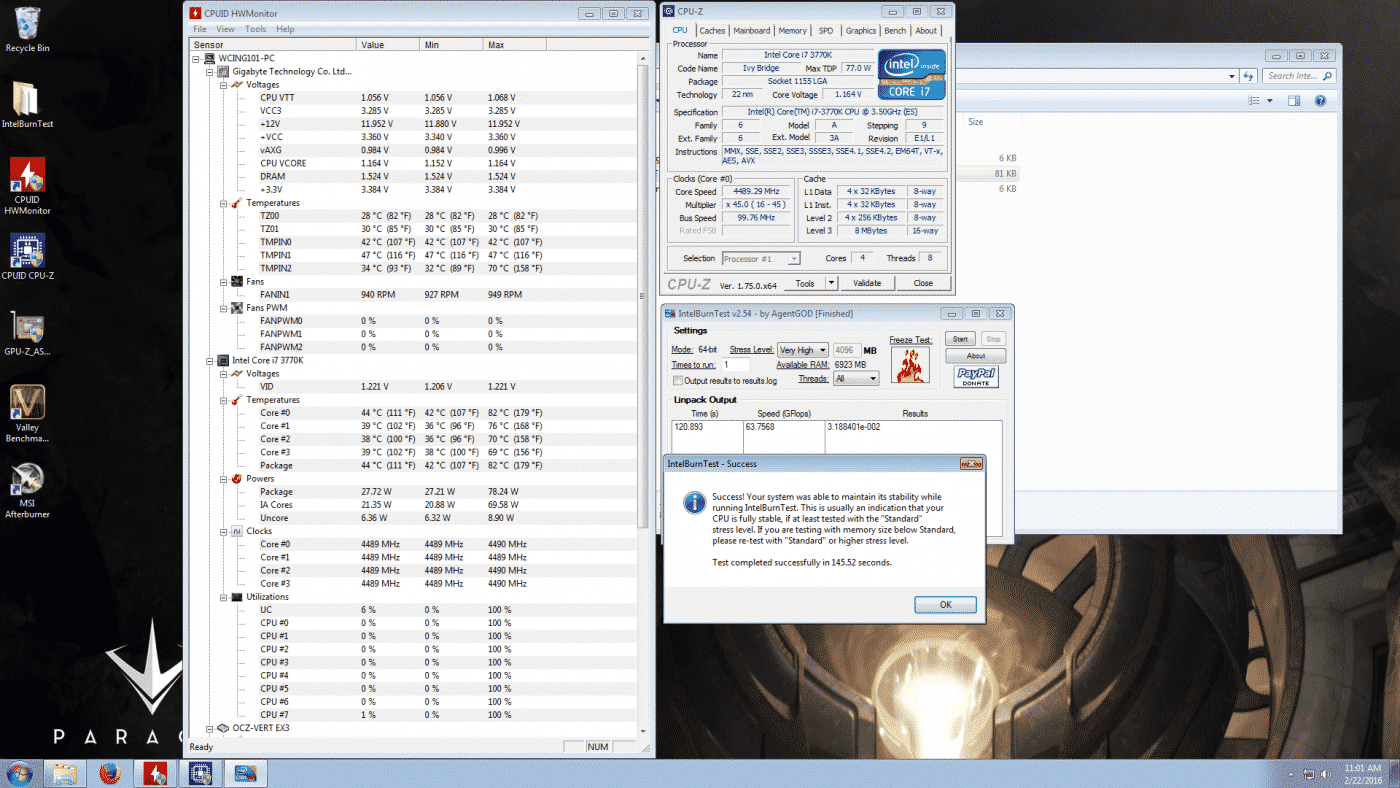
Before we continue we need to decide what our thermal limit is. Knowing our chip and also that it is bound to run hot it is crucial to decide this before you start overclocking. We decide not to go past 90°C but we’d prefer to hang out in the low 80’s if possible. Based on the stock load temps we have about 20-30°C to play with. Since we use the same type of processor in one of our test rigs we have a general idea of what voltage and clock speed to shoot for. After messing about in BIOS for a few minutes we get the rig setup to run 4.5ghz with 1.2V vCore and a high level of line load calibration. We also turn off all rest state and power saving functions.
4.5ghz @ 1.2V vCore
Load Avg: 167.9°F / 75.5°C With one core hitting 83°C
Overall these aren’t bad temps, it’s the hot single core that is holding us back. For now 4.5ghz is a very decent overclock on this processor. Speed wise, we decide to leave it here and instead work to reduce voltage to get even better temps.
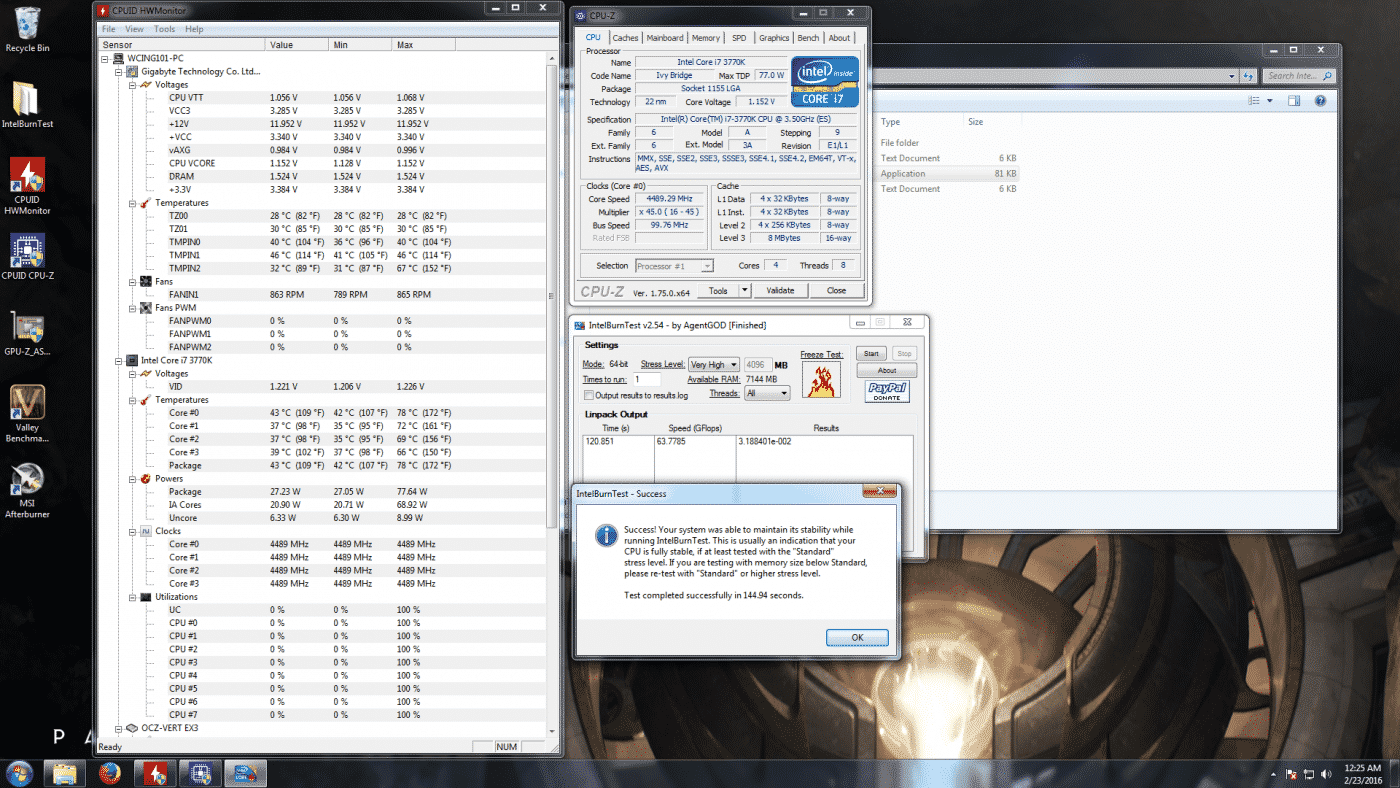
4.5ghz @ 1.18V vCore
Load Avg: 165.65°F / 74.25°C
Dropping the voltage by .02V netted us a 1.25°C temp drop and the system is still totally stable. Let’s pull some more voltage and see how the 3770K handles it.
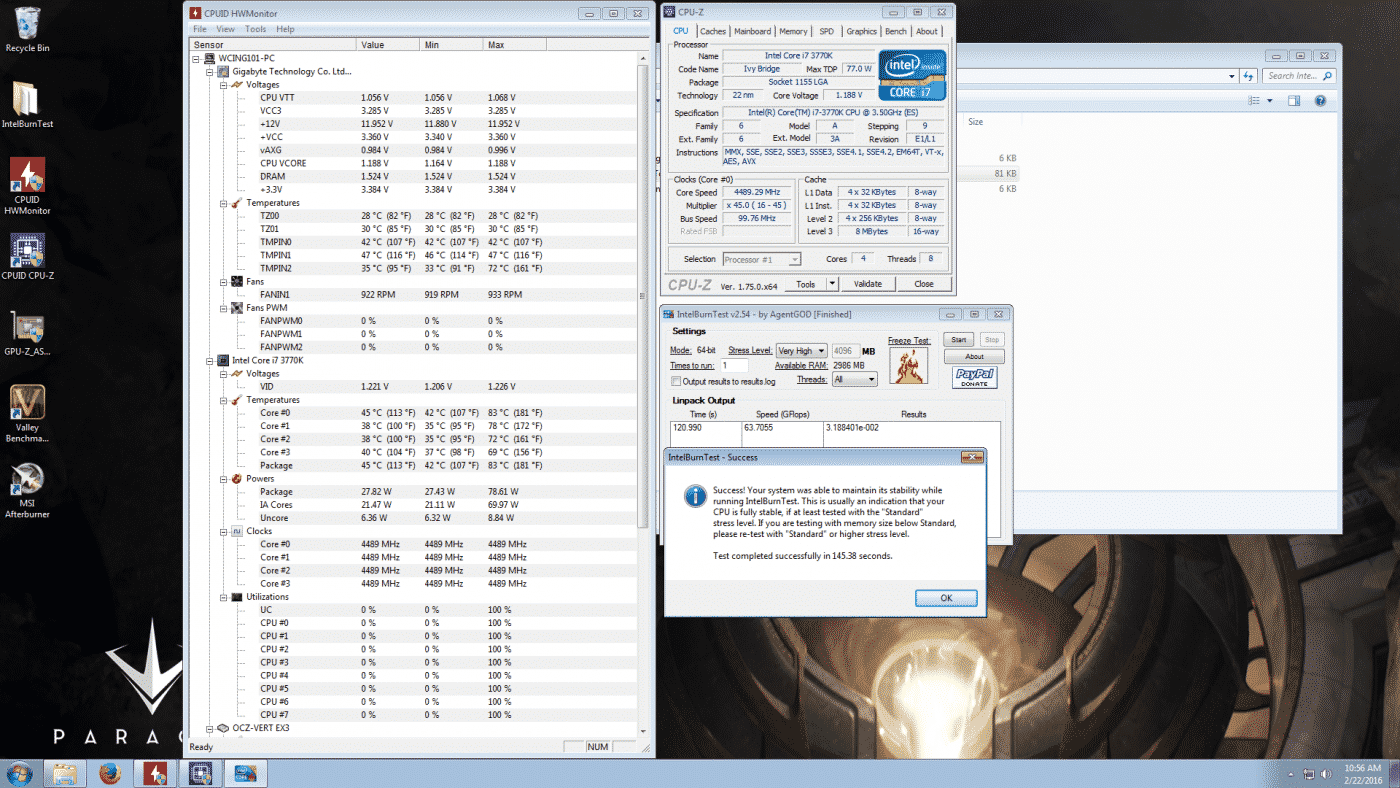
4.5ghz @ 1.16V vCore
Load Avg: 160.25°F / 71.25°C
Another .02V drop and an impressive 4.25°C drop from the 1.2V temperatures. Clearly this particular chip does not like high voltage one bit. Dropping it down has resulted in some really great temps that we are happy to run with. It would likely be possible to increase the voltage and clock speed, but as it is we are happy with this result knowing we are running cool and stable.
That’s it for episode 5, we guided you along, step by step, as you assembled your first custom water cooling loop. Once up and running a custom loop can be left alone for around six months to a year depending on who you are talking to and whether you have additives in the water to kill off bacteria. At that point the loop will need some maintenance which we will cover fully in a later article. In the meantime enjoy the art that you’ve created, show it off to your friends, and crank those clock speeds up!
Join us next time for Water Cooling 101 Episode 6, where we take the basic loop we just built and upgrade it to the next level with a GPU block and an additional 360mm radiator!