
Welcome back to ThinkComputers Water Cooling 101! Over the past several articles we’ve been covering all the tricks and tips we’ve learned from years of building water cooled PCs. After an introduction to the art and designing our desired layout, we showed you how to pick the best parts for your needs, and finally once they arrived how to prep them for use. Finally, we are now to the point where we can do something truly exciting and actually our hands dirty; it’s install day! Today we go step by step and show you to install your very own basic water cooling loop.
Our Water Cooling 101 series is brought to you by our great friends at Aquatuning! Check them out for all of your water cooling needs!

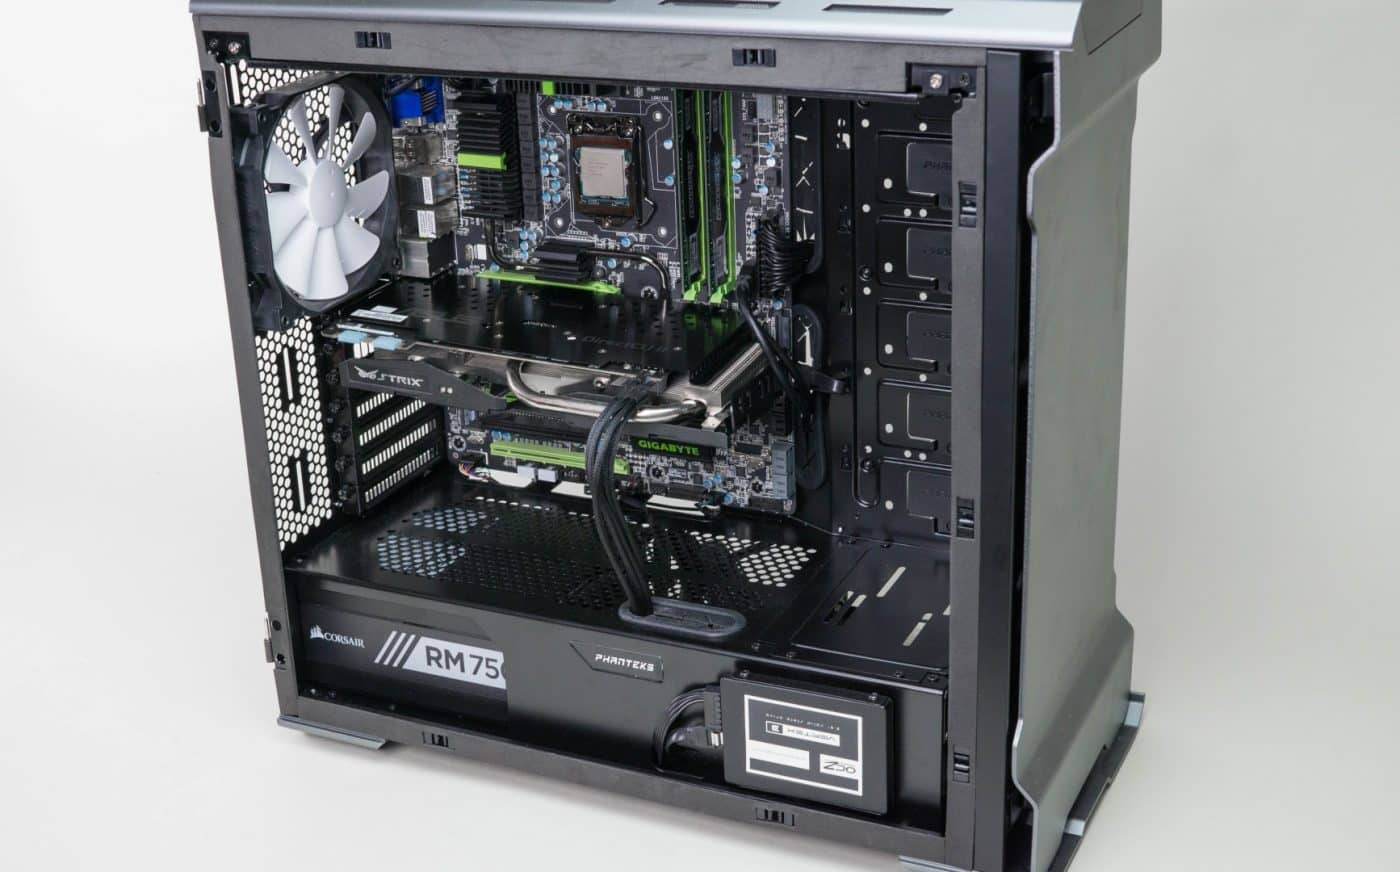
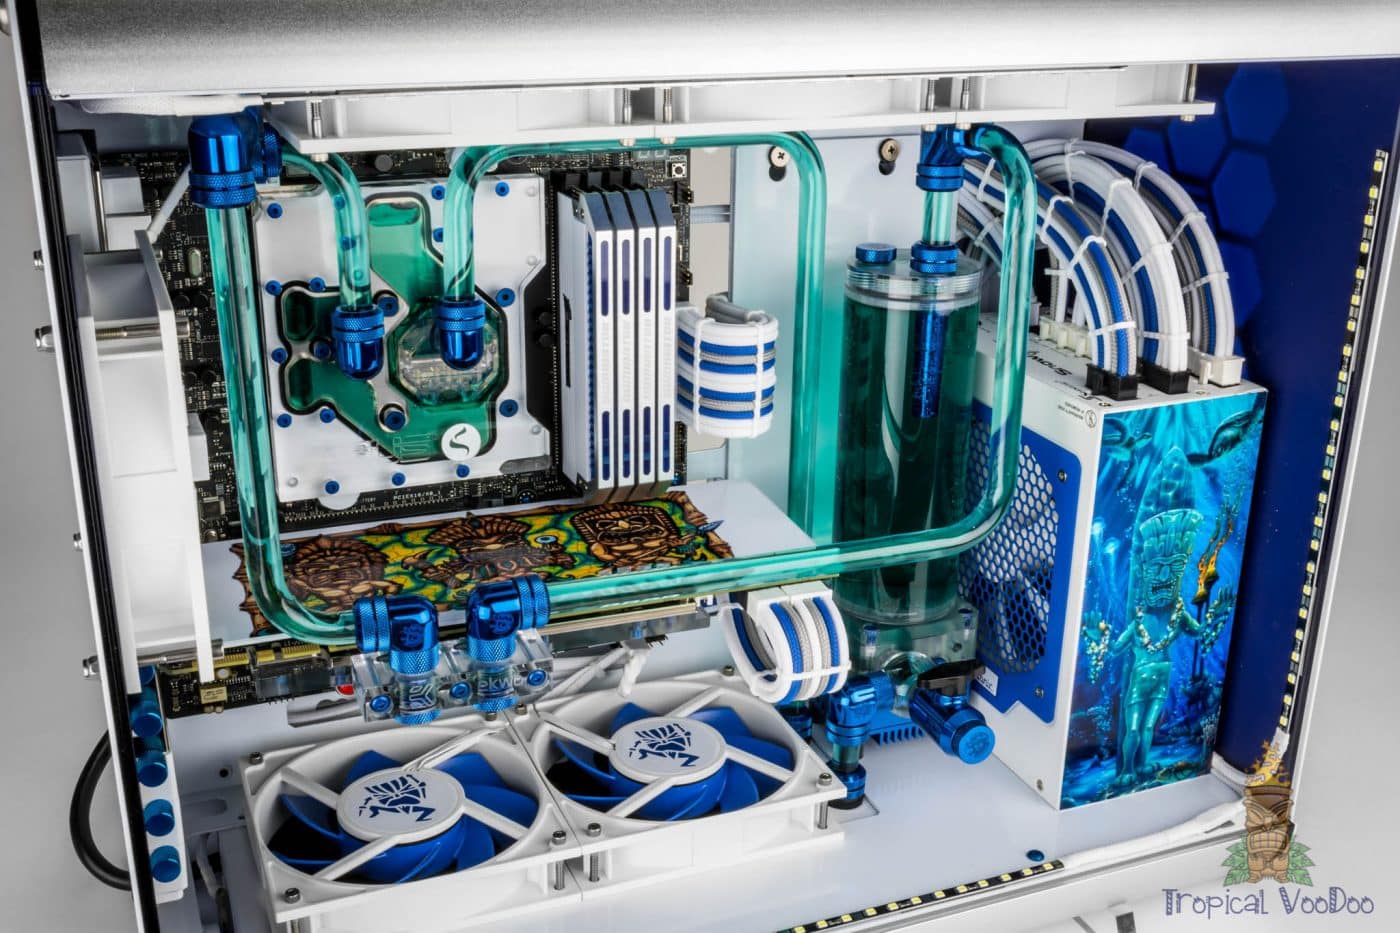
First things first, you gotta build up your standard PC. We are going to assume that you know what you are doing in this category and won’t be going over it step by step. Basically you just want to do a nice tidy install as if the main components are everything you are going to be installing. Starting with clean wiring will give you a nice clean blank canvas to start with when you begin putting in your water cooling components.
Our rig is based on the following components:
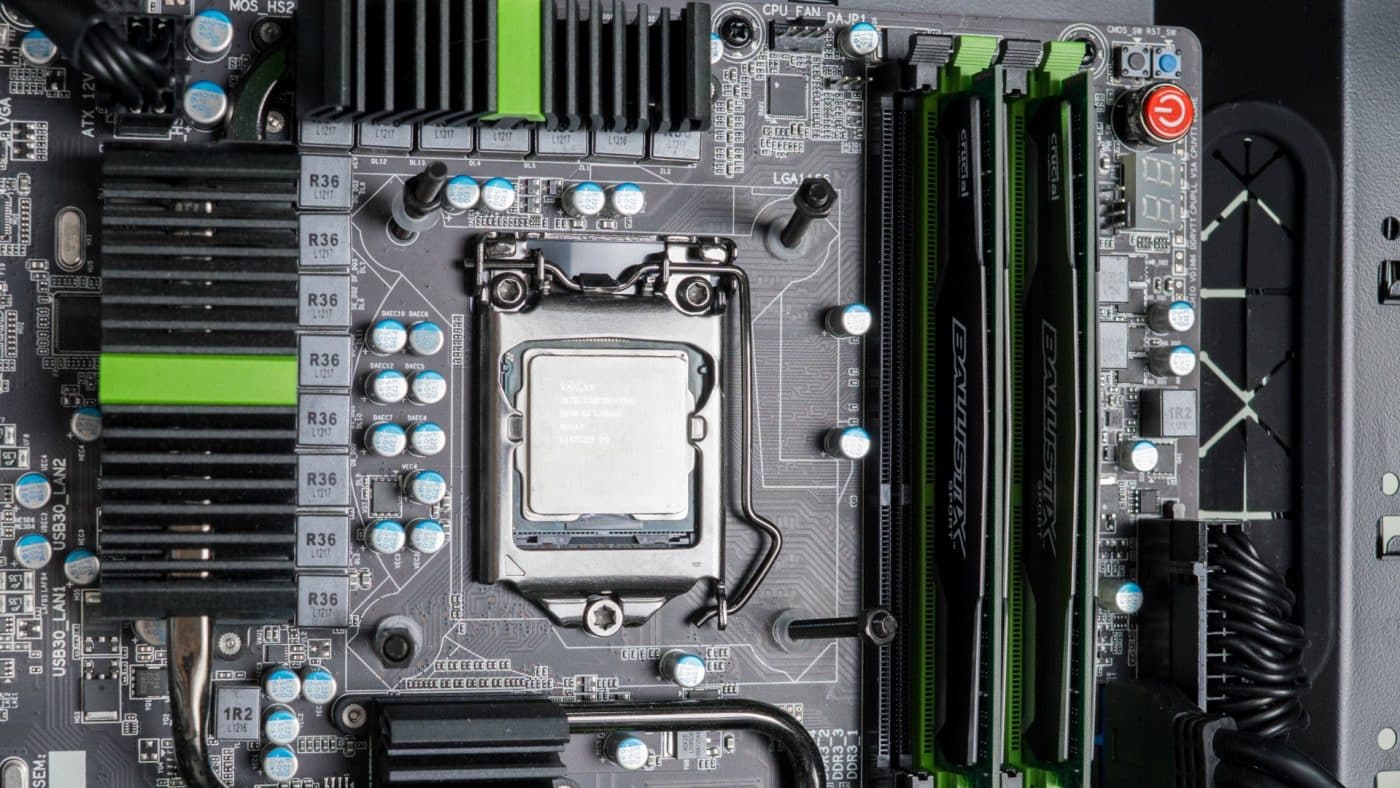
Motherboard: Gigabyte G1.Sniper3
CPU: Intel 3770K
Memory: Crucial Ballistix DDR3 1600 8GB Kit
GPU: Asus GTX970 Strix
Storage: OCZ Vertex 3 120GB
PSU: Corsair RM750x


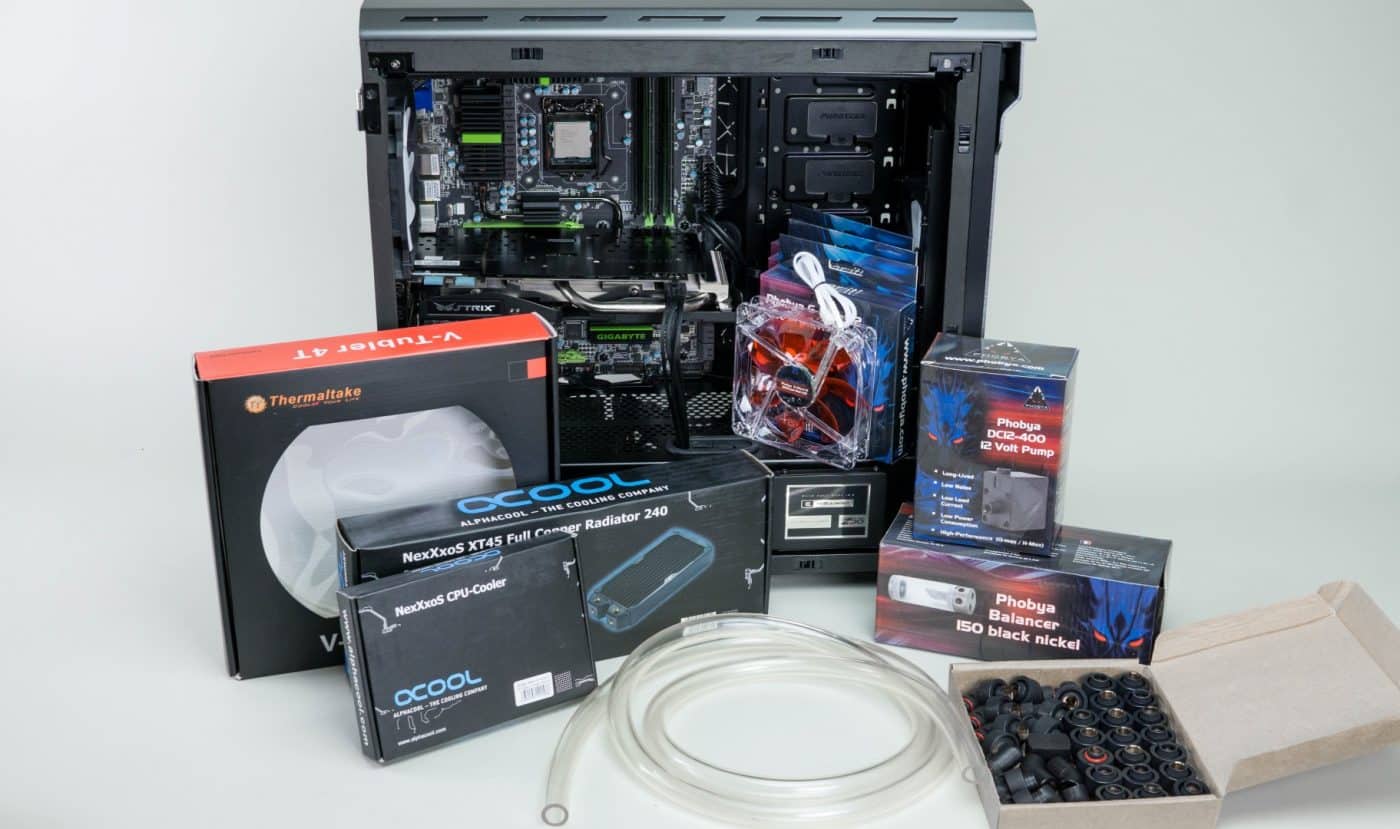
Before you begin make sure you have all your parts ready to go. We’ve got quite an awesome selection from our friends at Aquatuning, time to put it all to good use!
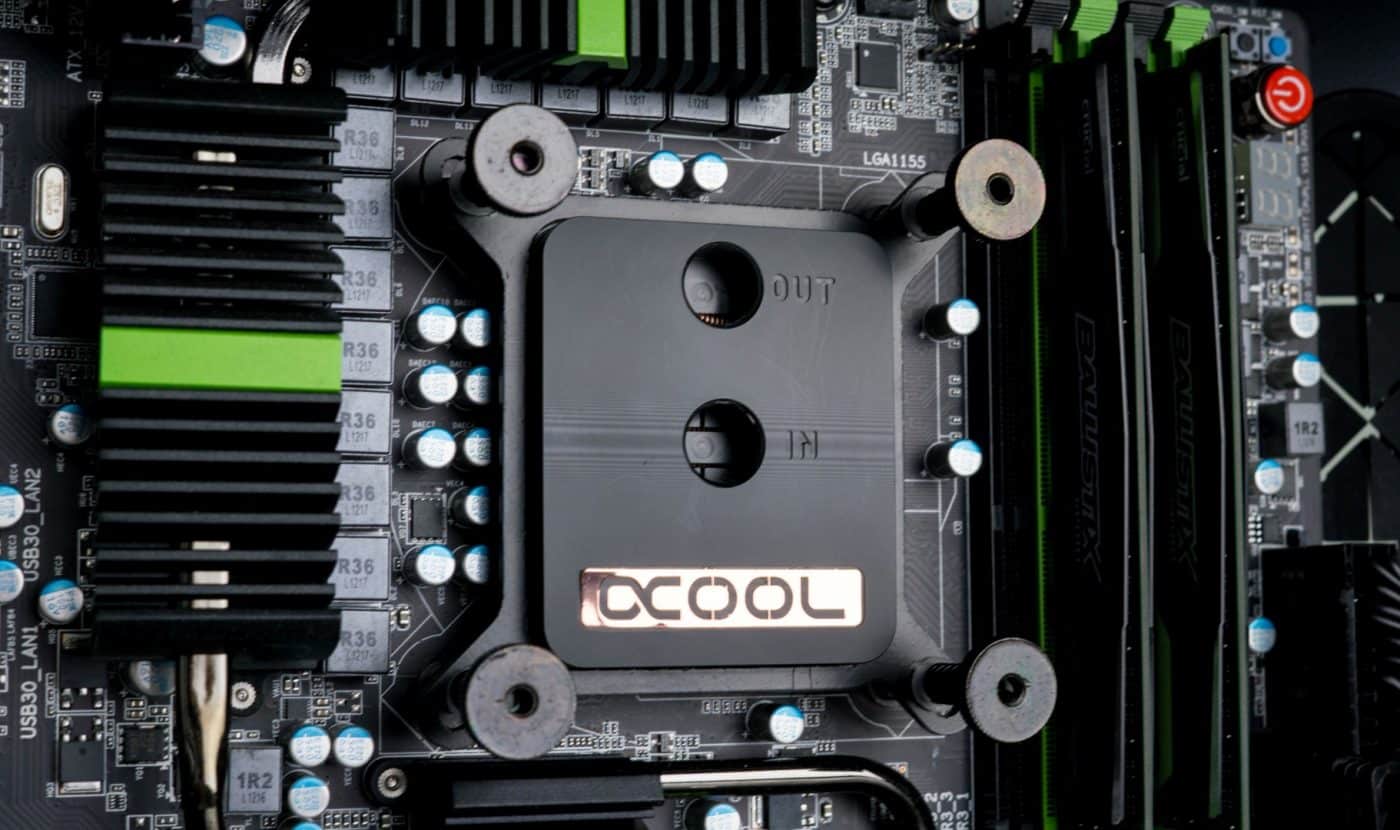
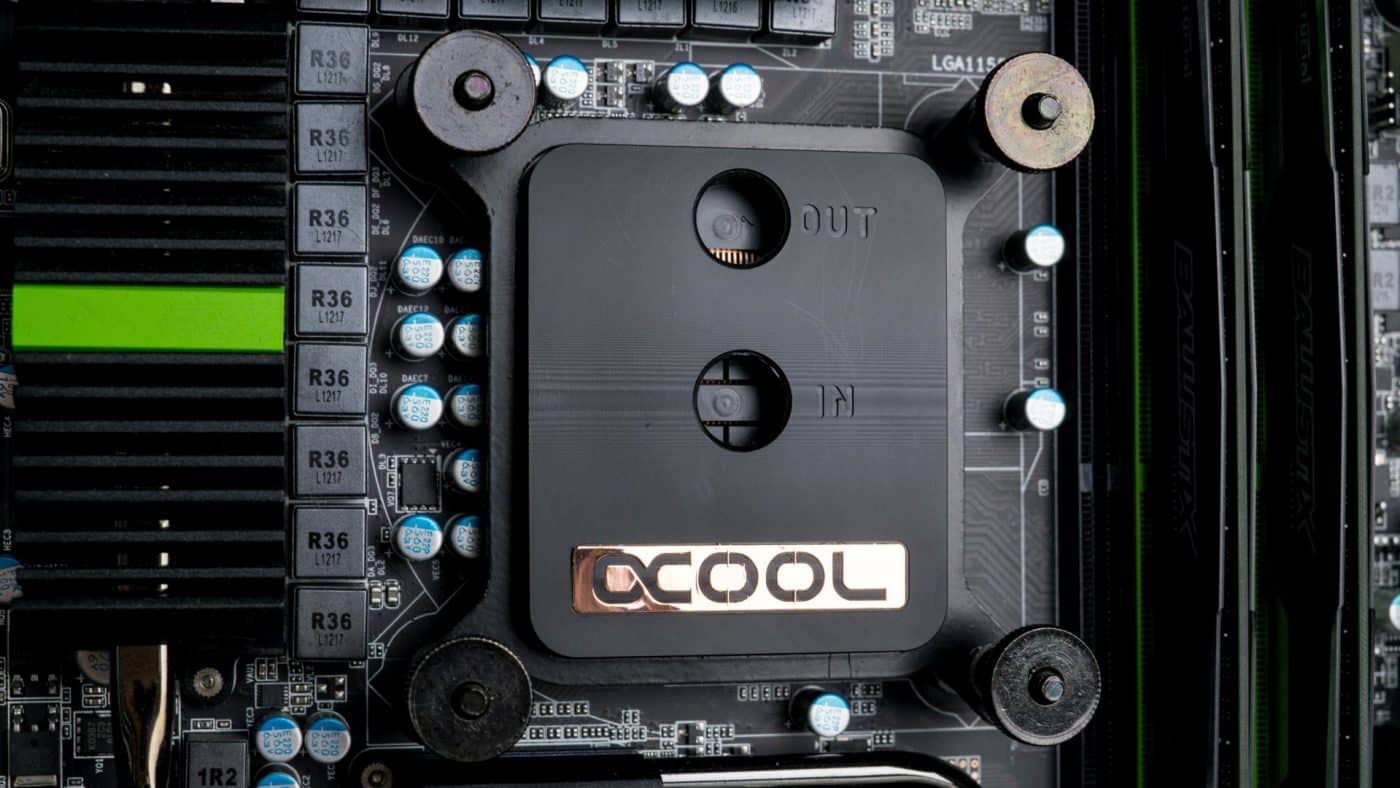
Installing the CPU Block
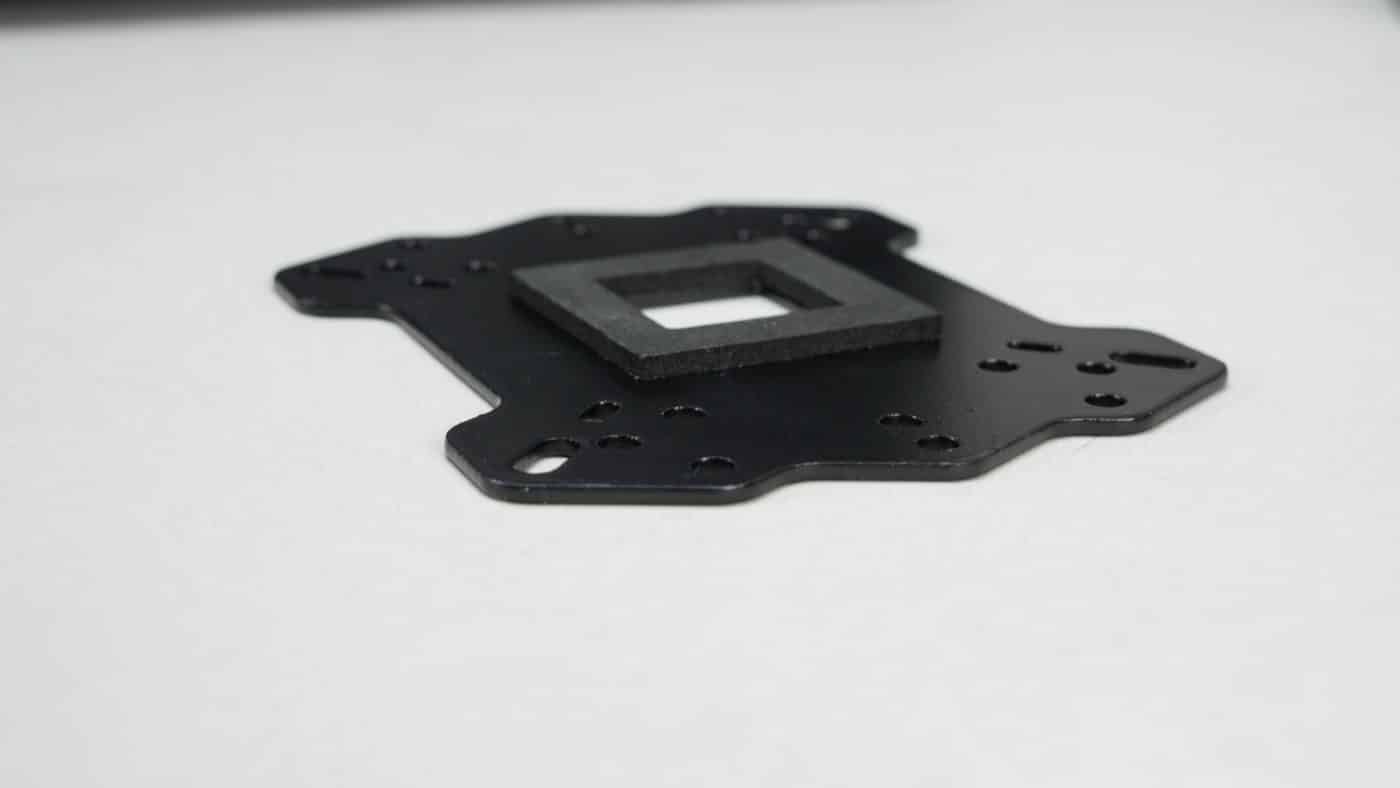
The first step is to install your CPU block. Depending on which block you chose this will vary slightly, but in our experience they all install using a very similar method. We are using an Alphacool NexXxoS XP3 Light block, and as we are using an Intel processor and motherboard we are going to use the Intel bracket for the block. This is simply placed onto the top of the block itself.
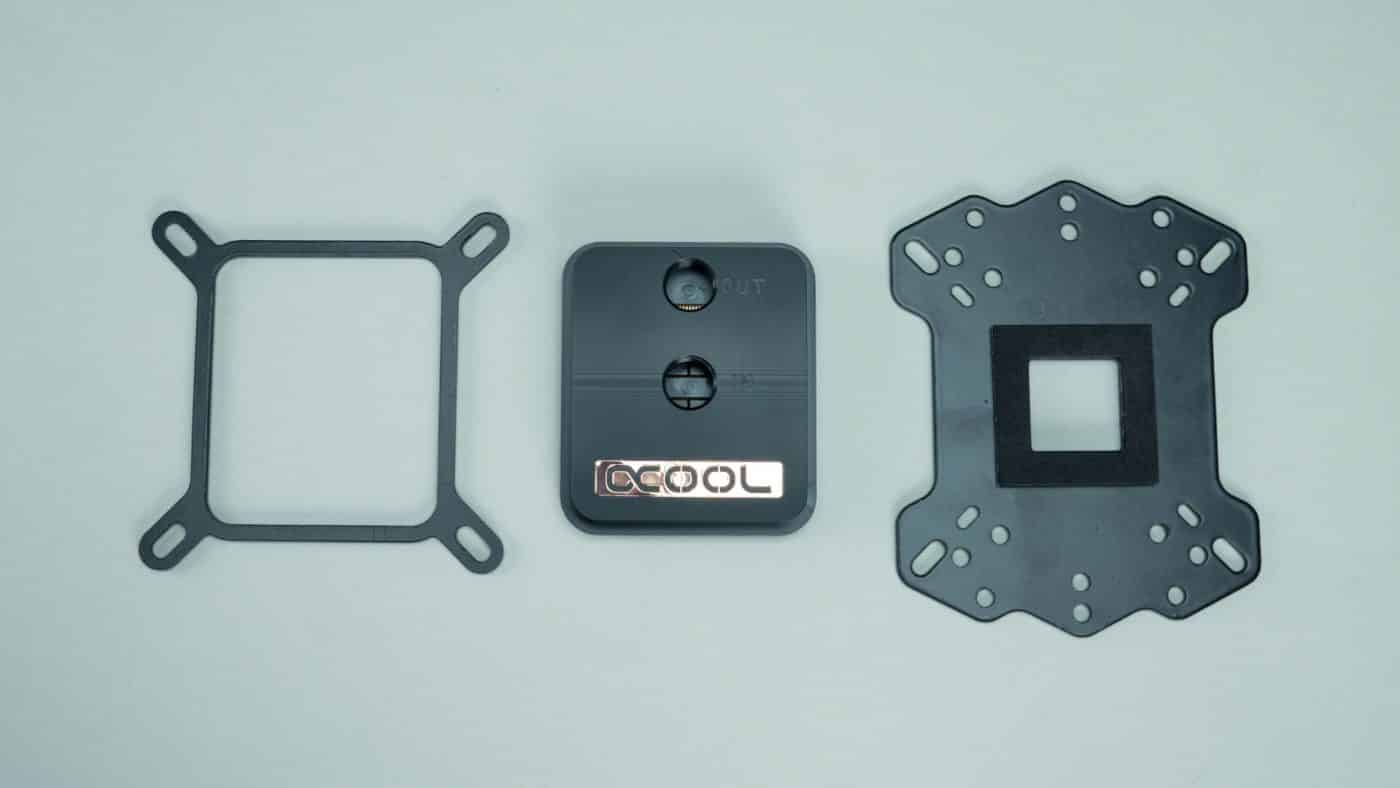


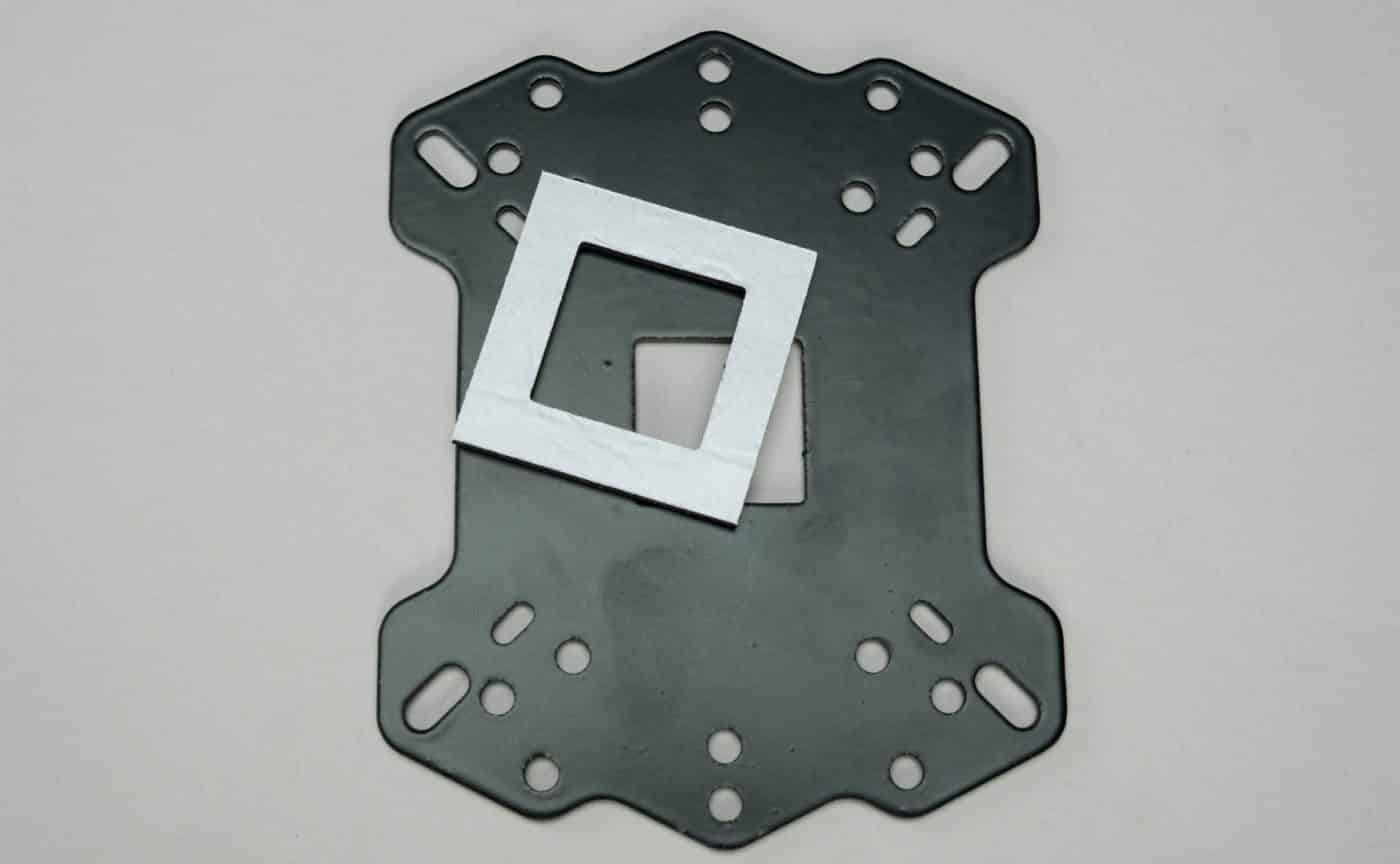
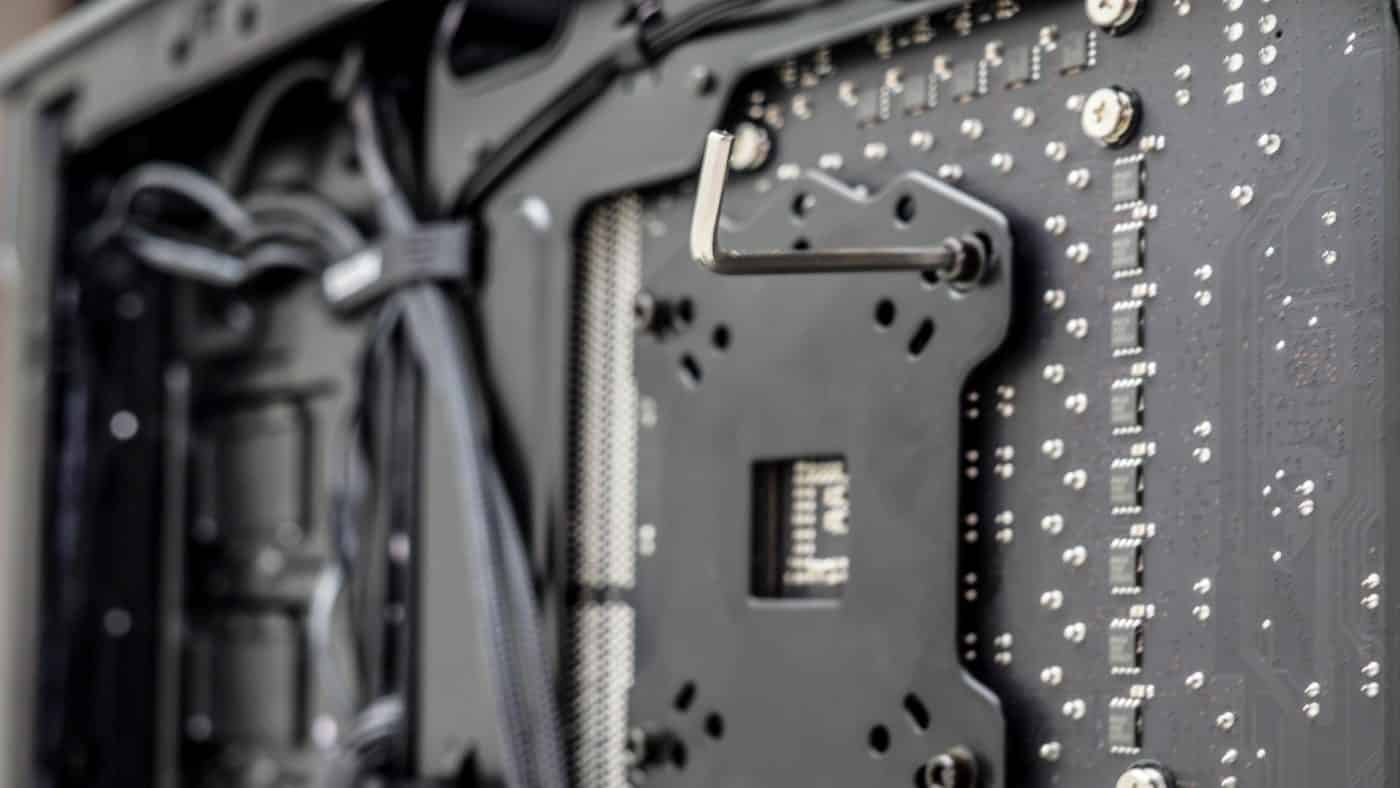
Next we pull the plastic backing off the small square piece of foam and secure it to the backplate. We then set up our stand off screws (the longest ones included in the kit) with on single washer on each. In the photos you will see we put the black metal washers on the stand off screws, this is actually incorrect, you should be using the white plastic washer here. The stand off screws are then passed through the correct slot in the backplate. You can find this by simply lining the backplate up with your motherboard and checking visually which holes they correspond with.
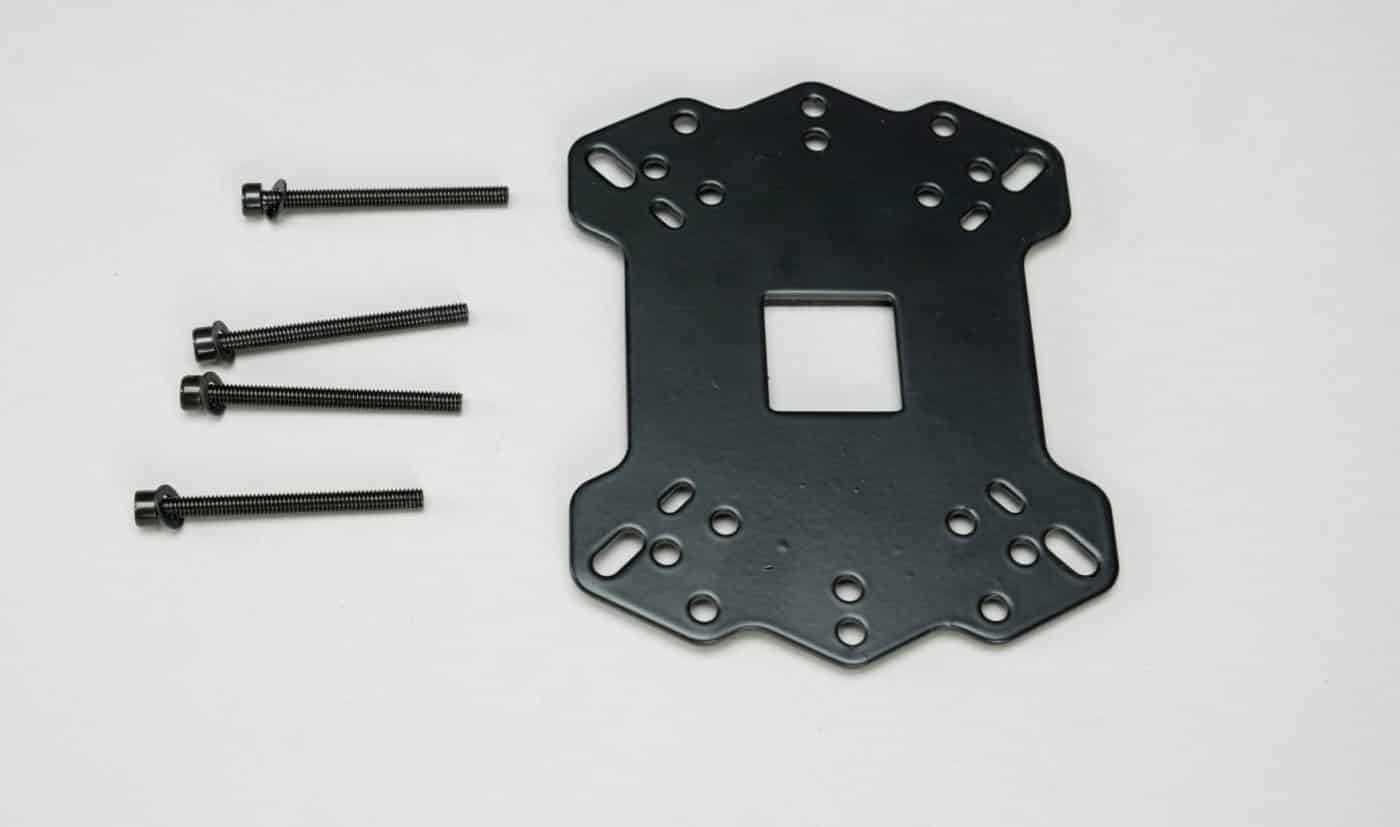
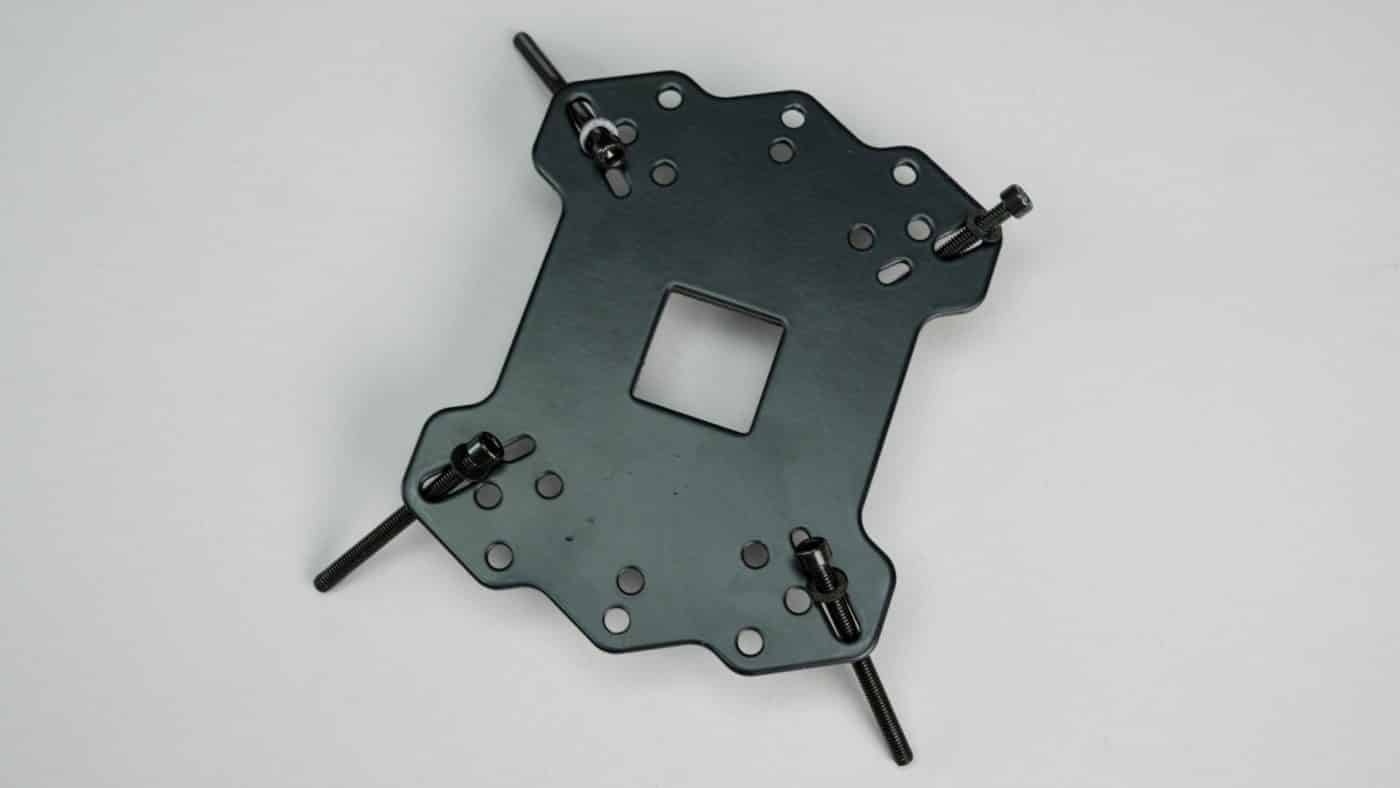
With the screws in the right place line all four up with the motherboard and pass them through the holes and into the front of the case. Holding the backplate with one hand, begin by putting an additional white washer onto the screw followed by one of the small nuts. Once all four are started evenly tighten them down with your fingers to secure them in place. Using the included allen wrench you can keep the screws from spinning while you tighten the nuts.
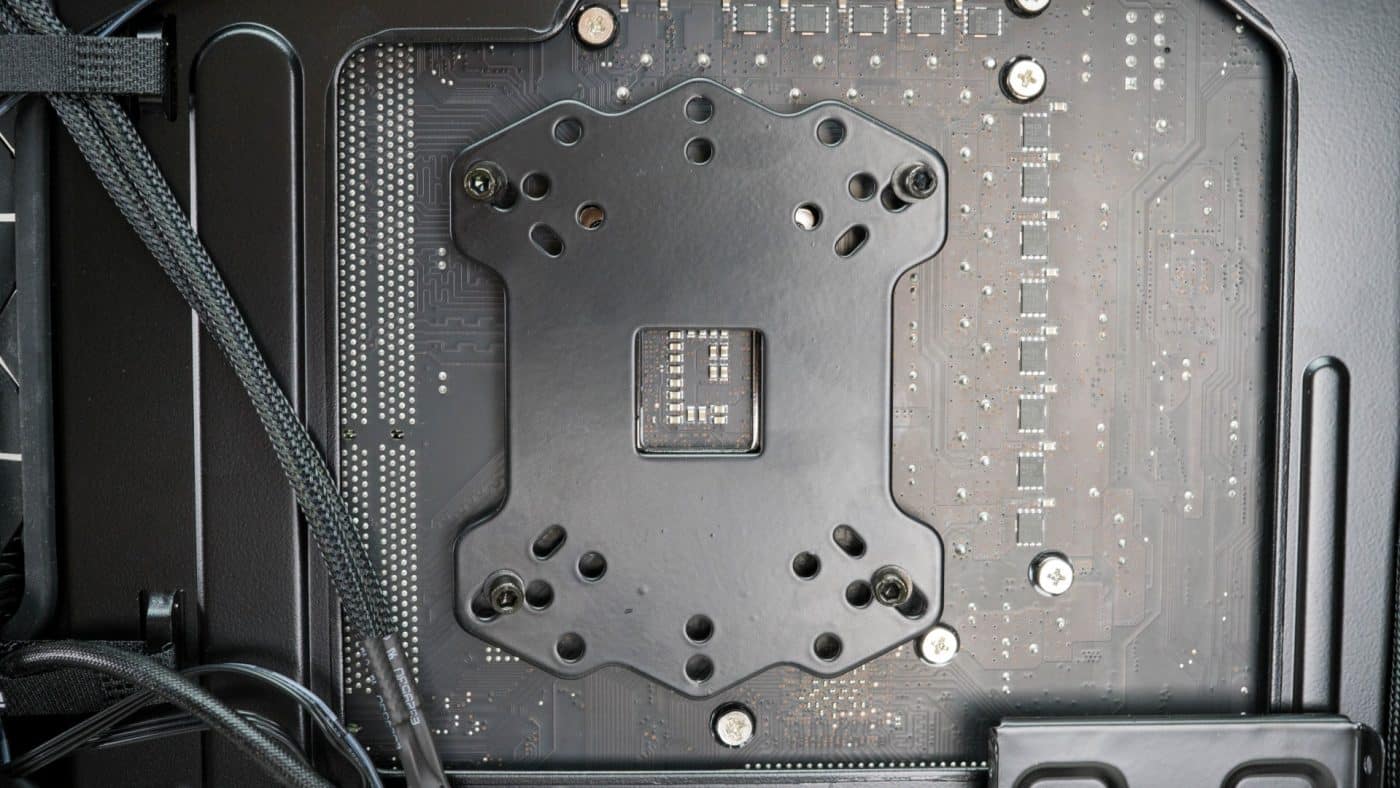

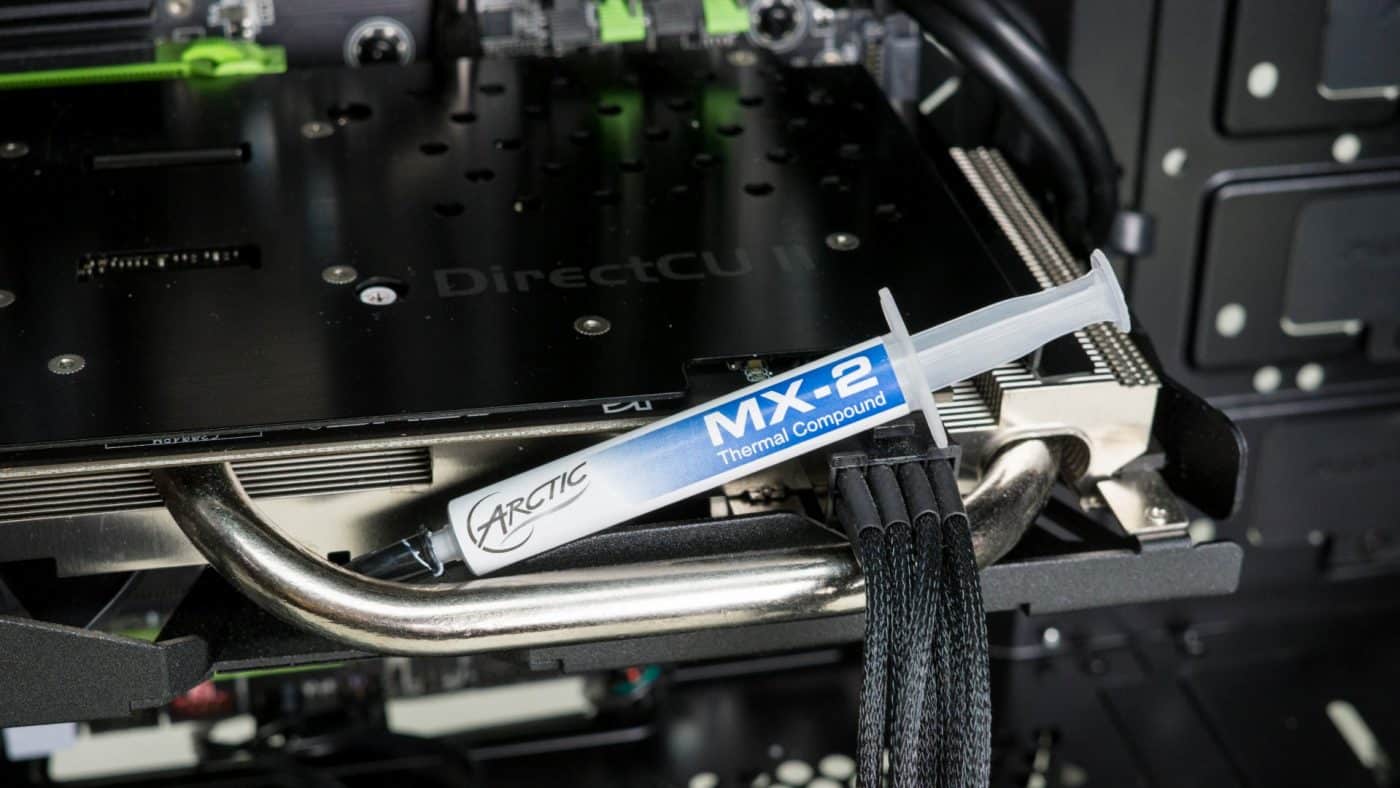
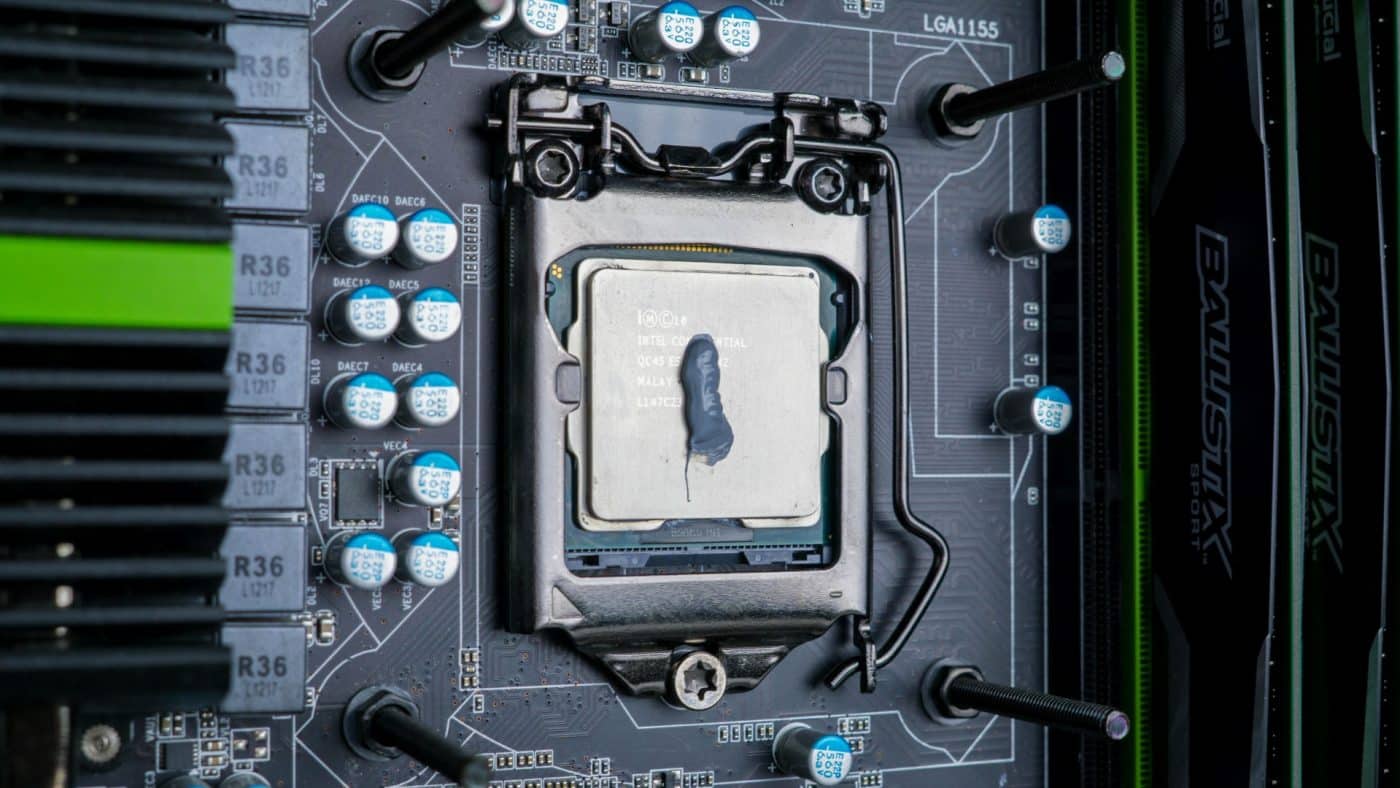
The backplate is now secure and ready to have the block installed, but first you must remember to apply thermal paste! There is paste included with the kit, however we chose to use some high performance Artic MX-2 paste that we know from experience performs really well. Apply a grain of rice size bead to the top of the CPU and prepare to install the block.
Passing the stand off screws through the ends of the block firmly press down and hold it in place with one hand. With the other hand place a washer on each screw followed by a spring and finally secure each with a thumb screw. After getting each one started, begin to alternate in a cross pattern until each screw is finger tight and all four are evenly applying pressure. You’ve now completely installed your first piece of water cooling hardware, the CPU block!


” …the DC12-400 has the inlet in the front and outlet up top. Because of that we are unable to have the reservoir feed directly into the top of the pump how we would have liked. ”
I’ve used EKWB’s version of the same pump; if I want to have a tube reservoir feed directly into the pump from the top, I just switch the orientation so that the inlet is at the top. There’s no law that states you can’t change the orientation to order to make the system work the way you want it to.
” Now pull the fitting to the end and tighten them until your fingers hurt. ”
After many builds using compression fittings I can attest to one’s fingertips being extremely sore after tightening all the fittings.
This time around; I’m going to be wearing latex gloves (the cheap yellow ones used for doing housework), and save my fingertips some unneeded pain.
Does the Gtx 970 Strix seem slightly pending or not?