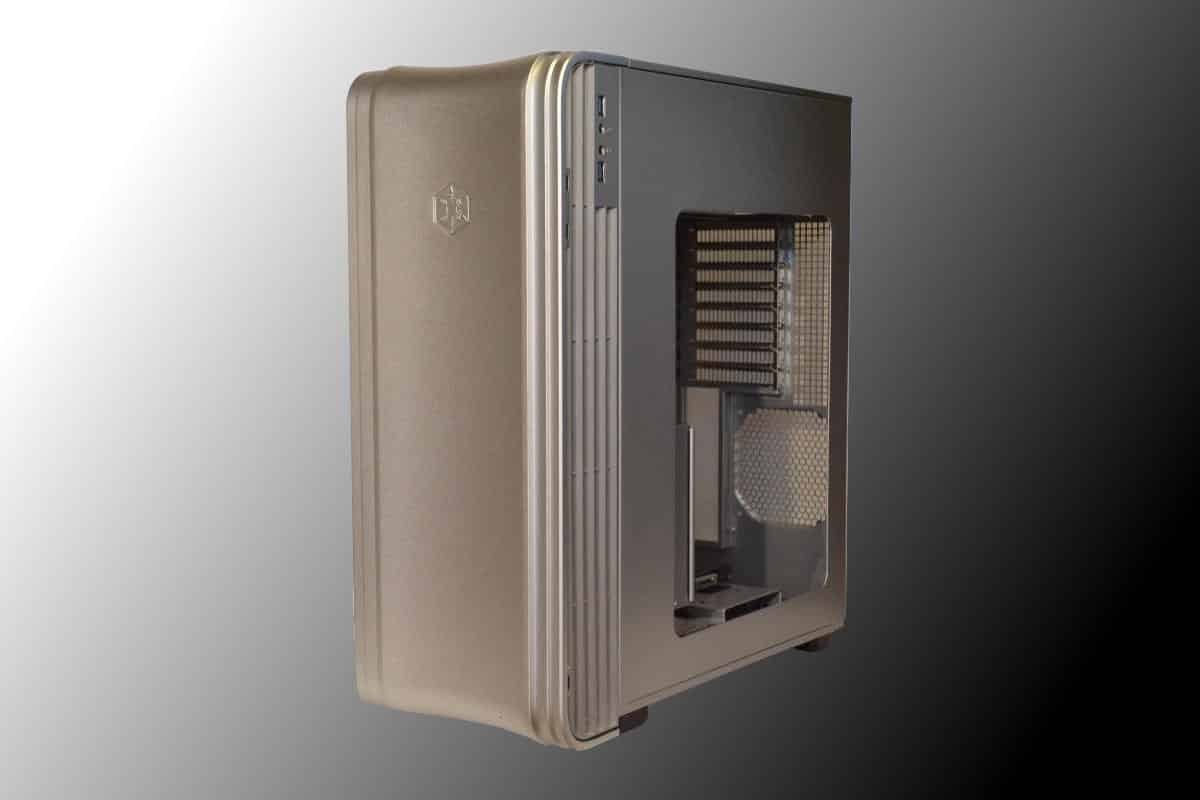
Inside the Silverstone Fortress FT04
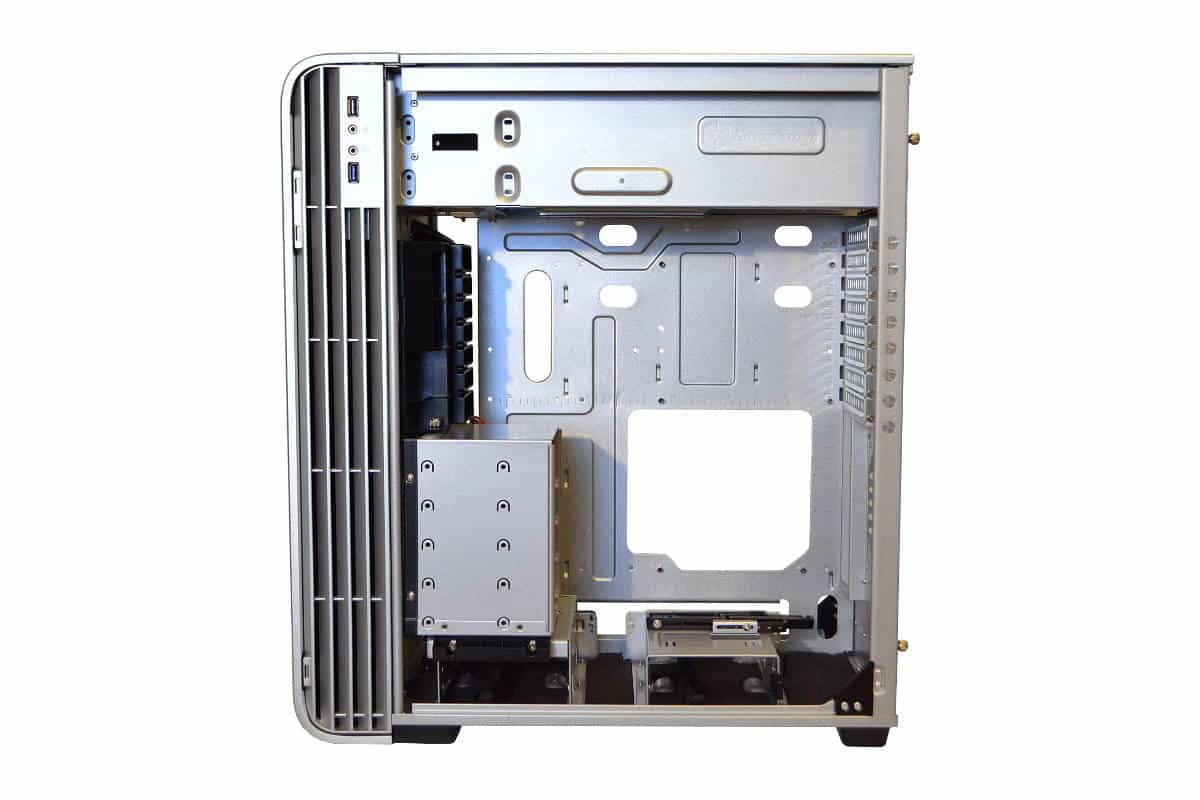
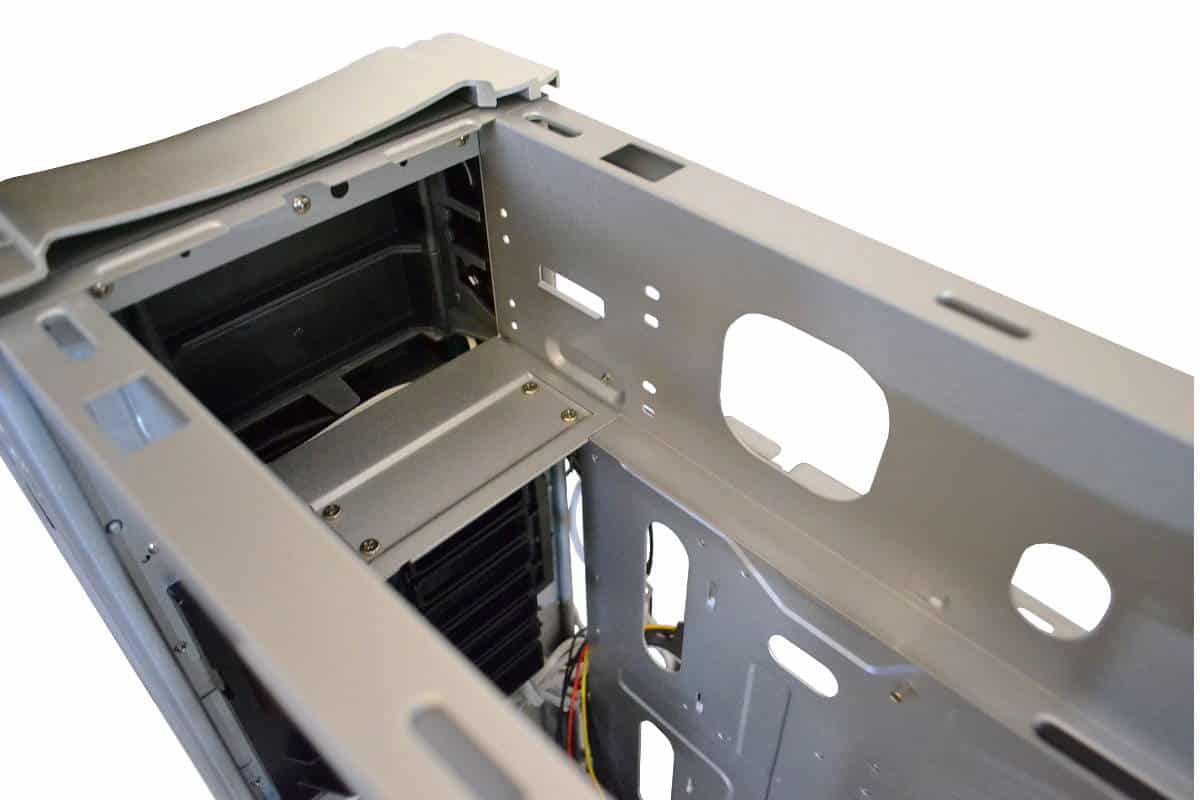
The first thing that pops out as a negative in this case when you are looking at it is that rectangular hard drive module. It looks out of place and I didn’t like it as well. It’s in the window view and it gets in the way. That is, if you do not realize that it is easy to remove and really for the average builder there is no reason to use it. It is there if you want to run a complete server out of this but this case is too classic for such a utilitarian function so I just removed mine for the build. The black module above the hard drive module is specifically for controlling cool air direction to blow straight onto the hottest of discrete video card solutions. The top wall is open at the bottom allowing for airflow and more room for optical drives, card readers or fan controllers also leaving unlimited room for any sized power supply the builder might choose. The removable motherboard tray has great wire management holes and a very large and well placed CPU access hole for changing cooling solutions without removing the system from its comfortable bed. There is an adjustable CPU Air Cooling brace that can relieve stress on the Motherboard’s socket retention bracket in the back.
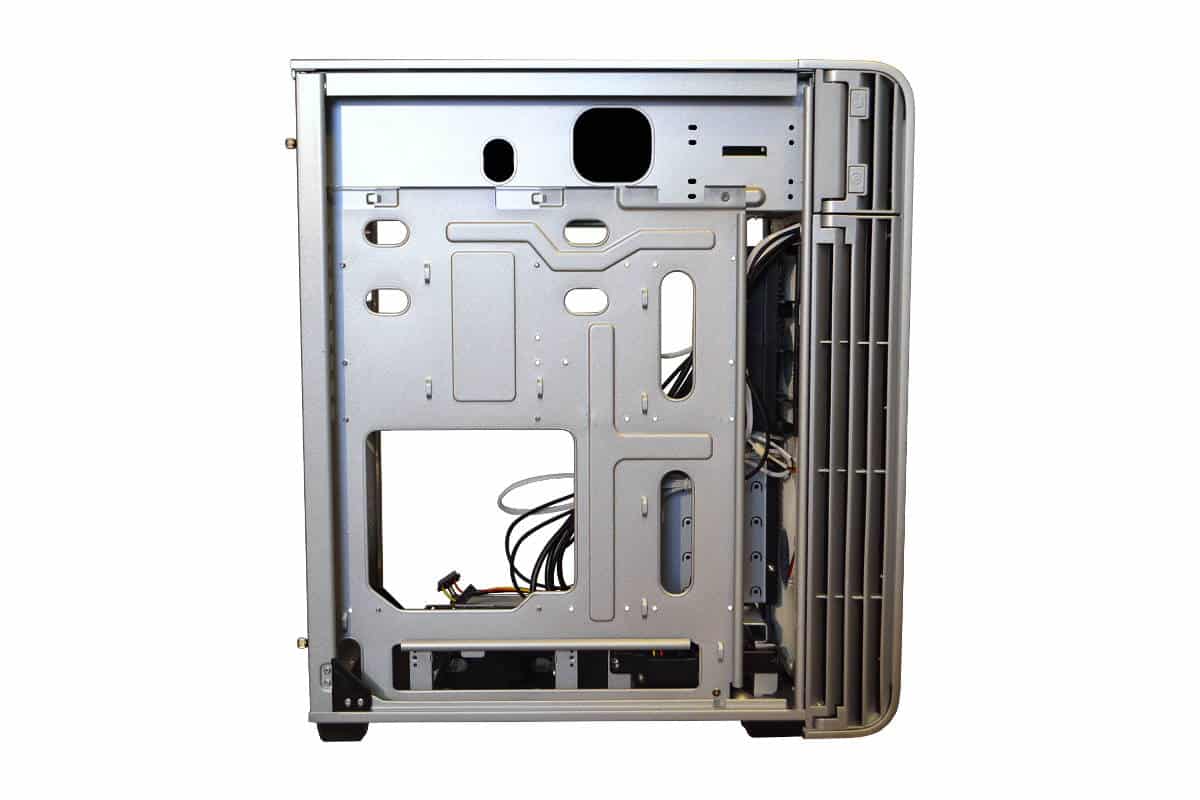
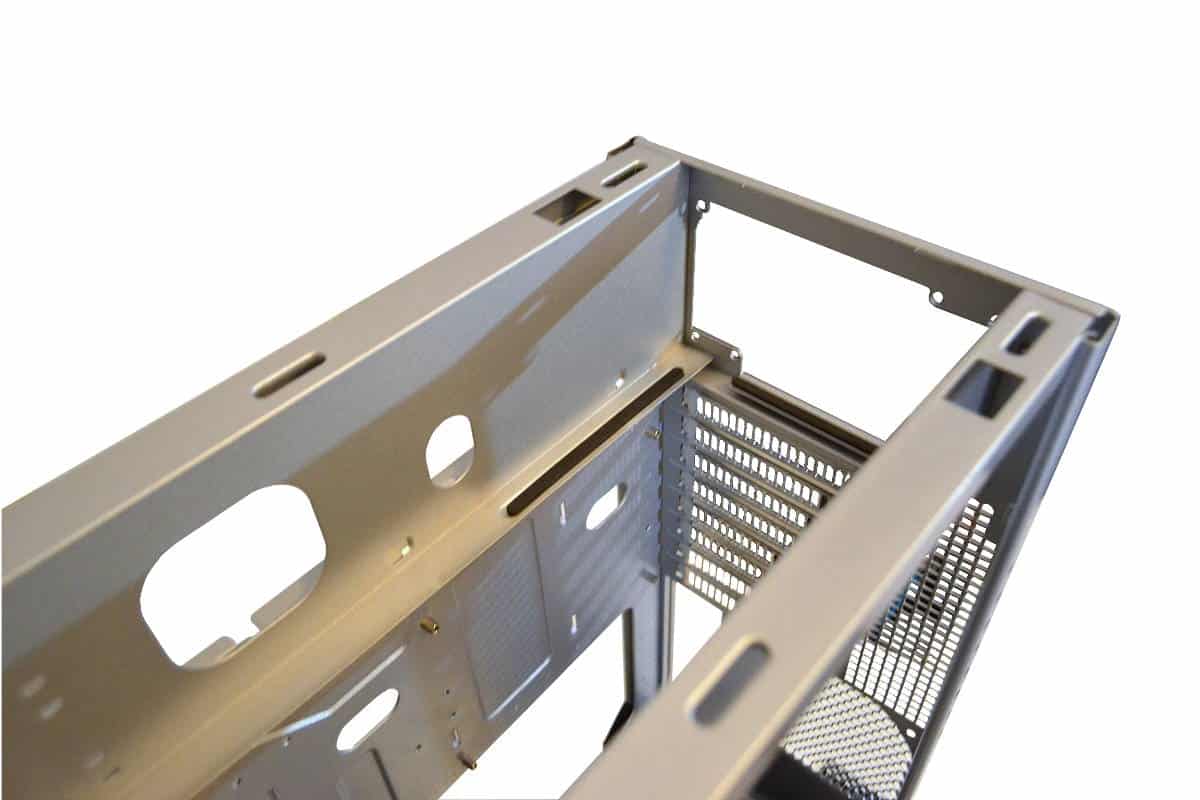
We moved the wires to the front of the case to give a better look at the back of the removable motherboard tray. There is ample amounts of room behind this tray and smartly located tie downs to keep the wiring from being a problem when cleaning up the build in the final stages of the building process. The large hole at the top is for the main power supply wires to escape from the walled railing at the top to help keep the wires out of the eyes way to keep the build clean. There is 24mm of space of wire clearance behind the tray which is ample room for wire management and lots of places to hide wire and the motherboard placement is not so much space as to make a builder have to result to drastic measures to extend any wires.
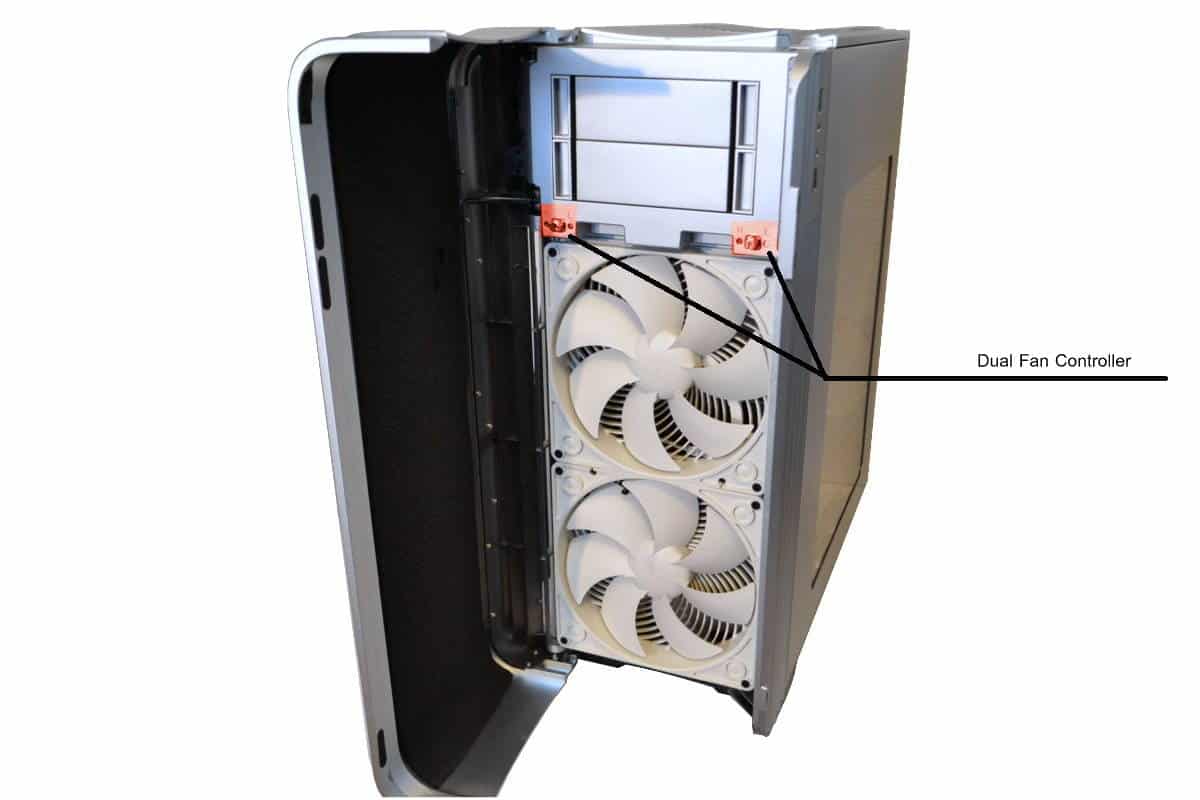
With the front opened and the fan filter removed it’s easy to see the clean look of the build with the easy removable top bay covers and the two control knobs colored in red are the two fan controllers that can be disabled by simply placing the included bypass wire to them to allow the fans to run at full volume or be controlled by other means. The 180mm fans are very nice looking and also very strong fans. The back of the fans are fitted with a vortex air circulation management cover to direct the air that is generated by the fans and making that air more efficiently used for cooling in a more direct cyclonic motion. The front door is obviously very thick and very aluminum. The addition of the noise isolation padding under it is to keep air noise to an absolute minimum.
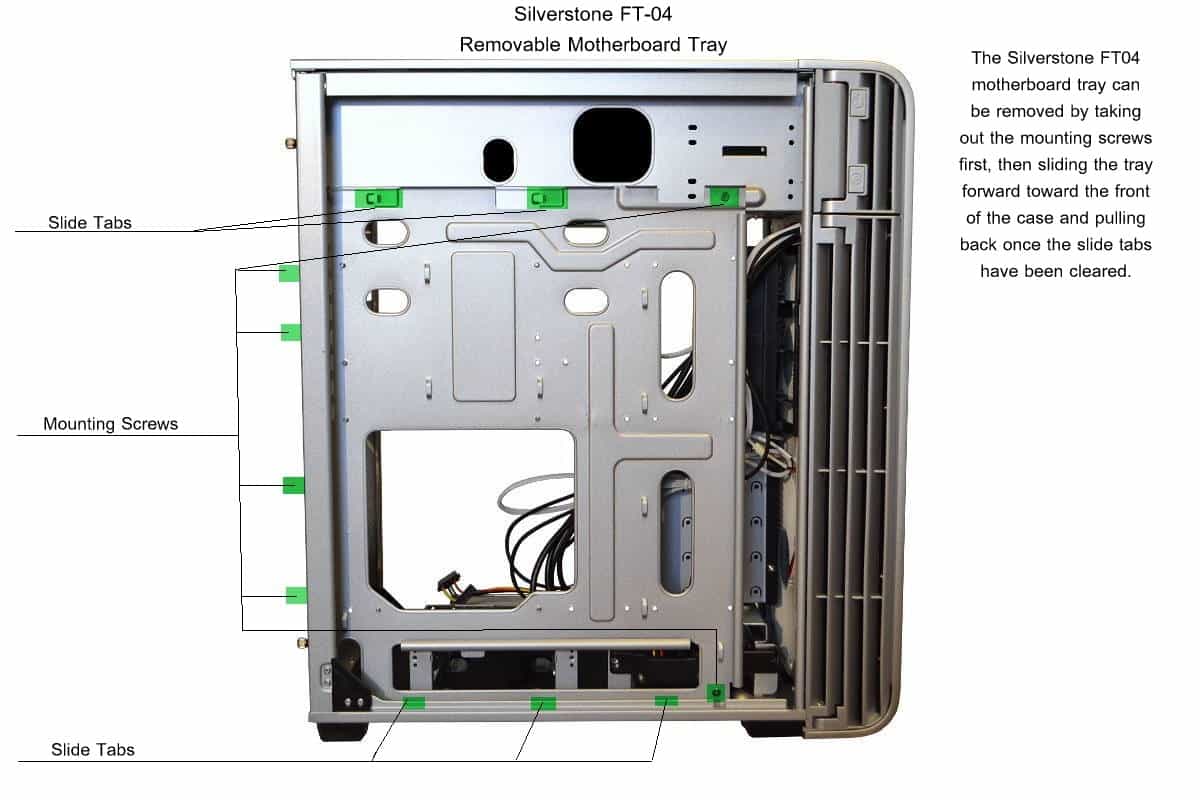
I must confess that I had no need for removing the motherboard tray but it would be recommended for the largest of motherboard with dual CPU or if you are changing an existing motherboard to a new one with the drives all configured. The motherboard tray is assembly is built for stability and vibration control. I found it to be as stable as any permanent motherboard tray that I have tested in the past, if not better since it is made with very high quality steel. It’s almost unapparent that the motherboard tray is removable at first glance and this is the reason I took so much time noting the points for removal. The slide forward motion is needed as you can easily position the motherboard to the I/O shield perfectly when replacing the tray with the board included and simply lock it into place as shown in the figure below.
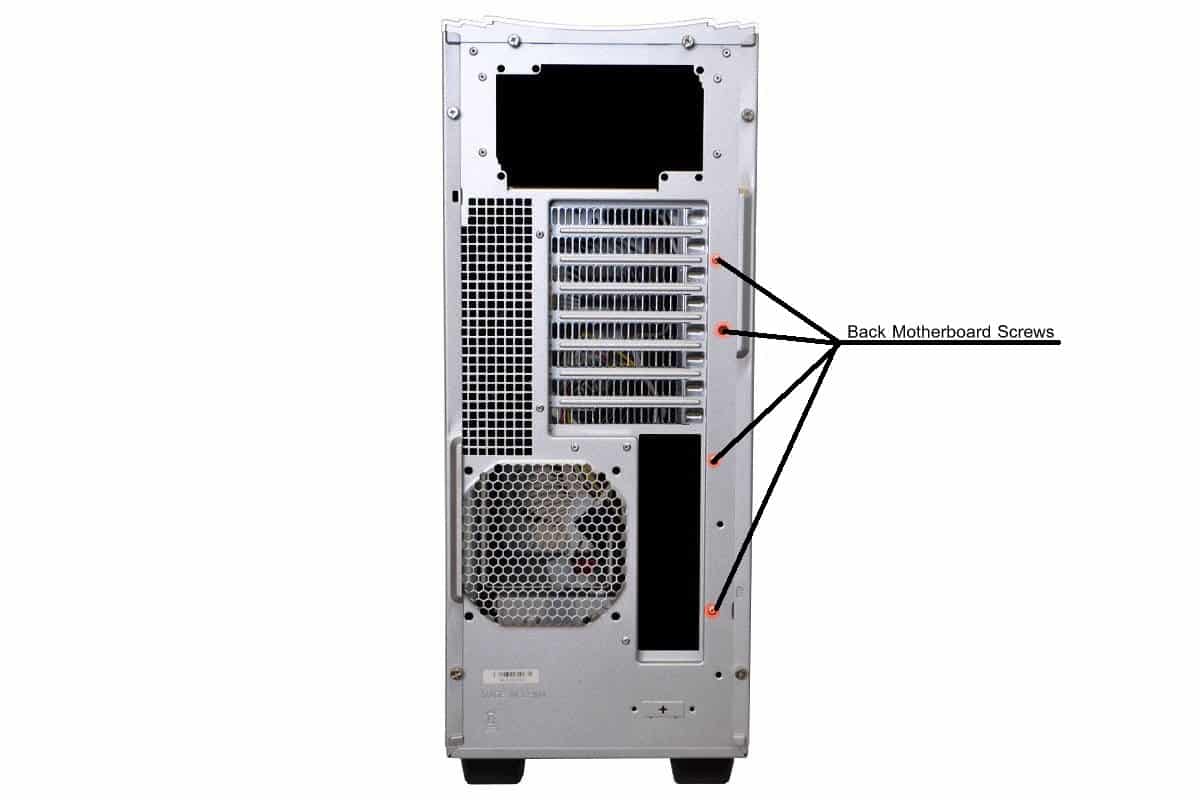
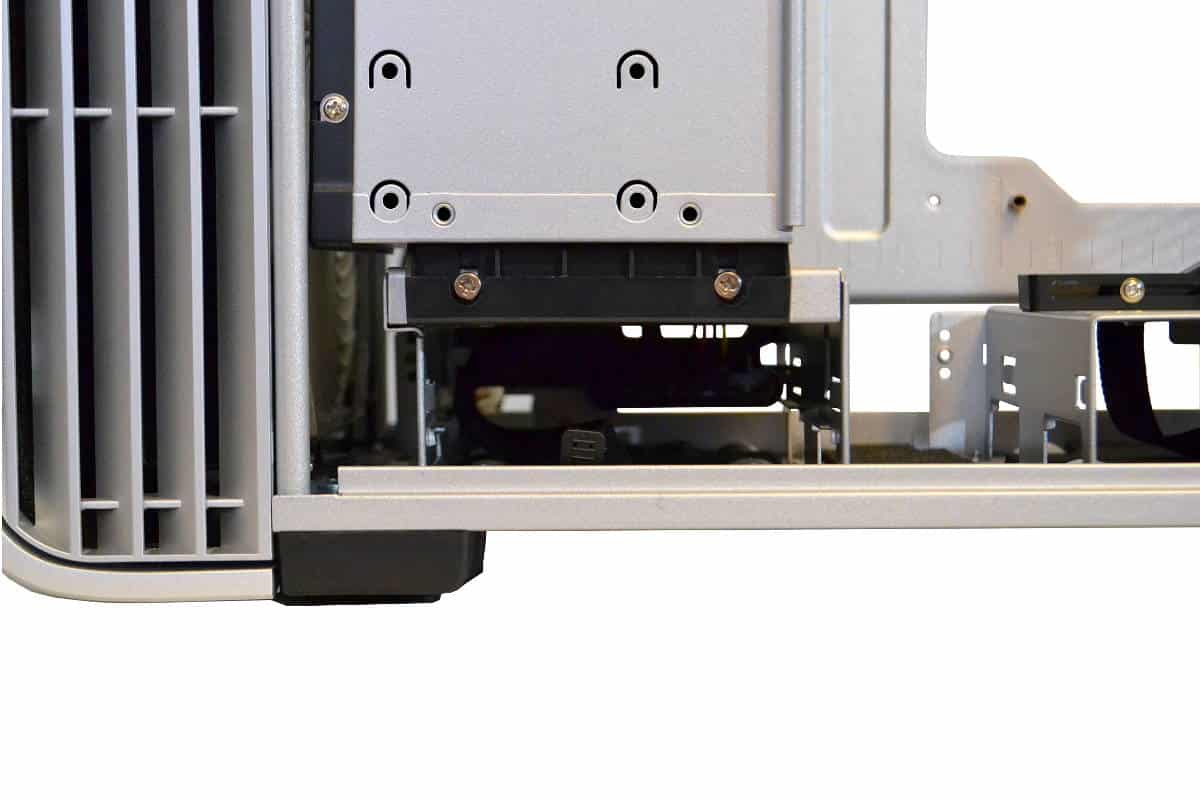
Here is a second look at the mounting screws that affix the motherboard tray to the back of the case.
Removing the front filter is simple with two tension clips that hold the filter into place. The filtration element is very strong and very finely woven to allow for good air flow and maximum protection from airborne particulates. The filter unit is both very strong well made that allows it to be washed with soap and water if needed or just blown out with some strong air pressure depending on the owners preference for clean. There is no need to worry about damaging the filter unit unless you have a very sharp knife or a heavy gauged hammer and a really bad case of “Roid Rage” and you need to vent violently.

The power supply fits tightly into the top placement area with open bottom to allow for fan down operation. This can help in some cases to suck in more heat from the inside of the case and expel that heated air out the back of the power supply. While this can be a good way to keep internal temperatures down I would recommend the fan up configuration to fan down as the air flow from the top will cool the power supply more effectively for high wattage power supplies.
The 5.25 drive area shares the same top rails and stay out the way of the rest of the build. The bottom tray at the base is removable for water tubing or it can stay and hold a front bay reservoir system or be a good hiding place for a water pump in a custom loop.
The inner side of the windowed panel is very well made as well made of heavy gauge steel, high quality acrylic window material that is higher quality than most cases except for the ones that use tempered glass. Anti vibration and sound dampening material is located on steel areas are not much on this side but this system is pretty sound dampening. The window is easy to remove and replace with the tabs on two sides that hole the window in place while the other two sides are secured strong with screw reinforcement.
The back panel is completely covered with high quality sound and vibration dampening material. Also the panels are very simple to remove and replace. They work like a door with no hinges. Just place the front side of the panel into the slot and then close the panel as if it was a door and secure with the padded thumbscrews provided.
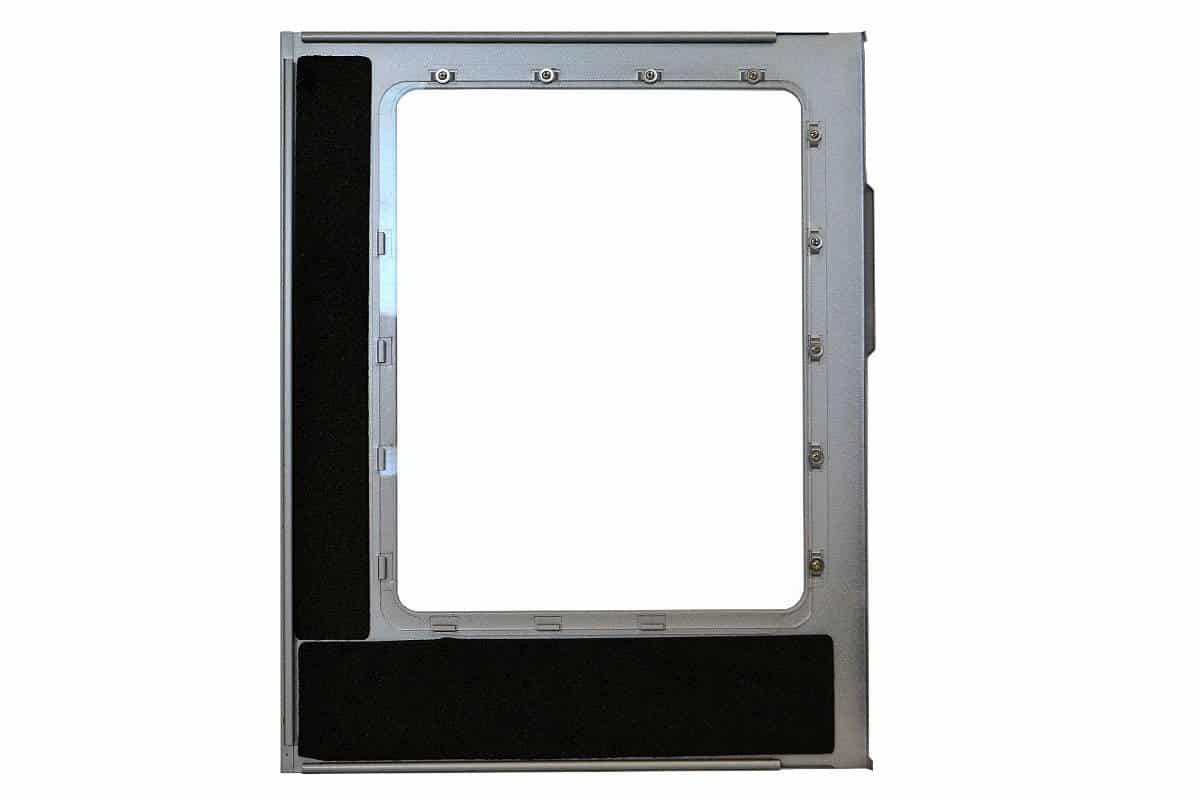
The auxiliary five bay module is padded inside and made of the same hard reinforced steel as the rest of the cage is. The inside is padded for sound and vibration dampening as well and the hard drive is mounted at four screw points to insure a strong bond to the module. This module is completely removable and I suggest not using it unless you absolutely need that many hard drives in your system.

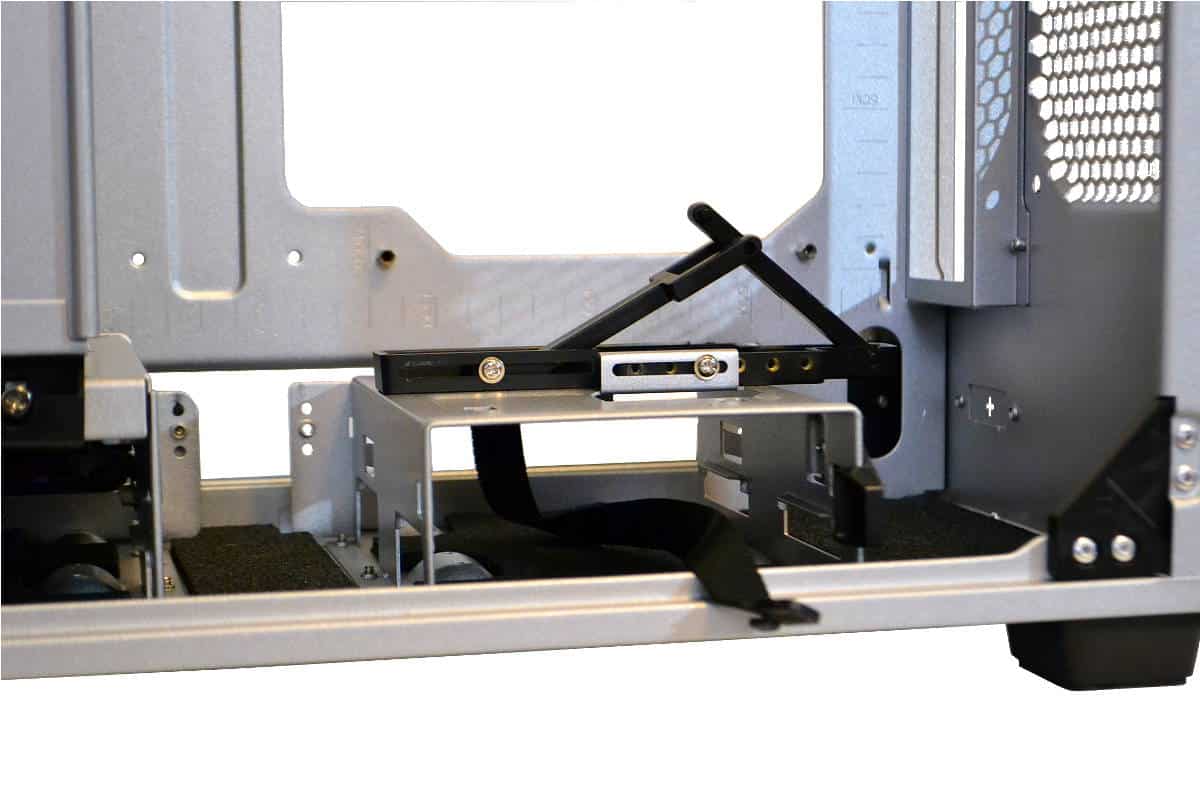
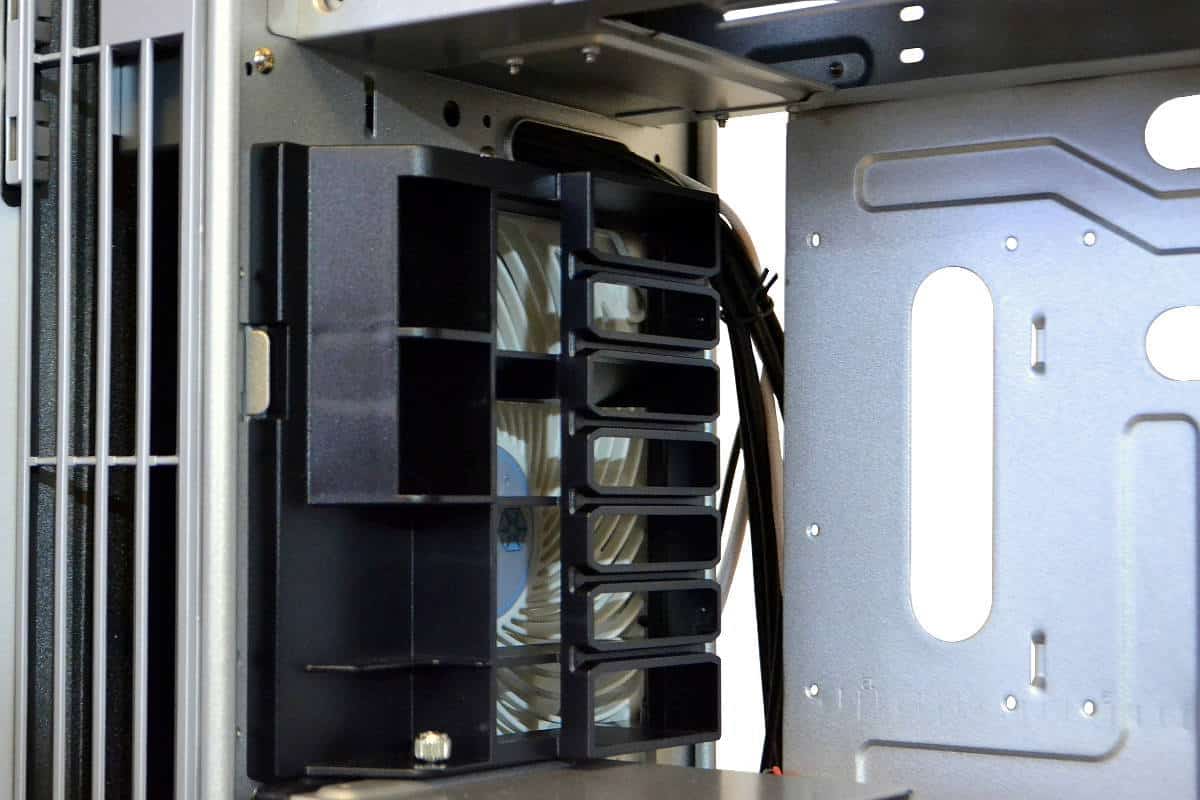
This is a unique feature of the Silverstone Fortress FT04. This removable module is made to direct a straight line of air flow directly to the video cards that are mounted in the top of the case.
I really like this unit and the only reason I would not use it would be if I added a 360 radiator into the front air intake. This is also a great opportunity to see the intake vents on the front of the case that is very generous and made with the same aluminum that makes up the front end of the case. The vents are spaced widely apart for less air resistance and less air noise. If there is any fan noise it is directed toward the back of the case as to increase the quiet nature of this classical design.
Measured hash marks are etched into the motherboard try to help with pre-configuration planning of board placement and standoff installations. This case can handle about any motherboard size on the market from a tiny M-ITX board to a whopping large server board and still leaves ample space. The rear PCI slots are aluminum and vented and the screws for the PCI slots can be easily accessed from the holes that are provided to each of the slots to allow a screw driver to be inserted through the case side wall.

This front bottom drive bay is pre-wired for one SATA hard drive that allows the average gamer to insert a very large mechanical hard drive into the slot and press in. The back is configured to accept the average SATA 3 or 6 mechanical drive and can be is so stable inside of the module it will take a few curse words to get the drive back out so make sure that the drive you plan to put into this slot is the one you want to use here or you will be very surprised at how tight the fit is.
As all of these modules are removable this one is really nice if you have an exceptionally large air cooling solution. This movable mount will stabilize your cooler from putting too much down force on your board. I did not find it necessary to use this device and this module or the front module must be removed to install the Solid State Hard drive to the bottom padded floor of the case. There are four placement areas for the SSD mounting but the module will have to be removed to use them.