

Installation
When starting an installation, I always start with the motherboard first. After easily slapping in the motherboard backplate our ATX board lined right up with the pre-installed mounting screws. Using nine of the included black finished screws completing the board installation was a snap. As you can see we still had the block and ram installed on our board from previous build. If needed however there is plenty of room to install the block without removing the board thanks to the massive cut out.


After the mobo, I went ahead and installed the PSU. There are 6 posts on the base of the case to support even extremely large PSUs.

With the intake fan facing out towards where the cutout in the back panel should be, set the PSU in place and line up the mounting holes.


Using 4 of the included screws secure the PSU. The all black hardware Phanteks has included is great!

With our modular PSU secured, we went ahead and attached all our necessary power cables. Looks like a mess, hope the Enthoo Primo is up to this cable management task! Getting a clean look on the motherboard side was easy due to the large assortment of pass throughs.


Next I installed our GPU to test how everything fits. My intention was to mount a large tube reservoir on the cable cover. Unfortunately it seems that our GTX 690 is too long for the cover to be used. This is definitely something to keep in mind when planning your build. The GTX 690 is a longer card, but not excessively so. I am a little disappointed as the cover would really help to clean up the look of the build.


Now we need to attach the power for the fan splitter power board. We took the 4 pin power connector and passed it through the grommet nearest the CPU_FAN header and plugged it in. You may use any header, but we won’t be using the CPU header since we have waterblocks.


We are going to be using a pair of SSD in RAID 0. Installing them was simple, slide them into the bracket until the holes line up and secure them with 4 of the included screws. Our drives made a nice little sandwich of silicone, plastic and metal. To attach the bracket back to the case, you simply line them up with the correct mounting screws and lock them into place. Then attach your Sata power and data cables and you’re good to go.


For HDD’s the Enthoo Primo makes it even easier. Pull the “wings” out of the sides of the tray, insert the drive into the tray, re-insert the “wings”, and slide the tray into a slot in the cage.


The last item to be installed behind the main compartment and the first of our pieces of watercooling gear was our MCP 655. This pump has the full Bitspower dress kit. As it is we were only able to attach it by two screws to the pump mount. It will be fine this way, but we would have prefered to get all four corners secured. After mounting the pump to the stand, install it back in the case with two thumb screws.


Wanting to really max out this case with gear we opted to install both a 420mm and a 280mm radiator. The 280 rad goes in the bottom of the main compartment. Thanks to the layout of the case there is really very little to limit what thickness of rads you can use. Our choice was a set of 60mm thick Alphacool UT60 rads. We set them both up in push/pull with 25mm thick fans on both sides. As you can see there is still room to play with on the bottom. If wanted you could even go with something like the Alphacool Monsta series which are 86mm thick! Installing the rad in the bottom was made easy by the rad mounting plate. By removing the plate you can install all your fans with plenty of room and no hassle. Then put the whole assembly back into the bottom of the case. We did find that you must do this without any expansion cards installed, so we removed our GTX 690.

To install the 420 rad in the top of the case it was necessary to remove the top plate in order to get the rad inside. This painless task involved popping both the top and front panels off and removing a handful of screws. Depending on your choice of rad this process may or may not be needed. At any rate it is not difficult in the slightest and anyone attempting watercooling should expect to do a certain amount of “manual labor”. With the rad in place we attached it loosely with just the center fan. Phanteks designed the top with slots instead of screw holes which allow you to slide the radiator forward or backward depending on what your needs are. This is very helpful in a jam packed water cooled rig. With the rad positioned where we liked, all the way forward, we installed the rest of our fans and tightened things down. The bottom front fan was accessible from the front of case through the 5.25” bays.


One thing small issue we had fitting fans to our top rad, was some overlap of the fans and motherboard. This could be an issue with ram clearance, or for us, our 8pin CPU power plug. We were able to make it work of course but would have prefered not to have bent the wires as much as we had to. The bigger issue would be clearing ram heat spreaders on certain motherboards. Certainly consider this when making your radiator purchase.

With all the fans attached we then used the wiring holes in the top of the case to feed the fan wires through to the front of the case. We could have tried to run our fans off the power board that comes with the case, but typically they are not up to the task. In the past we seen them start on fire from being overloaded with fans. To play it safe we used our own fan controller. In addition to being safer, it allows us to manually control fan speed. After all the wires were set, we reattached the panels, this wrapped up the top rad install.


Next we installed a small tube reservoir to the mounting area on the back inside of the main compartment. We really wanted to mount a larger res on the wire cover, but as mentioned earlier, we had a clearance issue with our GPU leaving us with this option. When mounting the res in this location we again had a GPU clearance issue. The connector on the XSPC block prevented us from using the slots that Phanteks built in to the case. This is more the block fault than anything. Fortunately there is a honeycomb pattern for ventilation there as well, and we were able to just use those holes as our attachment points. We also took advantage of the slides on the rear Phanteks 140mm fan and slid it up and out of the way of the res.


With the last of the watercooling components installed we installed our fittings and tubing; completing the watercooling portion of the build.

We then installed a DVD drive in one of the 5 5.25” bays. Since we had the radiator protruding slightly into the bays, we used the bottom slot. Installing the drive was simple thanks to the tool-less system. As you push the drive in, the back part of the drive pushes the locking pins into the screw holes. And that is it, drive secured. There are of course screw holes accessible from the back panel side if you want to lock things in better, but the tool less systems seems to work great on its own. To release a drive, press the “Push” button to release it.


This clever system for the drives does have one weakness, and if it weren’t for our fan controller we might not have found it. Any device that is to short to push in the rear locking button won’t work with the tool-less locks. They must be secured with screws from the side. We would have like to see a manual locking option, but we got by with good old fashioned screws.


The additional slots are taken up with great looking mesh spacers with spring loaded locking tabs.


The only thing left was to clean up the mess of wiring on the back side. Thankfully Phanteks included just tons of cable management tabs and straps to make the job that much easier.


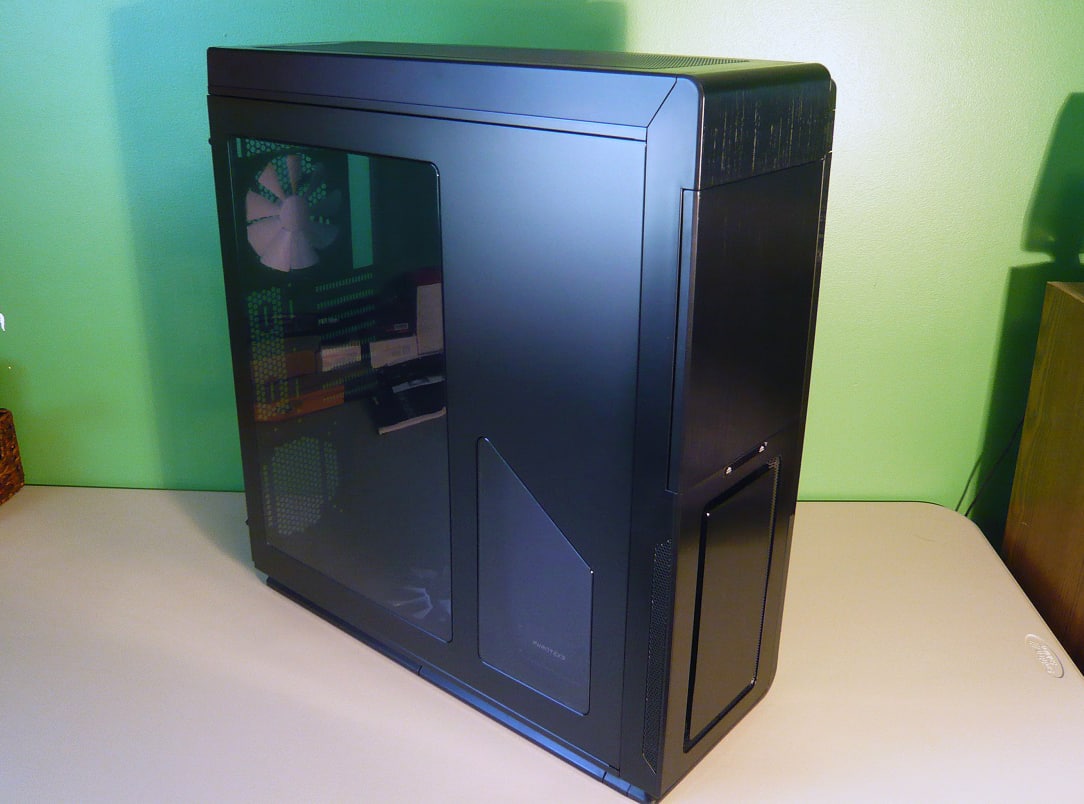
With the panels back on, and filled with water this is one sleek and stylish looking case.


